Write Jetson original system
Write Jetson original system1. Hardware connection1.1. Flashing mode1.2. Motherboard connection2. Software connection3. Use of SDK Manager3.1, SDK Manager download3.2, SDK Manager installation3.3, Start and log in to your account3.4, motherboard selection3.5, STEP13.6, STEP23.7, STEP33.8, STEP44, start the system4.1, Normal mode4.2, Start the system4.3, System settingsFrequently asked questionsUnrecognized device
The tutorial demonstrates burning the NVIDIA official system image on the Jetson Orin motherboard. It is not recommended for beginners!
Note:
1. The solid-state drive that comes with the product has a factory image, which includes the NVIDIA official system and motherboard environment; if you do not require a pure system, do not operate!
2. The image burned by this method cannot activate the Super mode. If you want the Super mode, please do not follow this tutorial! !
1. Hardware connection
1.1. Flashing mode
The Jetson Orin motherboard needs to short-circuit the FC REC and GND under the core board to enter the flashing mode:

1.2. Motherboard connection
The Jetson Orin motherboard needs to be connected to a DC power adapter, DP data cable, network cable and Type C data cable: Type C data cable connects to the computer

2. Software connection
The tutorial uses VMware Workstation 17 Pro to burn the system!
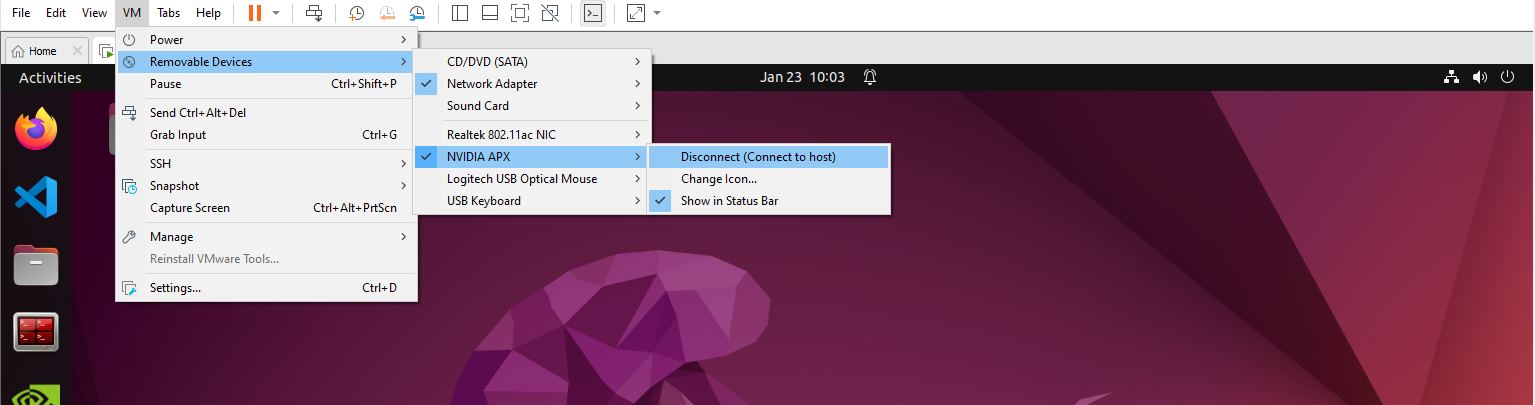
After starting the virtual machine, select in the menu bar: Virtual Machine → NVIDIA APX → Confirm the status of the connection with the virtual machine
3. Use of SDK Manager
To use SDK Manager, you need to register an account and log in in advance. Register and log in to the account by yourself!
You don't need to install SDK Manager to use our virtual machine. If you can't update SDK Manager, you can reinstall it according to the following tutorial
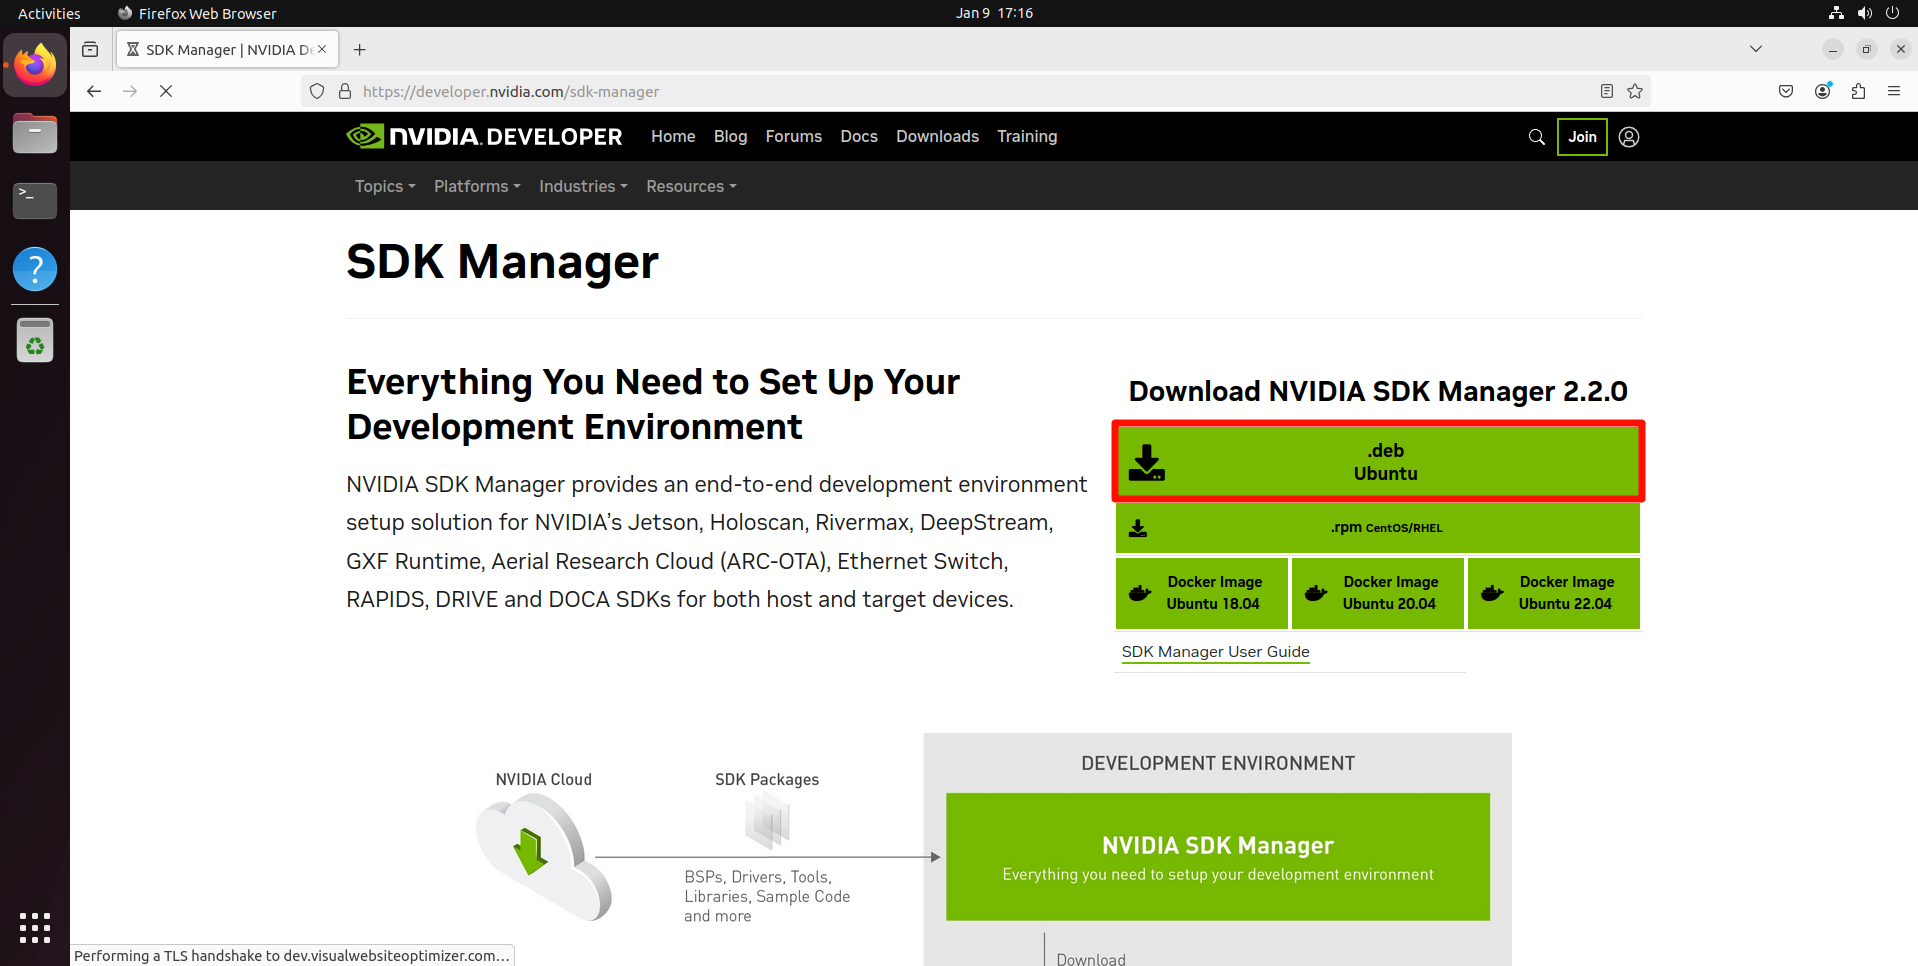
3.1, SDK Manager download
Official website: https://developer.nvidia.com/sdk-manager
3.2, SDK Manager installation
Enter the folder where the installation package is located and run the installation command:
xxxxxxxxxxsudo dpkg -i sdkmanager_2.2.0-12028_amd64.deb
Repair dependency: A clean system may have an error message when installing sdkmanager. You can run the following command and then rerun the installation command
xxxxxxxxxxsudo apt --fix-broken install -y

3.3, Start and log in to your account
Find the SDK Manager application icon in the system application menu bar or enter the following command in the terminal to start:
xxxxxxxxxxsdkmanager# To burn the old version of Jetpack, you need to use the command: sdkmanager --archived-versions
After clicking login, the browser login page will pop up automatically:
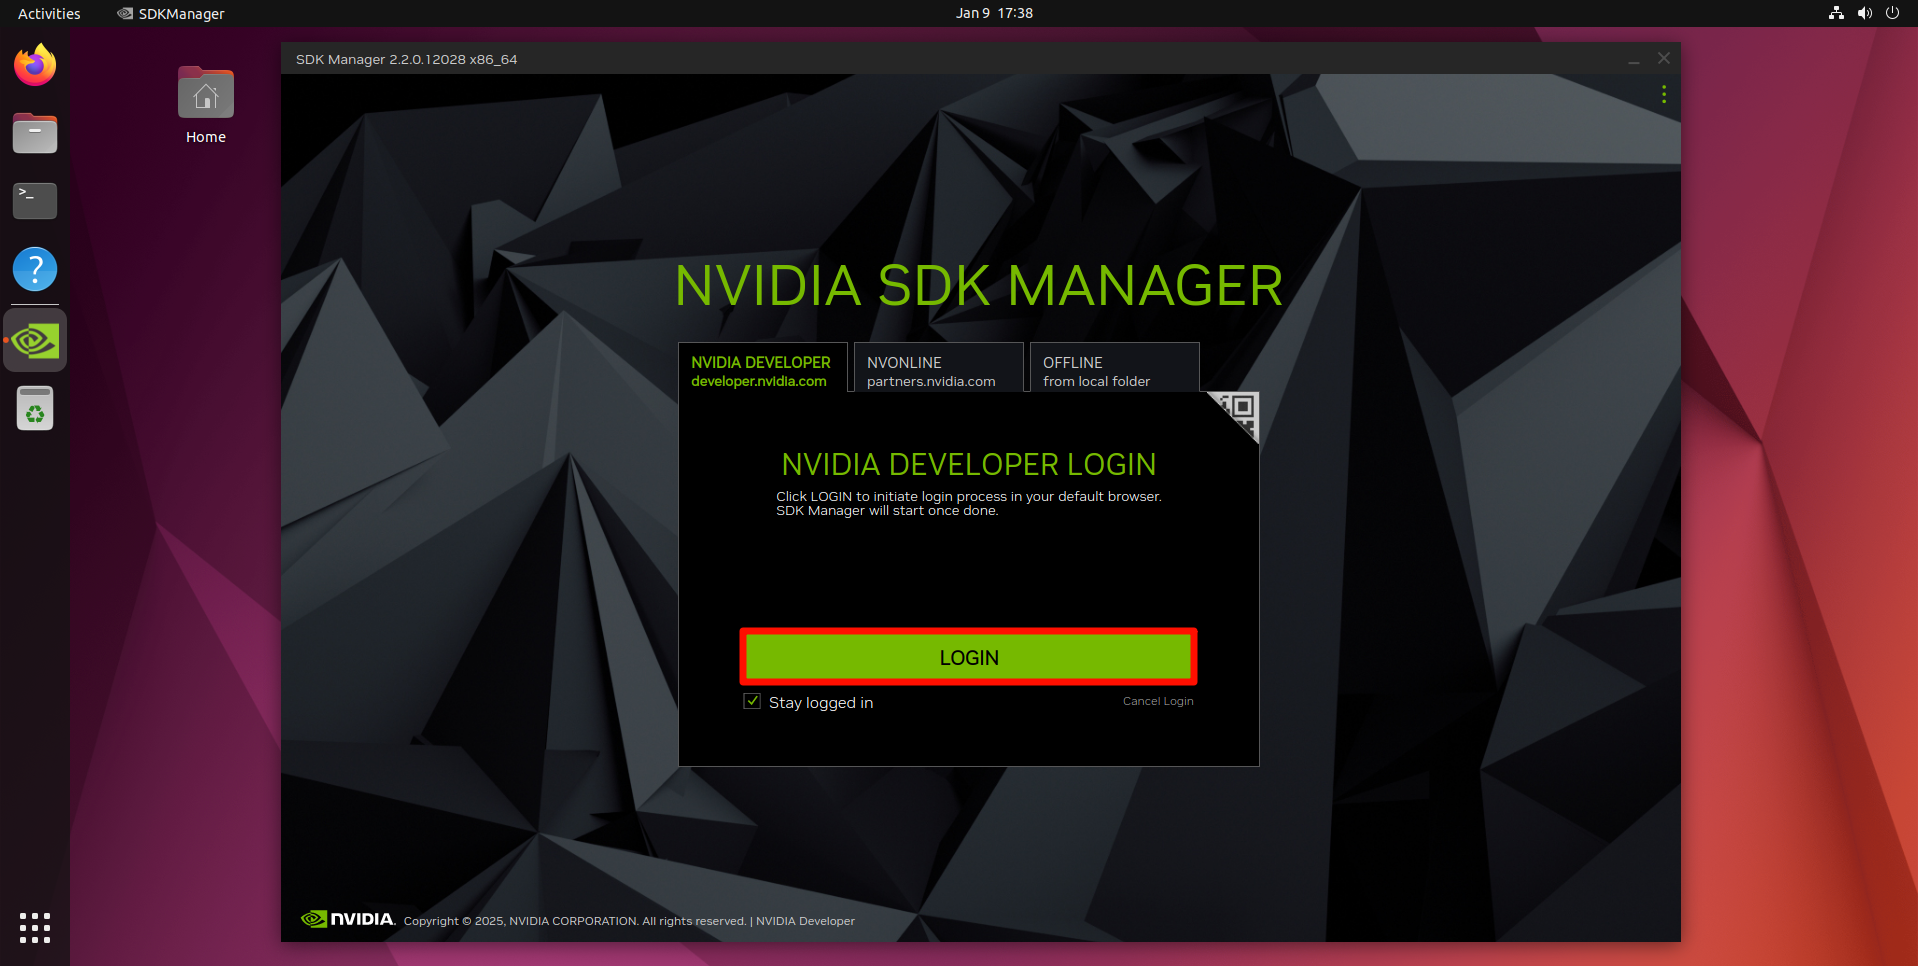
Enter the previously registered account and password to enter the software:

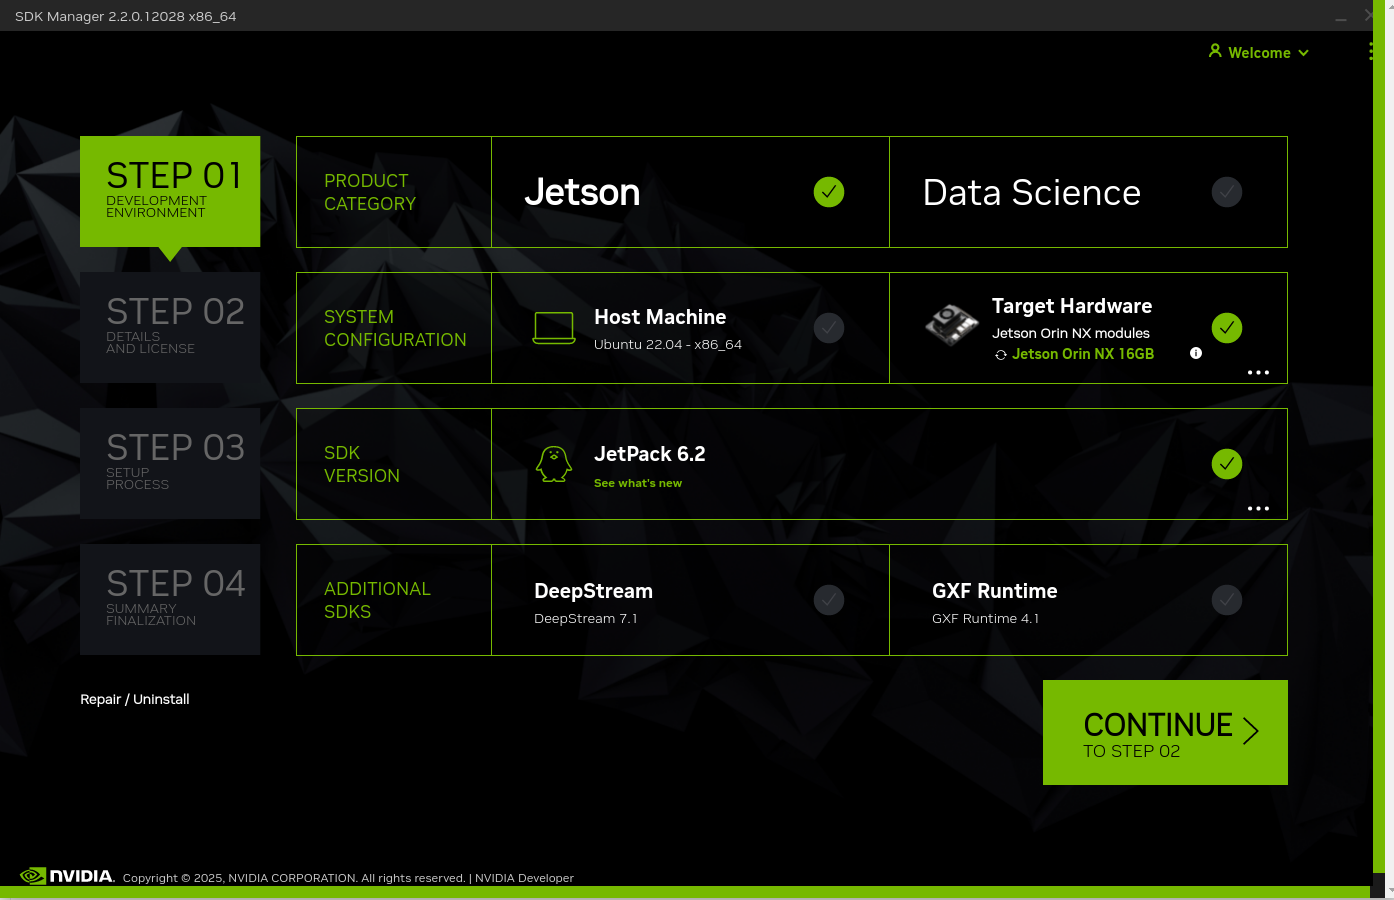
3.4, motherboard selection
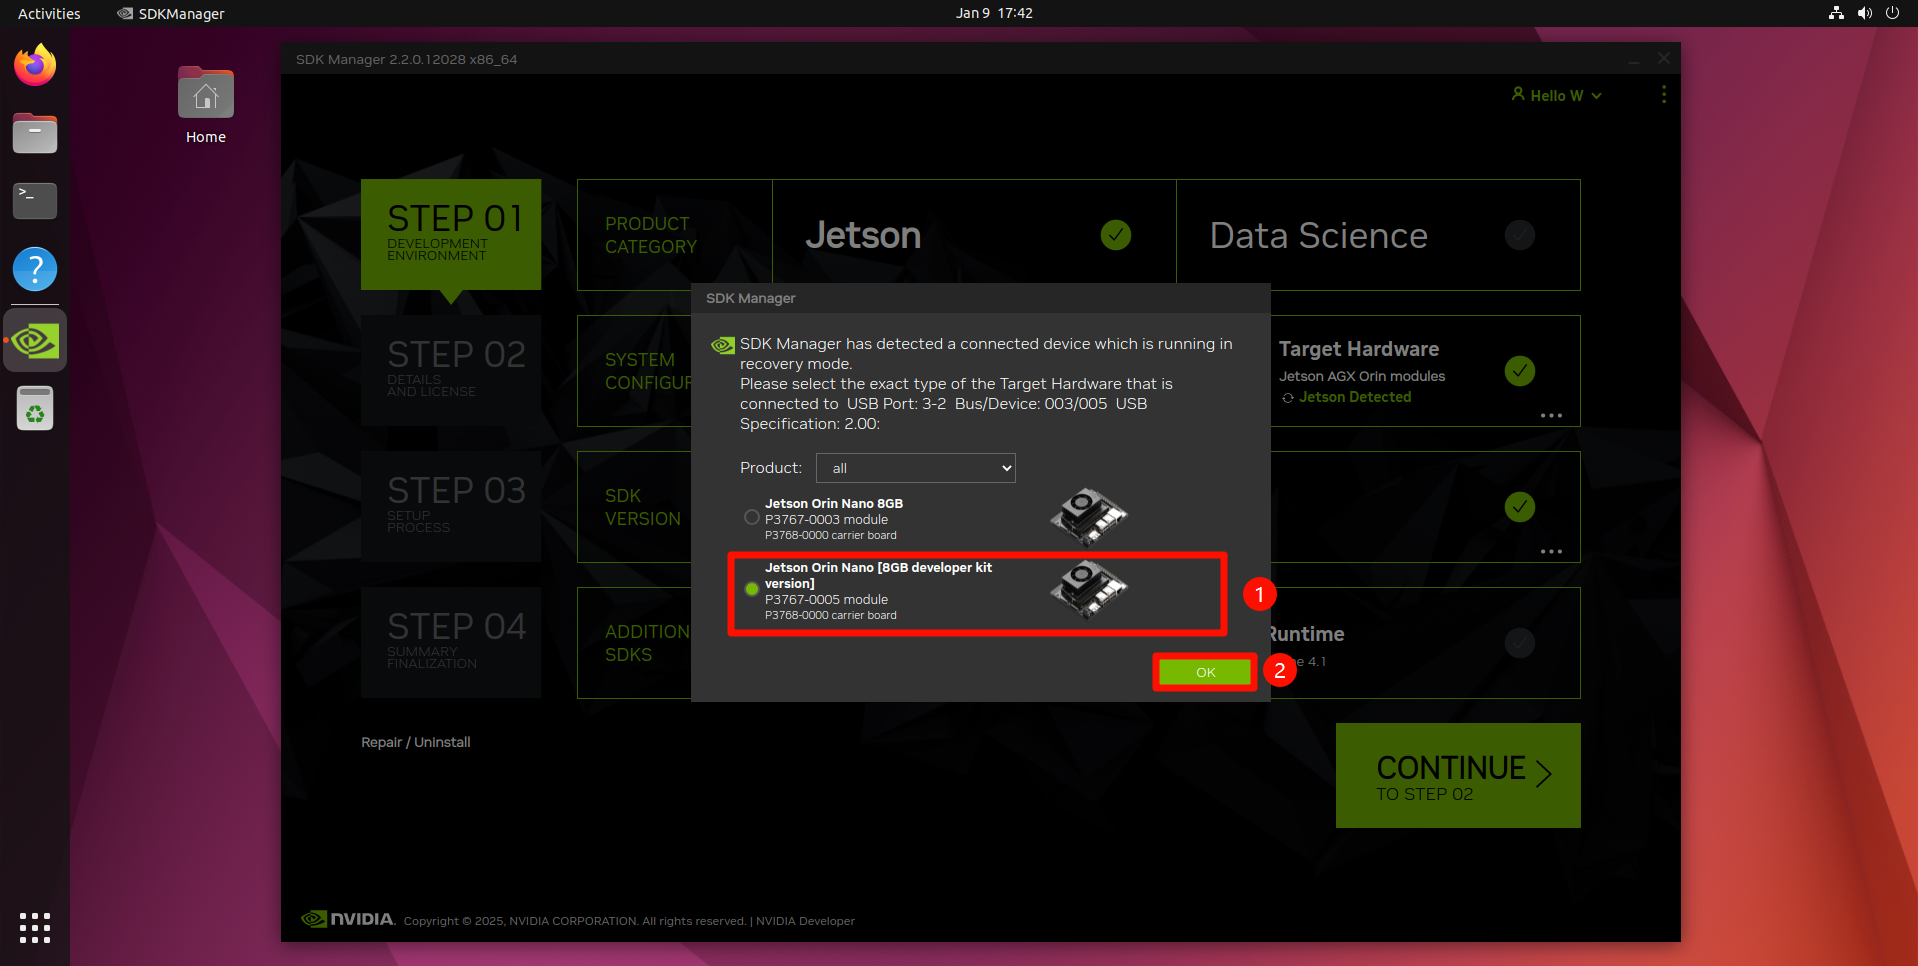
Choose according to your own motherboard model:Official kit selects Jetson Orin NX [*GB developer kit version]
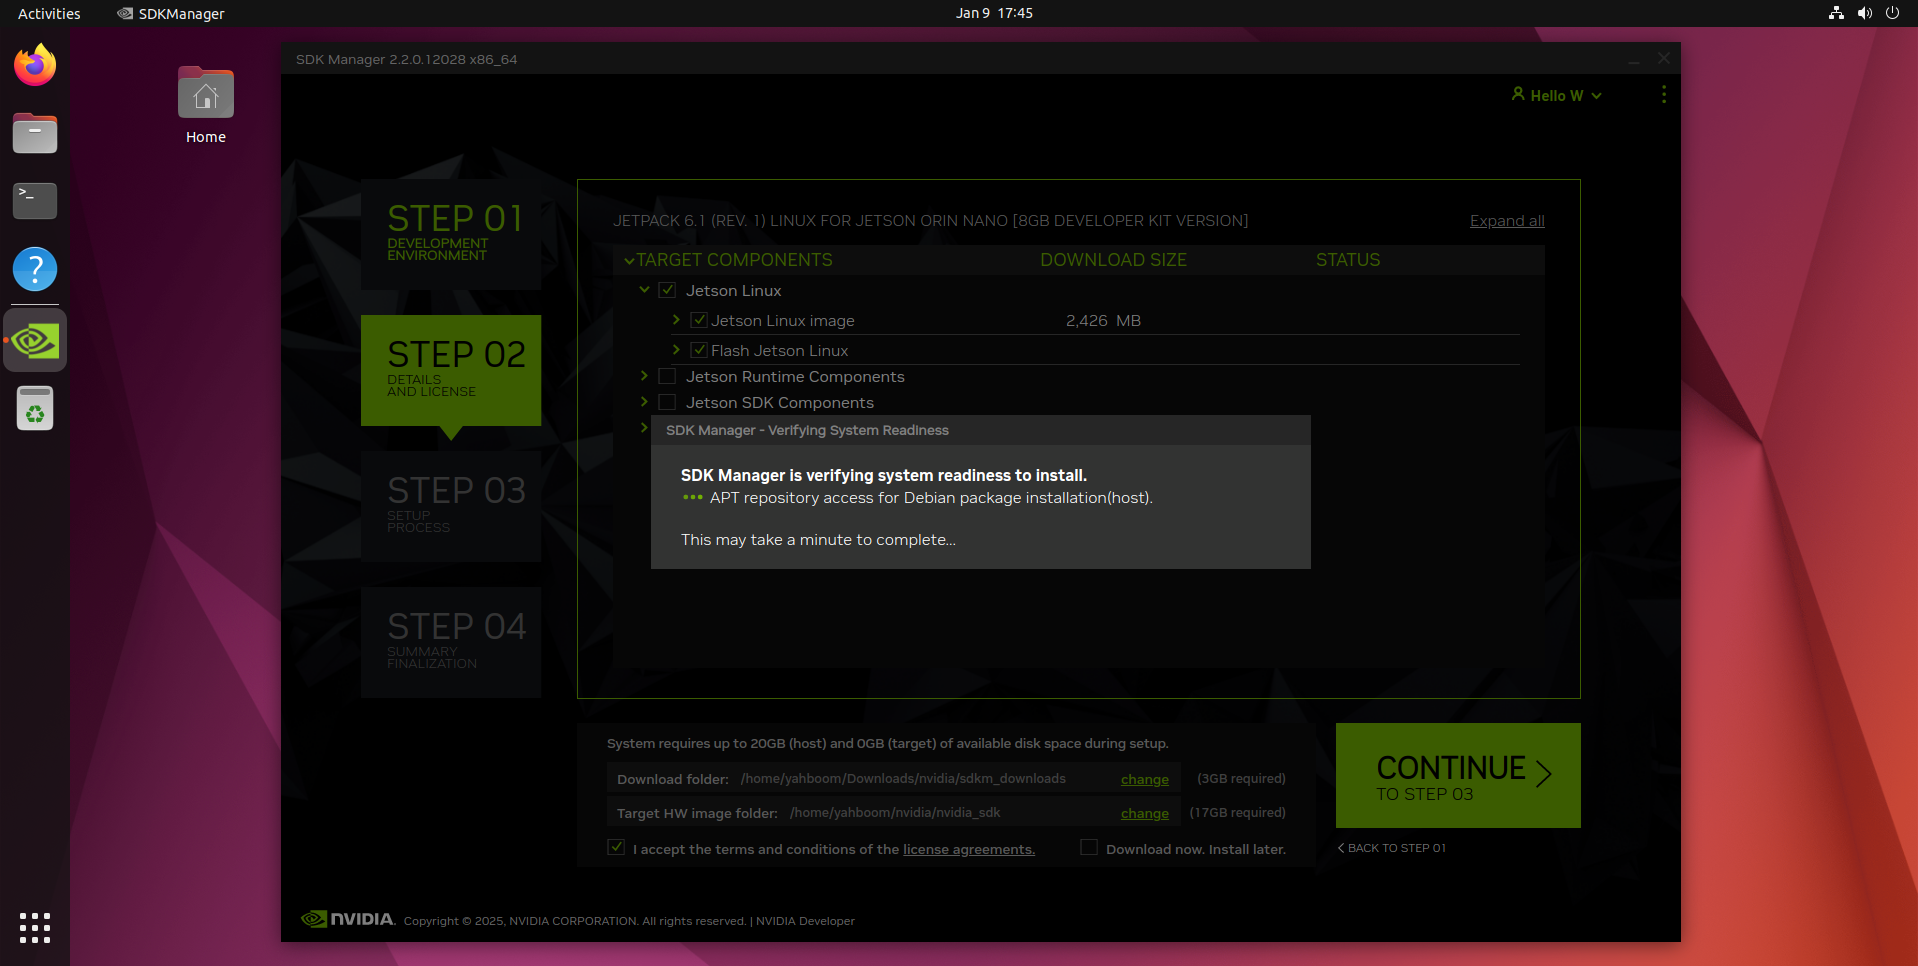
3.5, STEP1
Check the options below, confirm that they are consistent, and click CONTINUE:
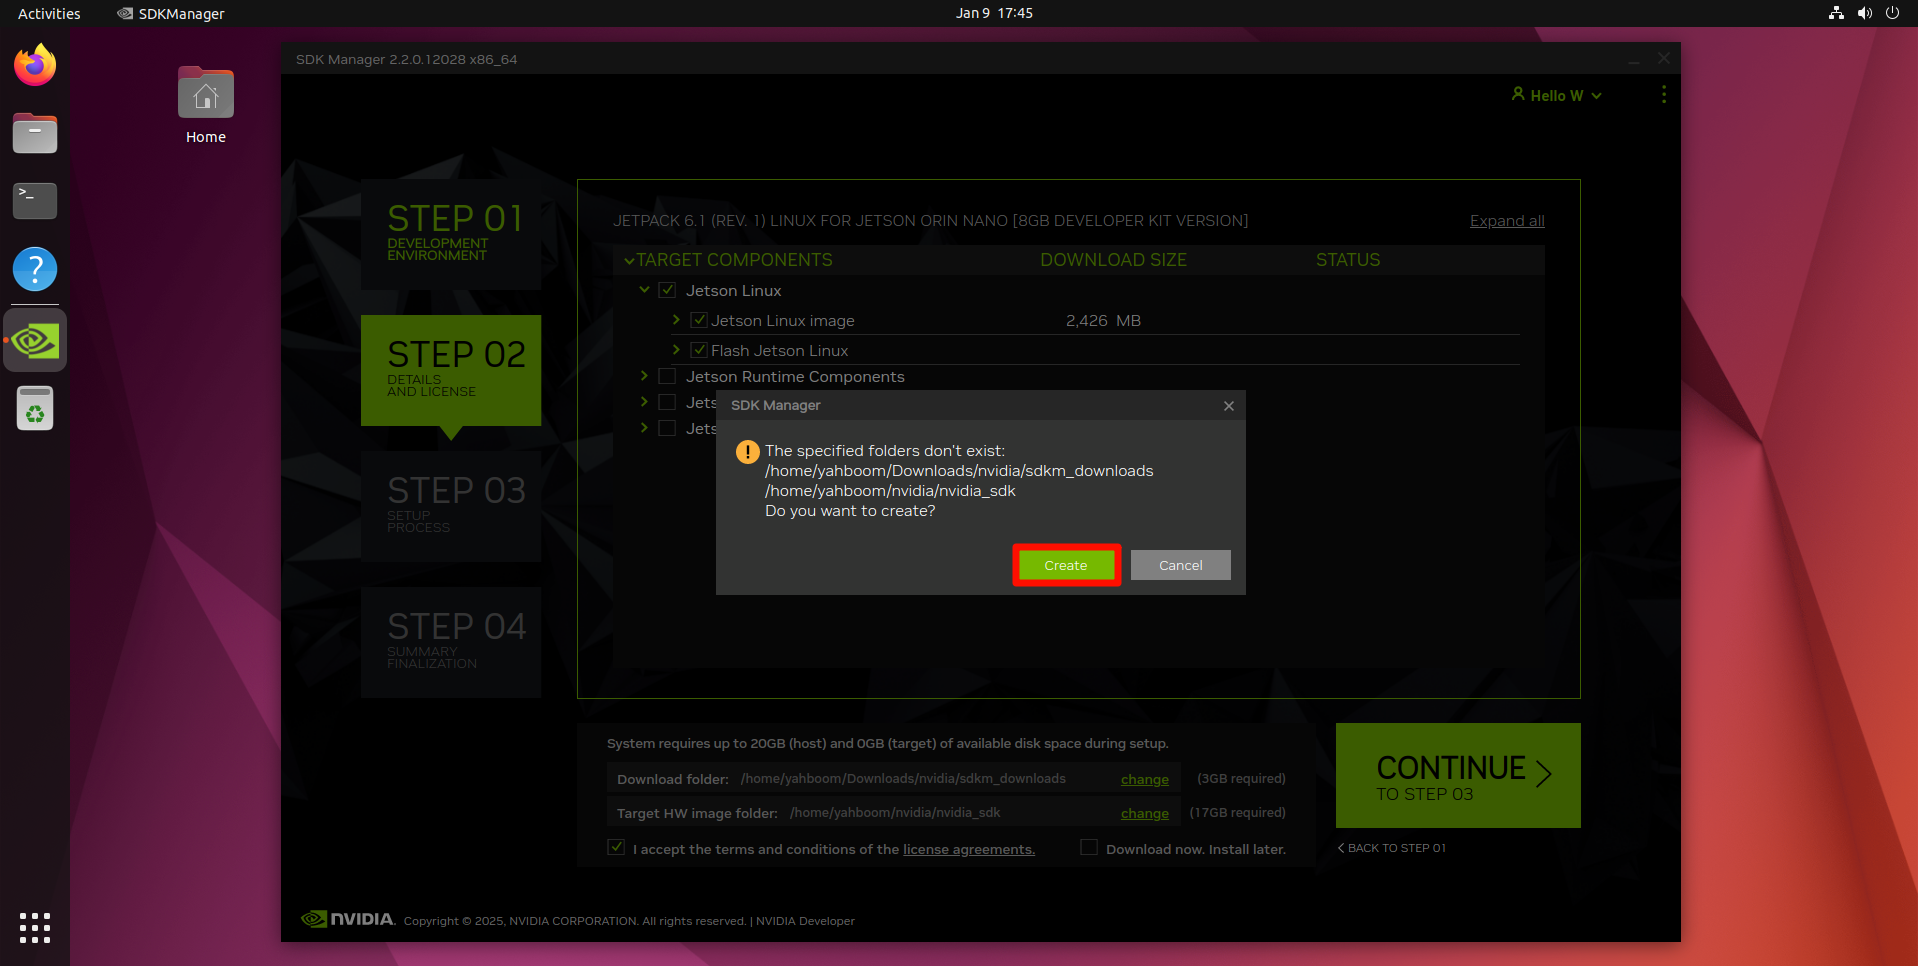
3.6, STEP2
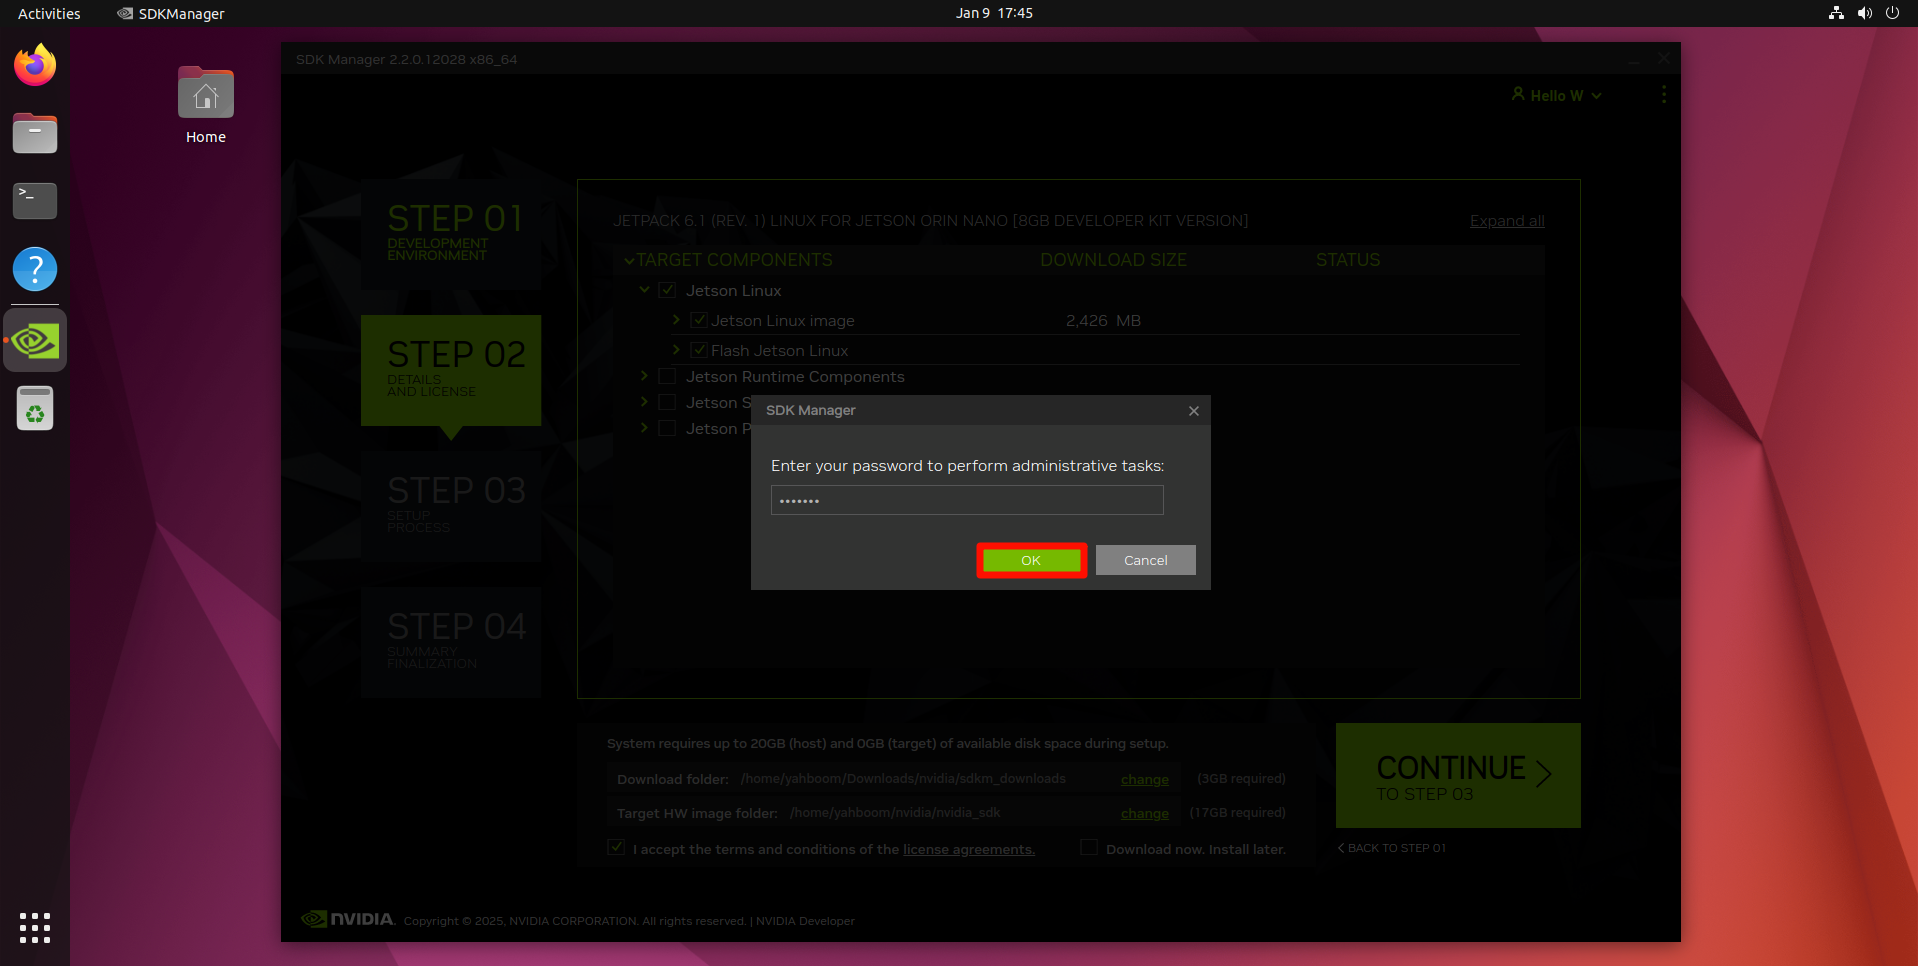
Check the options below, confirm that they are consistent, and click CONTINUE:
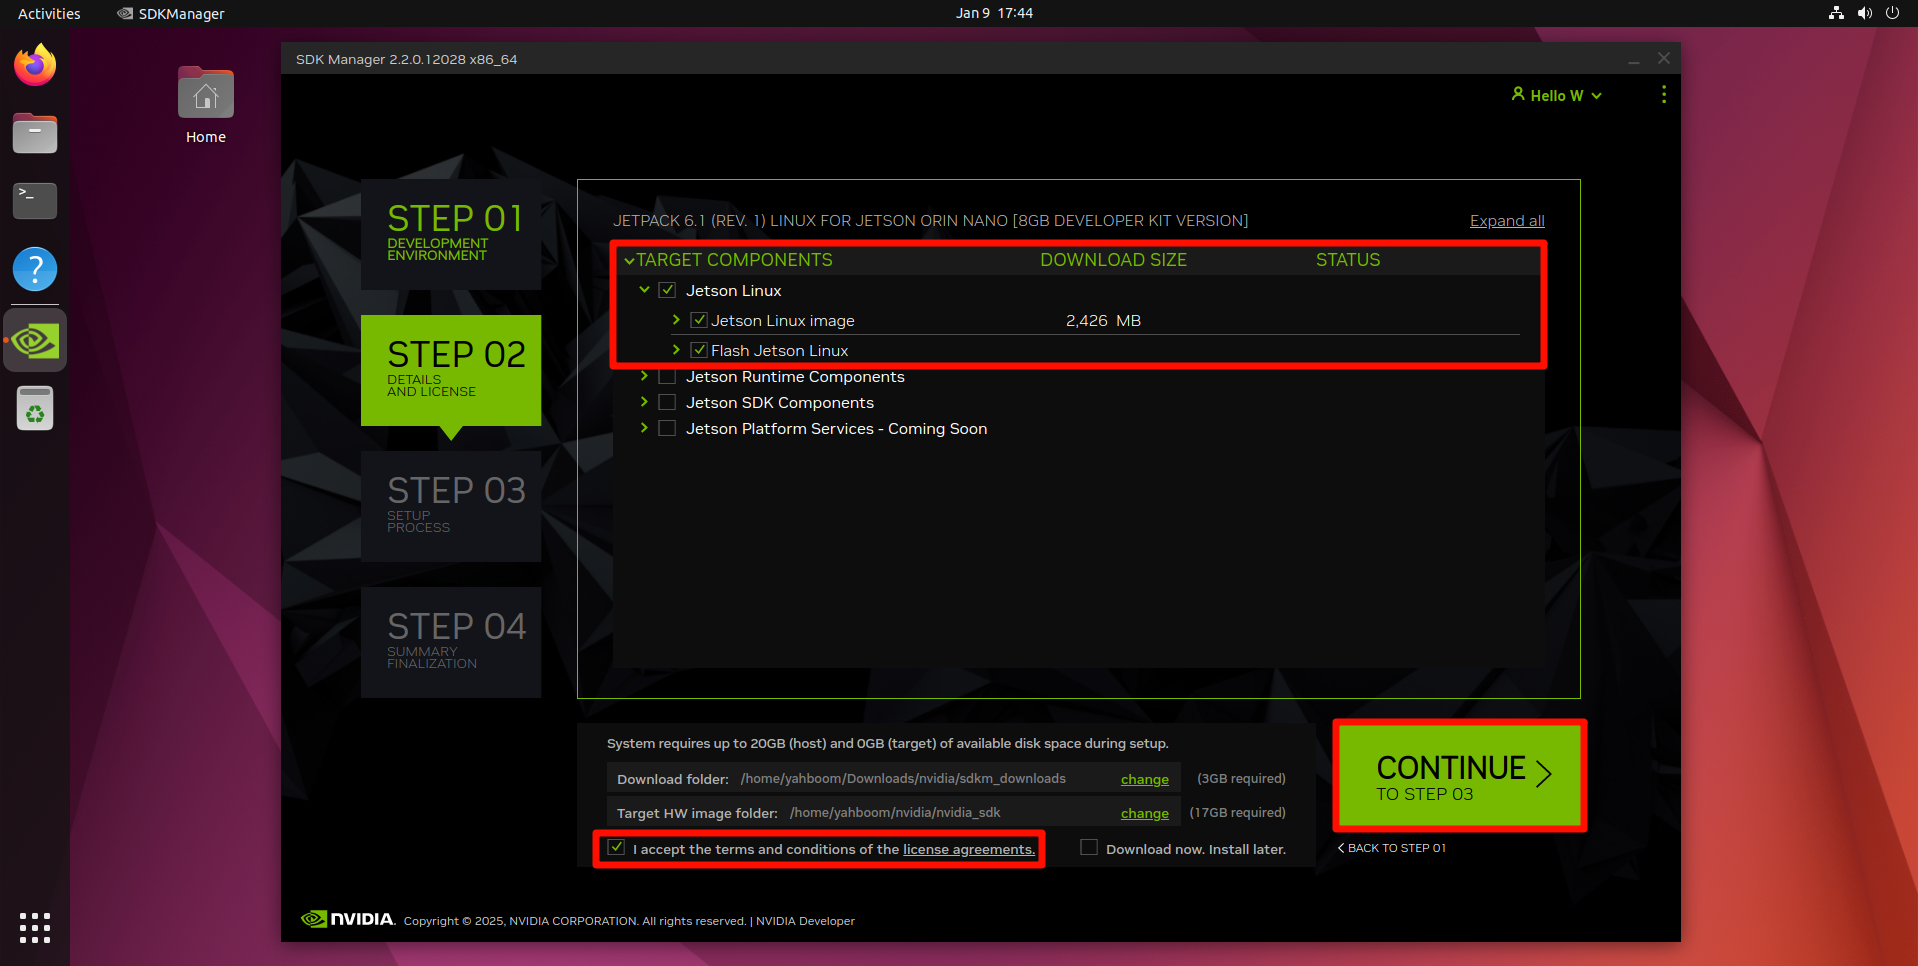
Enter the virtual machine password: yahboom
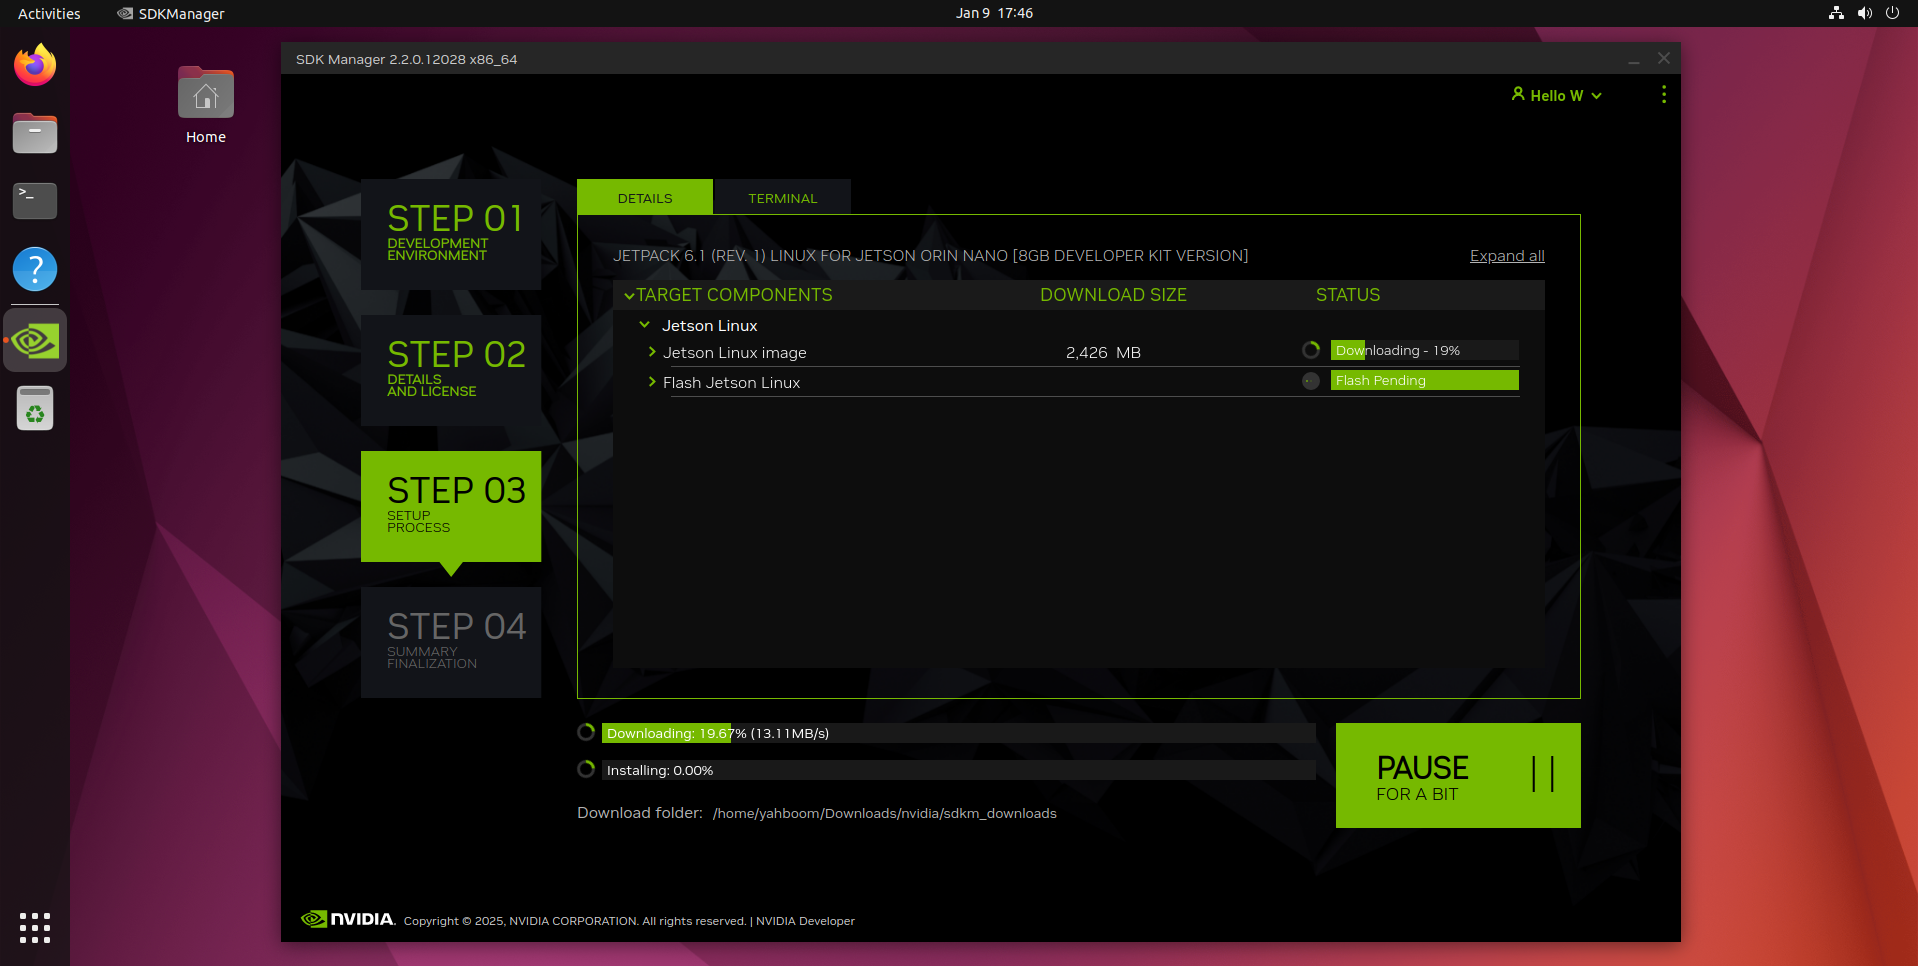
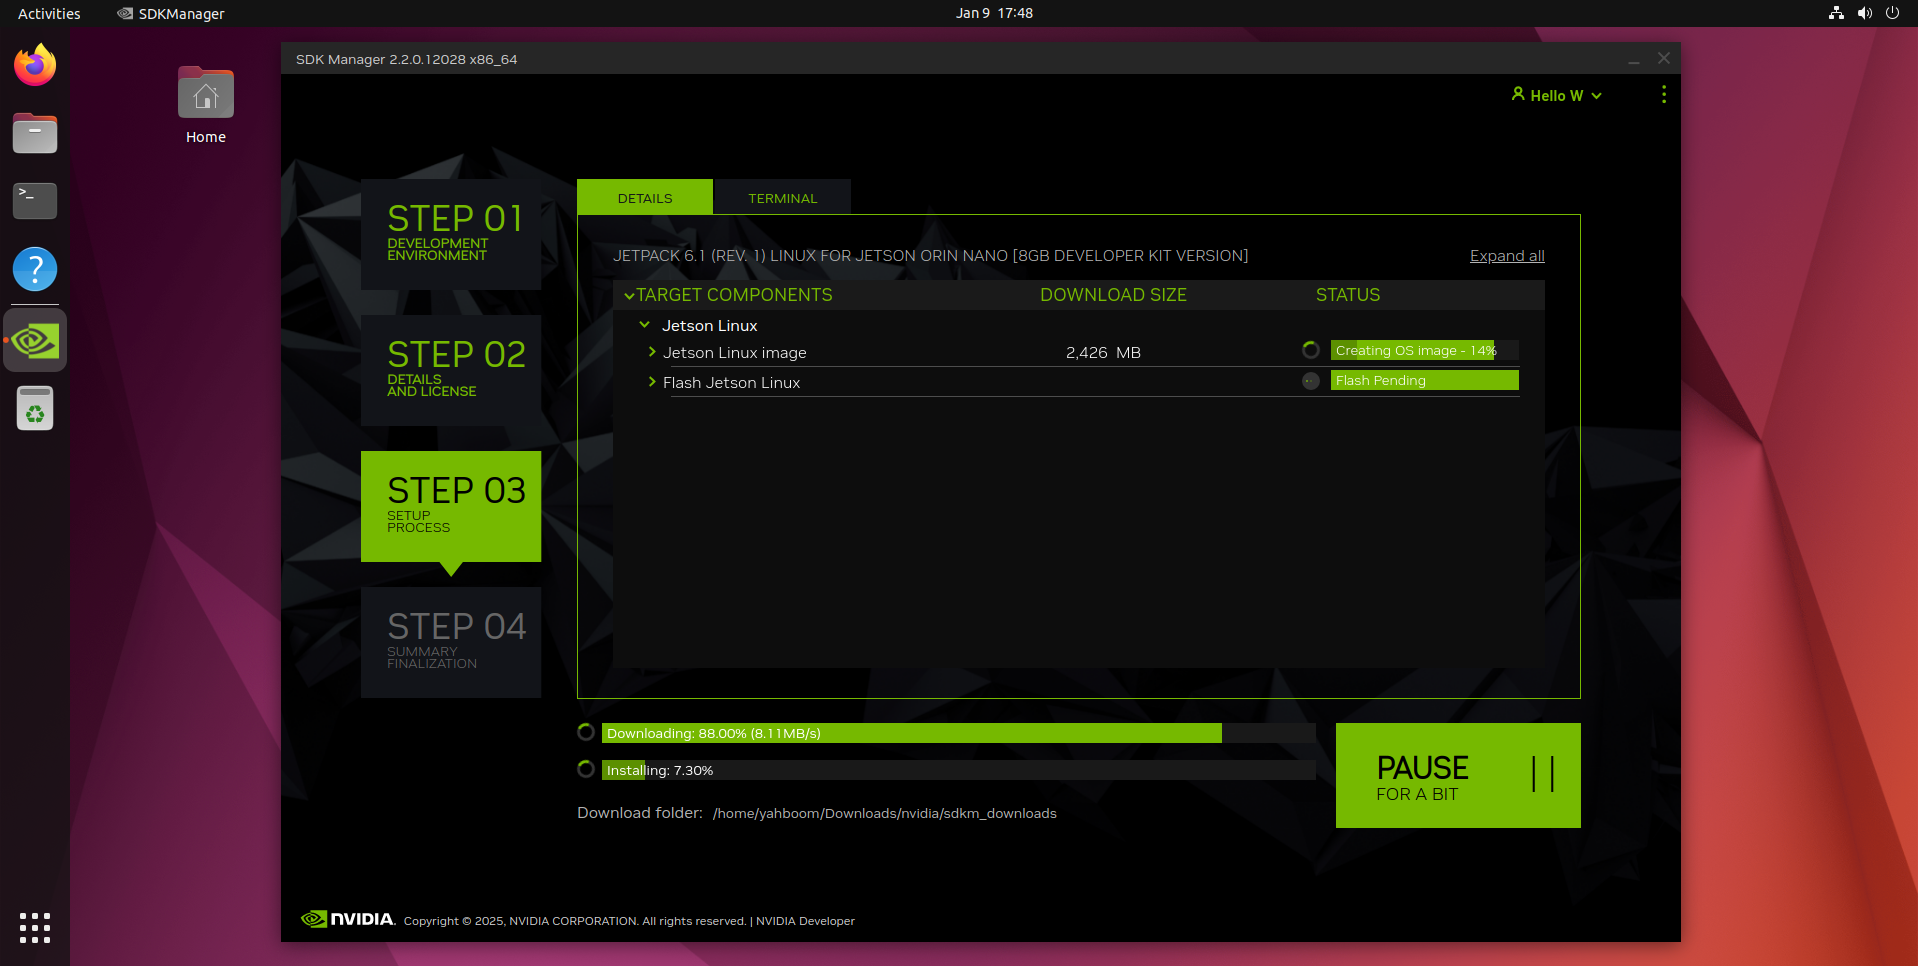
3.7, STEP3
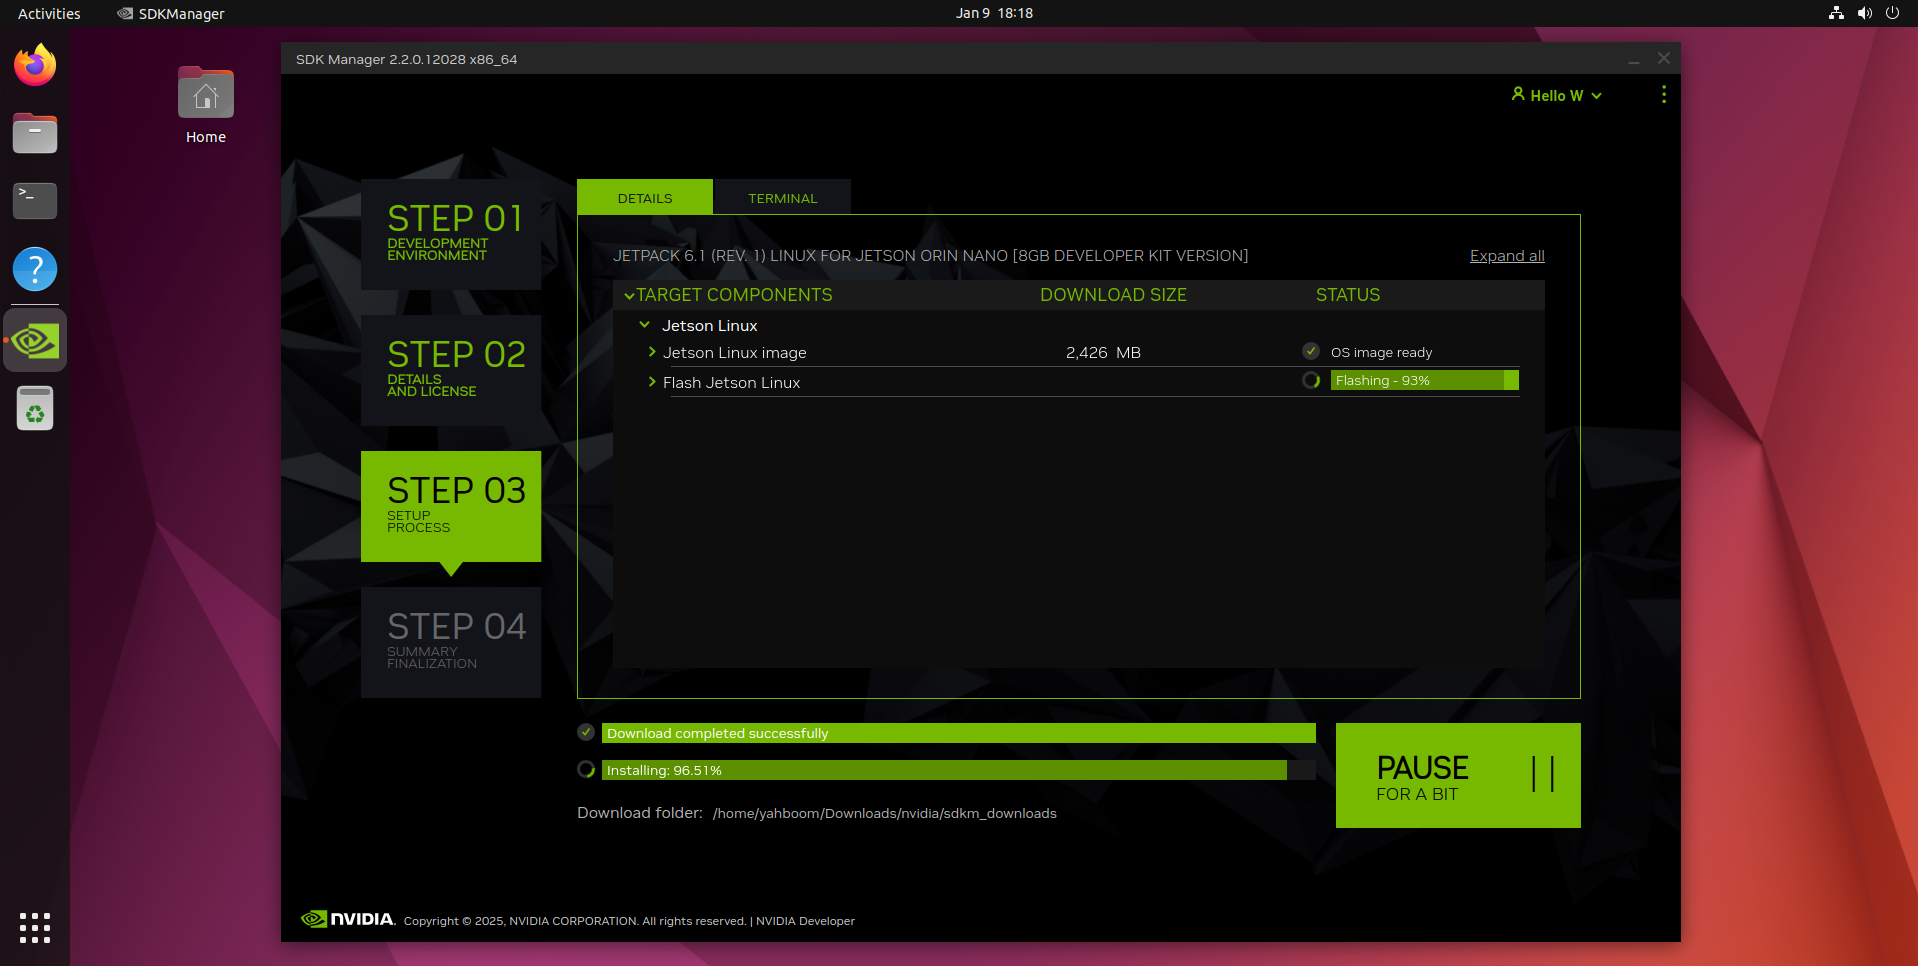
Wait for the system to download successfully:
Select the motherboard model, OEM configuration, and system storage medium:
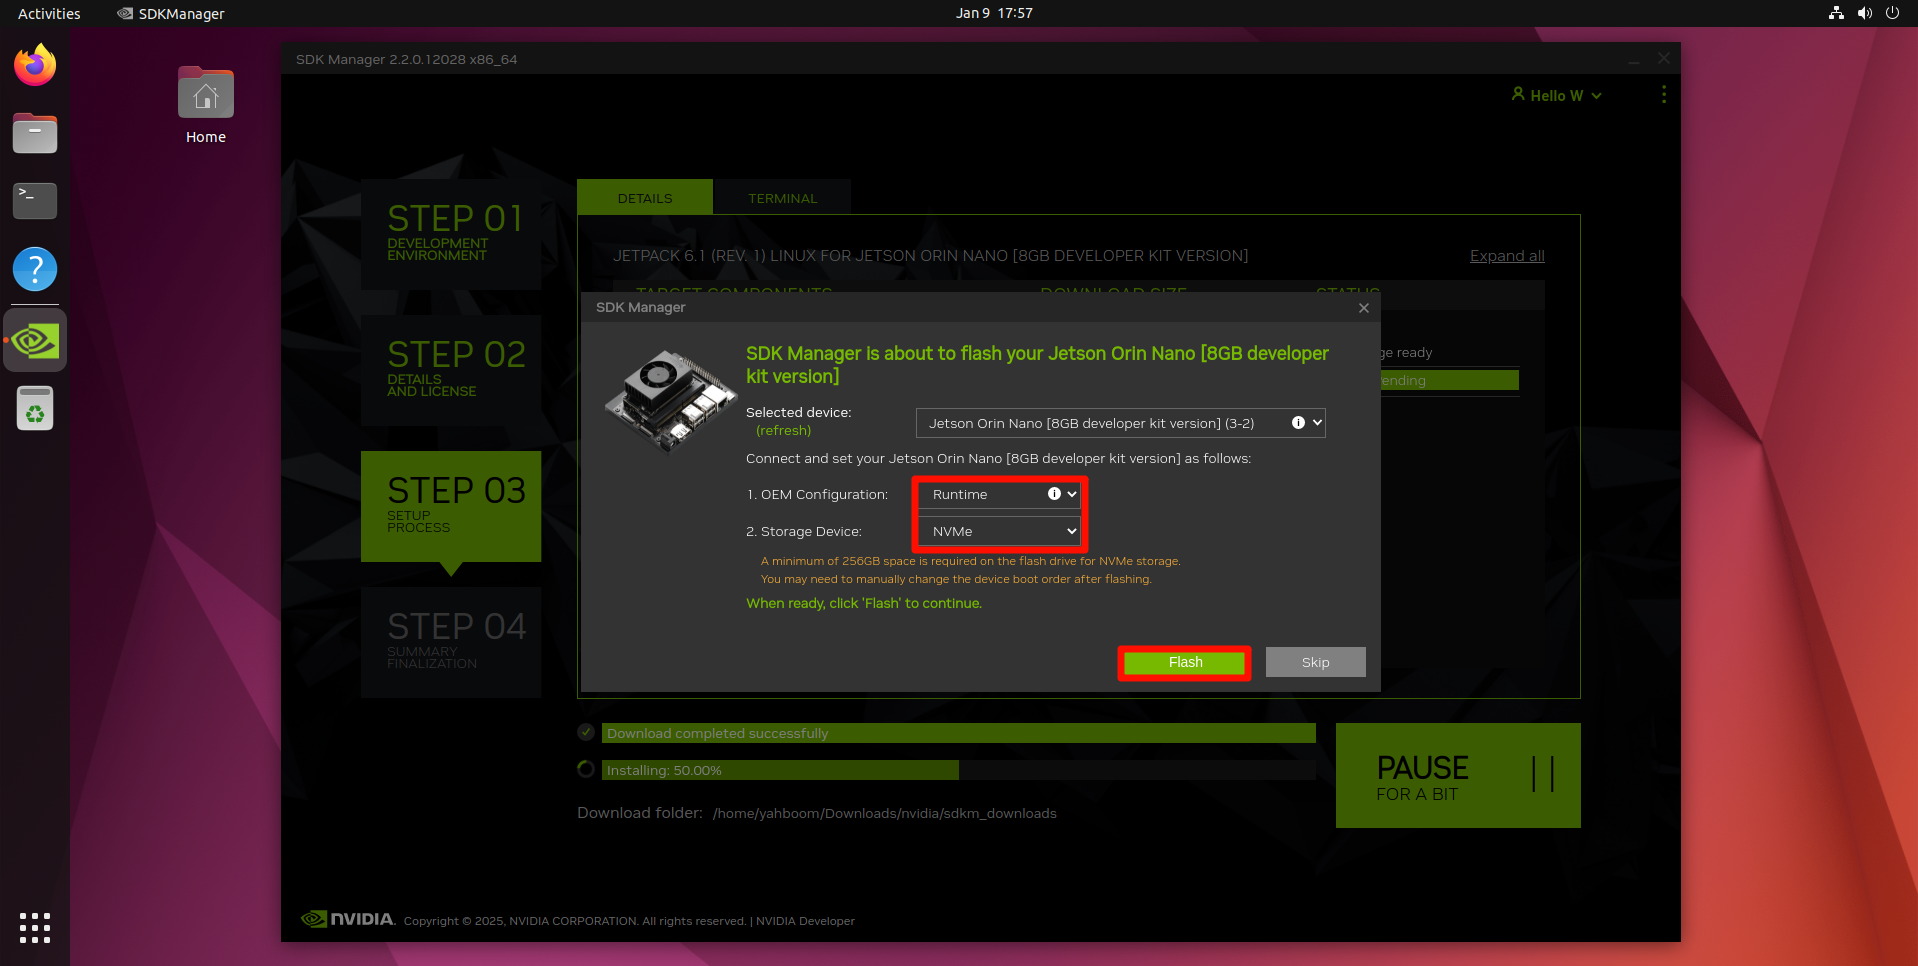
The virtual machine automatically controls the connection and disconnection of the device during the whole process, but more than 95% of the progress needs to pay attention to the SDK Manager burning system progress, once disconnected and not automatically connected to the virtual machine, you need to manually connect the motherboard to the virtual machine in time:

3.8, STEP4

4, start the system
After successfully burning the system using SDK Manager, you can disconnect the hardware connection between the motherboard and the computer and restore the motherboard to normal startup mode.
4.1, Normal mode
Unplug the FC REC and GND jumper caps that are shorted when flashing the Jetson Orin motherboard.
4.2, Start the system
Connect the DP data cable, network cable and Type C data cable to the Jetson motherboard, and finally use the DC power adapter to power the Jetson motherboard.
xxxxxxxxxxThe Jetson Orin series motherboard needs to be connected to a monitor to display the screen normally and perform VNC remote
4.3, System settings
After starting the system, users can set system options according to the prompts of the system.
Frequently asked questions
Unrecognized device
You can disconnect the DC power supply and Type C data cable of the motherboard, and then re-power it on to connect the virtual machine!