PICO remote control servo gimbal
Note: esp32 camera needs to be burned with factory firmware. If you have not flashed the firmware after receiving the esp32 camera, you do not need to do so. The factory default firmware is used
1. Experimental preparation
ESP32 camera
PICO development board
2-DOF gimbal
Dupont line
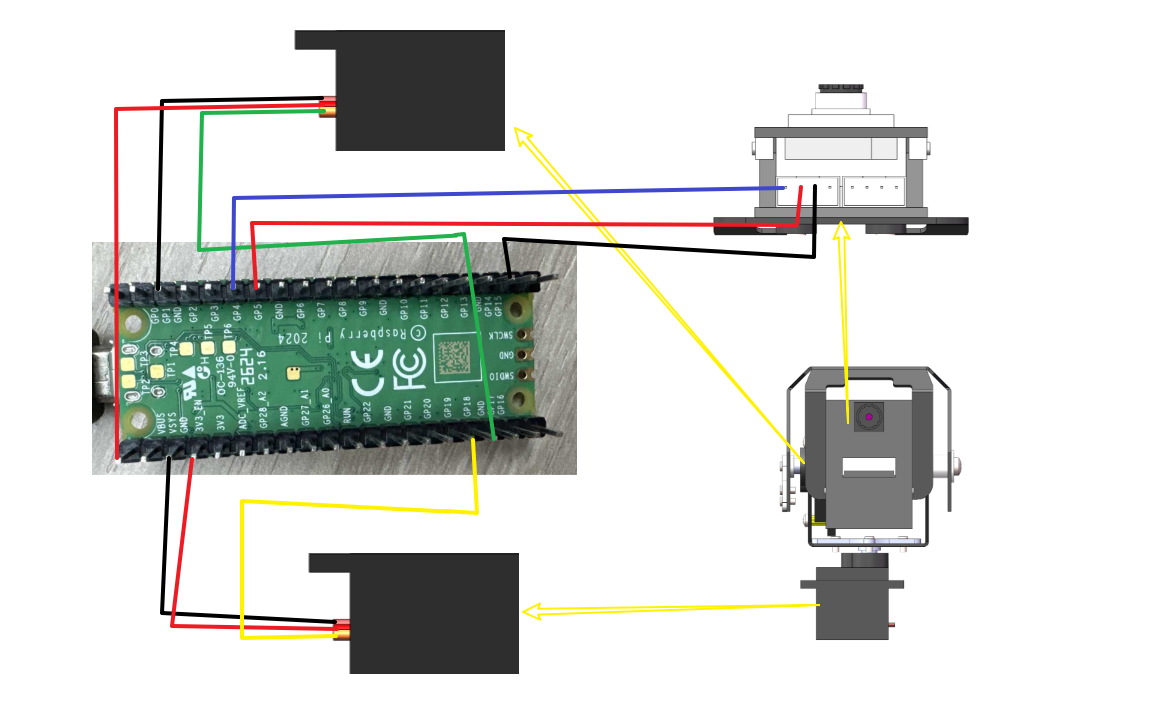
2. Wiring diagram
Note: Due to insufficient voltage, esp32 camera and PICO development board need additional power supply via type-c data cable
| pico motherboard | esp32 camera |
|---|---|
| P4 | RX |
| P5 | TX |
| GND | GND |
| 5V | 5V |
| pico motherboard | s1 servo |
|---|---|
| P18 | Signal line |
| 3.3V | |
| GND | GND |
| pico motherboard | s2 servo |
|---|---|
| P19 | Signal line |
| 3.3V | VCC |
| GND | GND |
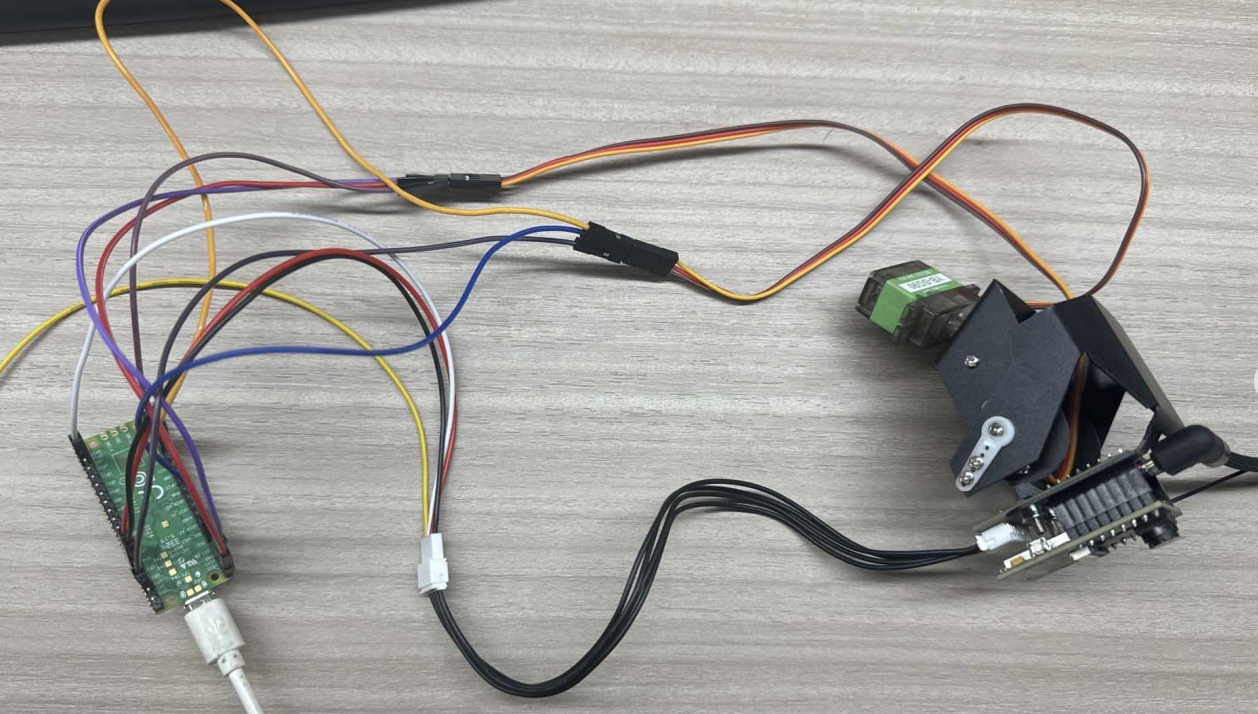
Physical connection diagram:
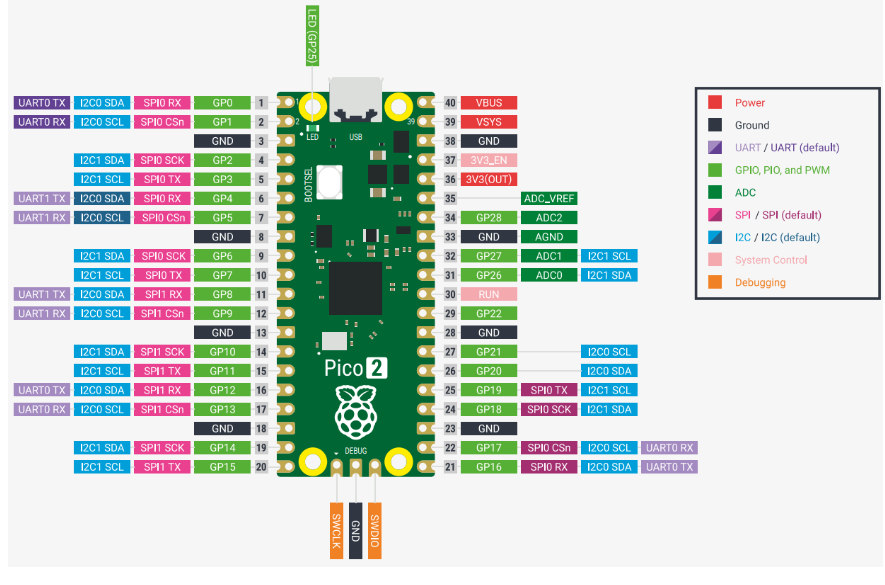
PICO pin diagram:
3. Experimental steps and results
Quick method: You can directly connect to the wifi opened by esp32. The name of this experiment is ESP32_WIFI_TEST. Then the IP address camera information of the mobile app is 192.169.4.1, and you can use the app to control the servo
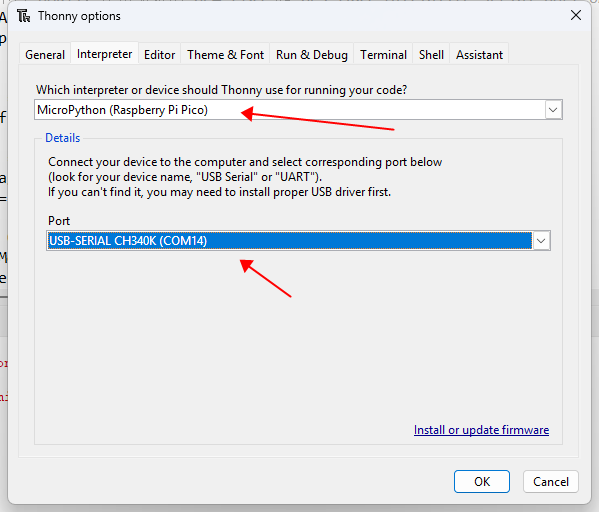
Open a thonny software, click Tools->Settings->Interpreter, and change it to your own port
Import the firmware library of the driving servo
Since some programs need to use third-party libraries to run normally, here is how to import third-party libraries into Pico 2. Importing the library only needs to be executed once, and there is no need to import it multiple times.
First, connect the Pico 2/Pico development board to the computer via the microUSB data cable in the package, open the Thonny IDE software, and click [File]->[Open...]->[This computer]
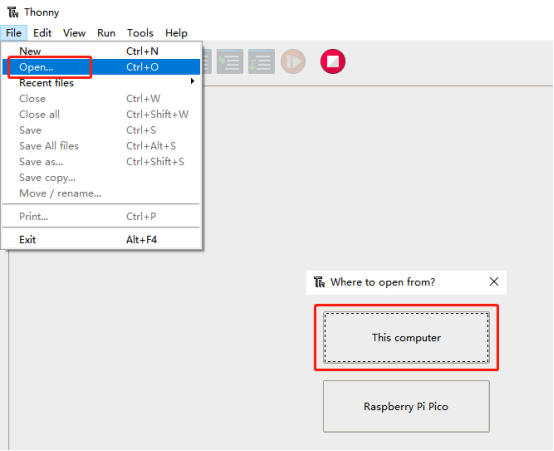
Select the library file in the program summary in the data. Here, take the library of the color recognition module as an example, find the pico_car.py file, and click Open.

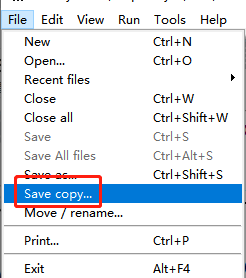
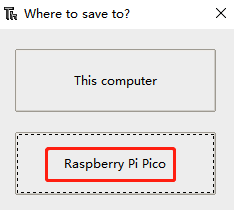
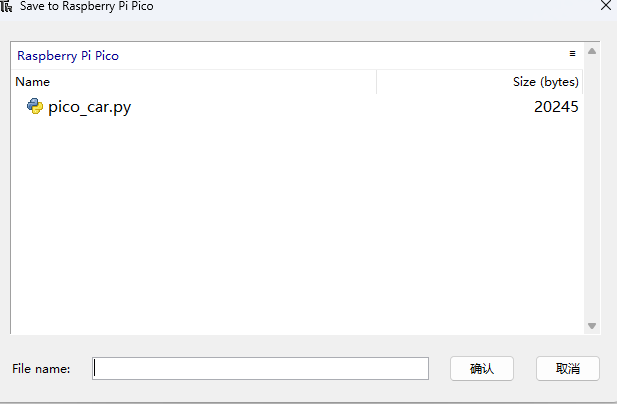
Click [File]->[Save copy...]->[Raspberry Pi Pico], and enter the saved name as pico_car.py in the lower left corner.
Follow the above method to save all libraries one by one to Pico 2/Pico. Note that the saved name must be exactly the same as the original name, otherwise there will be an error that the corresponding file cannot be found. The final completion is as shown in the following figure:
Open the code just uploaded and modify it to the wifi name and password you want to connect to. You can also modify the name of the hotspot and the corresponding wifi mode.

Run the program, and it will return the IP address of the current network connection and the address of the hotspot
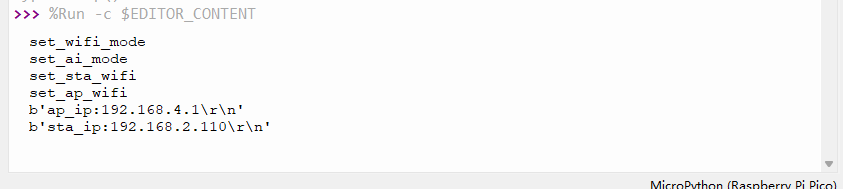
Use the app to control the movement of the car. After installing the "ESP32Cam" app, open it.
On the login page, set it according to the IP obtained by the serial port assistant. If the IP obtained by the serial port assistant is "192.168.2.110", then the configuration is as follows
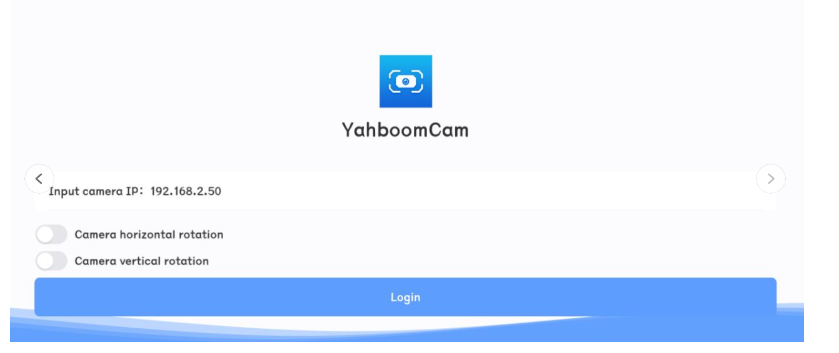
Then click login directly
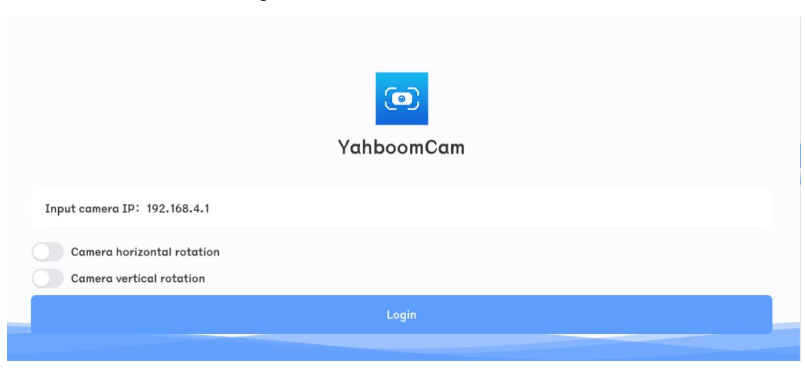
(Optional) If you want to connect to the hotspot of the wifi camera, the IP address must be set to 192.168.4.1, as shown in the figure
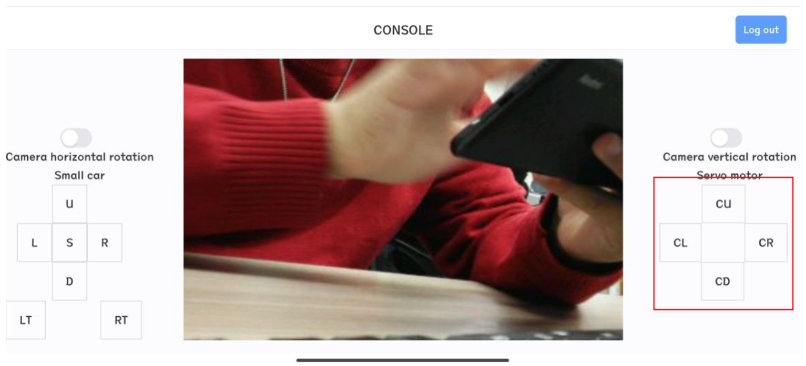
When the IP address is configured correctly and connected successfully, you can control the servo gimbal through the app console page
Horizontal screen
Note: Every time you restart the app, you need to click the exit button in the upper right corner, then exit and reconfigure the IP address information before logging in