Project creation
Project creationProject directoryFolder frameworkCMSISFWLibUSERBSPOBJConfigure the projectCreate a new projectChip selectionProject file managementProject target optionsTargetOutputC/C++Compile the projectTemplate.hex
The tutorial demonstrates how to create a new STM32F103RCT6 standard library project.
Project directory
Before using MDK-ARM to create a new project, we need to operate the folders under the project: the operation includes creating a new folder and copying the official standard library firmware package file to the specified folder.
Folder framework
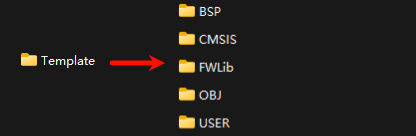
Create a new folder according to the following directory:
Template: Project name
CMSIS: Kernel driver and startup file
FWLib: Standard library function source code file
USER: Project file and user file
BSP: Development board peripheral driver file
OBJ: Compile and generate file
CMSIS
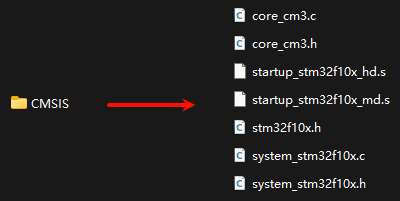
core_cm3.c
core_cm3.h
stm32f10x.h
system_stm32f10x.c
system_stm32f10x.h
startup_stm32f10x_hd.s: can be used with STM32F103RCT6
startup_stm32f10x_md.s: can be used with STM32F103C8T6
Note: startup_stm32f10x_hd.s and startup_stm32f10x_md.s cannot be imported into the project directory at the same time, otherwise an error will be reported!
xxxxxxxxxxThe kernel driver and startup files correspond to the path of the STM32 standard firmware library (STM32F10x_StdPeriph_Lib_V3.6.0):STM32F10x_StdPeriph_Lib_V3.6.0\Libraries\CMSIS\CM3\CoreSupportSTM32F10x_StdPeriph_Lib_V3.6.0\Libraries\CMSIS\CM3\DeviceSupport\ST\STM32F10xSTM32F10x_StdPeriph_Lib_V3.6.0.zip\STM32F10x_StdPeriph_Lib_V3.6.0\Libraries\CMSIS\CM3\DeviceSupport\ST\STM32F10x\startup\arm
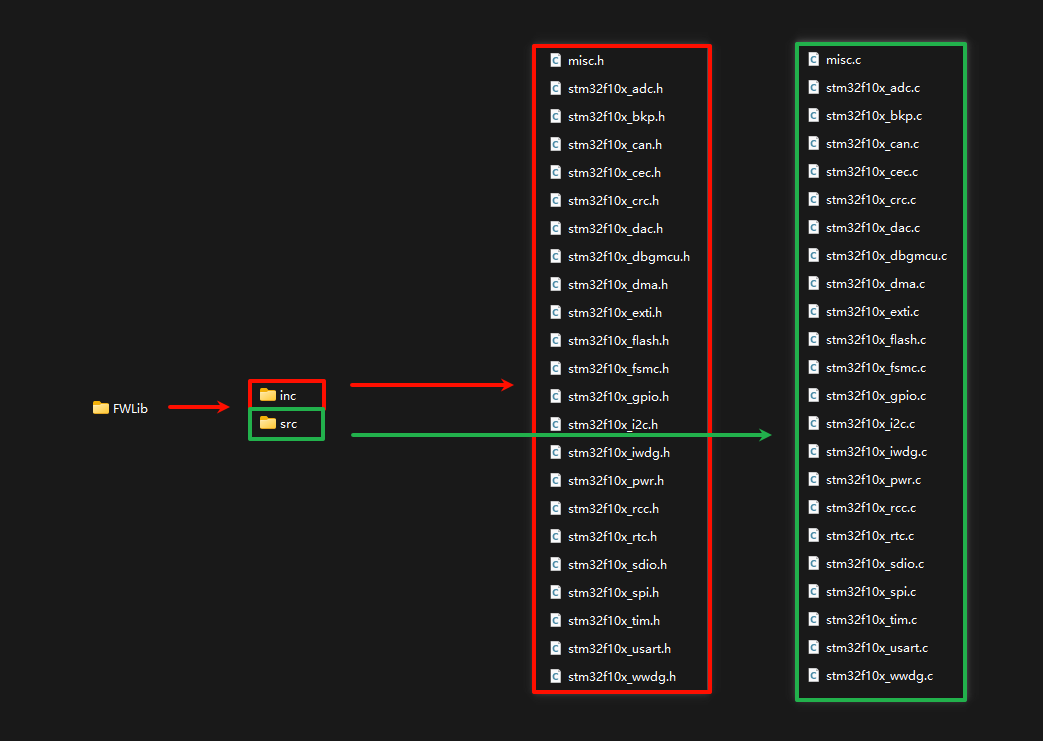
FWLib
inc
misc.h
stm32f10x_adc.h
stm32f10x_bkp.h
stm32f10x_can.h
stm32f10x_cec.h
stm32f10x_crc.h
stm32f10x_dac.h
stm32f10x_dbgmcu.h
stm32f10x_dma.h
stm32f10x_exti.h
stm32f10x_flash.h
stm32f10x_fsmc.h
stm32f10x_gpio.h
stm32f10x_i2c.h
stm32f10x_iwdg.h
stm32f10x_pwr.h
stm32f10x_rcc.h
stm32f10x_rtc.h
stm32f10x_sdio.h
stm32f10x_spi.h
stm32f10x_tim.h
stm32f10x_usart.h
stm32f10x_wwdg.h
src
misc.c
stm32f10x_adc.c
stm32f10x_bkp.c
stm32f10x_can.c
stm32f10x_cec.c
stm32f10x_crc.c
stm32f10x_dac.c
stm32f10x_dbgmcu.c
stm32f10x_dma.c
stm32f10x_exti.c
stm32f10x_flash.c
stm32f10x_fsmc.c
stm32f10x_gpio.c
stm32f10x_i2c.c
stm32f10x_iwdg.c
stm32f10x_pwr.c
stm32f10x_rcc.c
stm32f10x_rtc.c
stm32f10x_sdio.c
stm32f10x_spi.c
stm32f10x_tim.c
stm32f10x_usart.c
stm32f10x_wwdg.c
xxxxxxxxxxThe path of the standard library function source code file corresponding to the STM32 standard firmware library (STM32F10x_StdPeriph_Lib_V3.6.0):STM32F10x_StdPeriph_Lib_V3.6.0\Libraries\STM32F10x_StdPeriph_Driver\incSTM32F10x_StdPeriph_Lib_V3.6.0\Libraries\STM32F10x_StdPeriph_Driver\src
USER
新建工程时,会将工程放在该目录下。
main.c
stm32f10x_conf.h
stm32f10x_it.c
stm32f10x_it.h
xxxxxxxxxxThe path of the user file corresponding to the STM32 standard firmware library (STM32F10x_StdPeriph_Lib_V3.6.0):STM32F10x_StdPeriph_Lib_V3.6.0\Project\STM32F10x_StdPeriph_Template
BSP
When creating a new project, store the peripheral driver files of the development board
OBJ
When creating a new project, store the compiled files
Configure the project
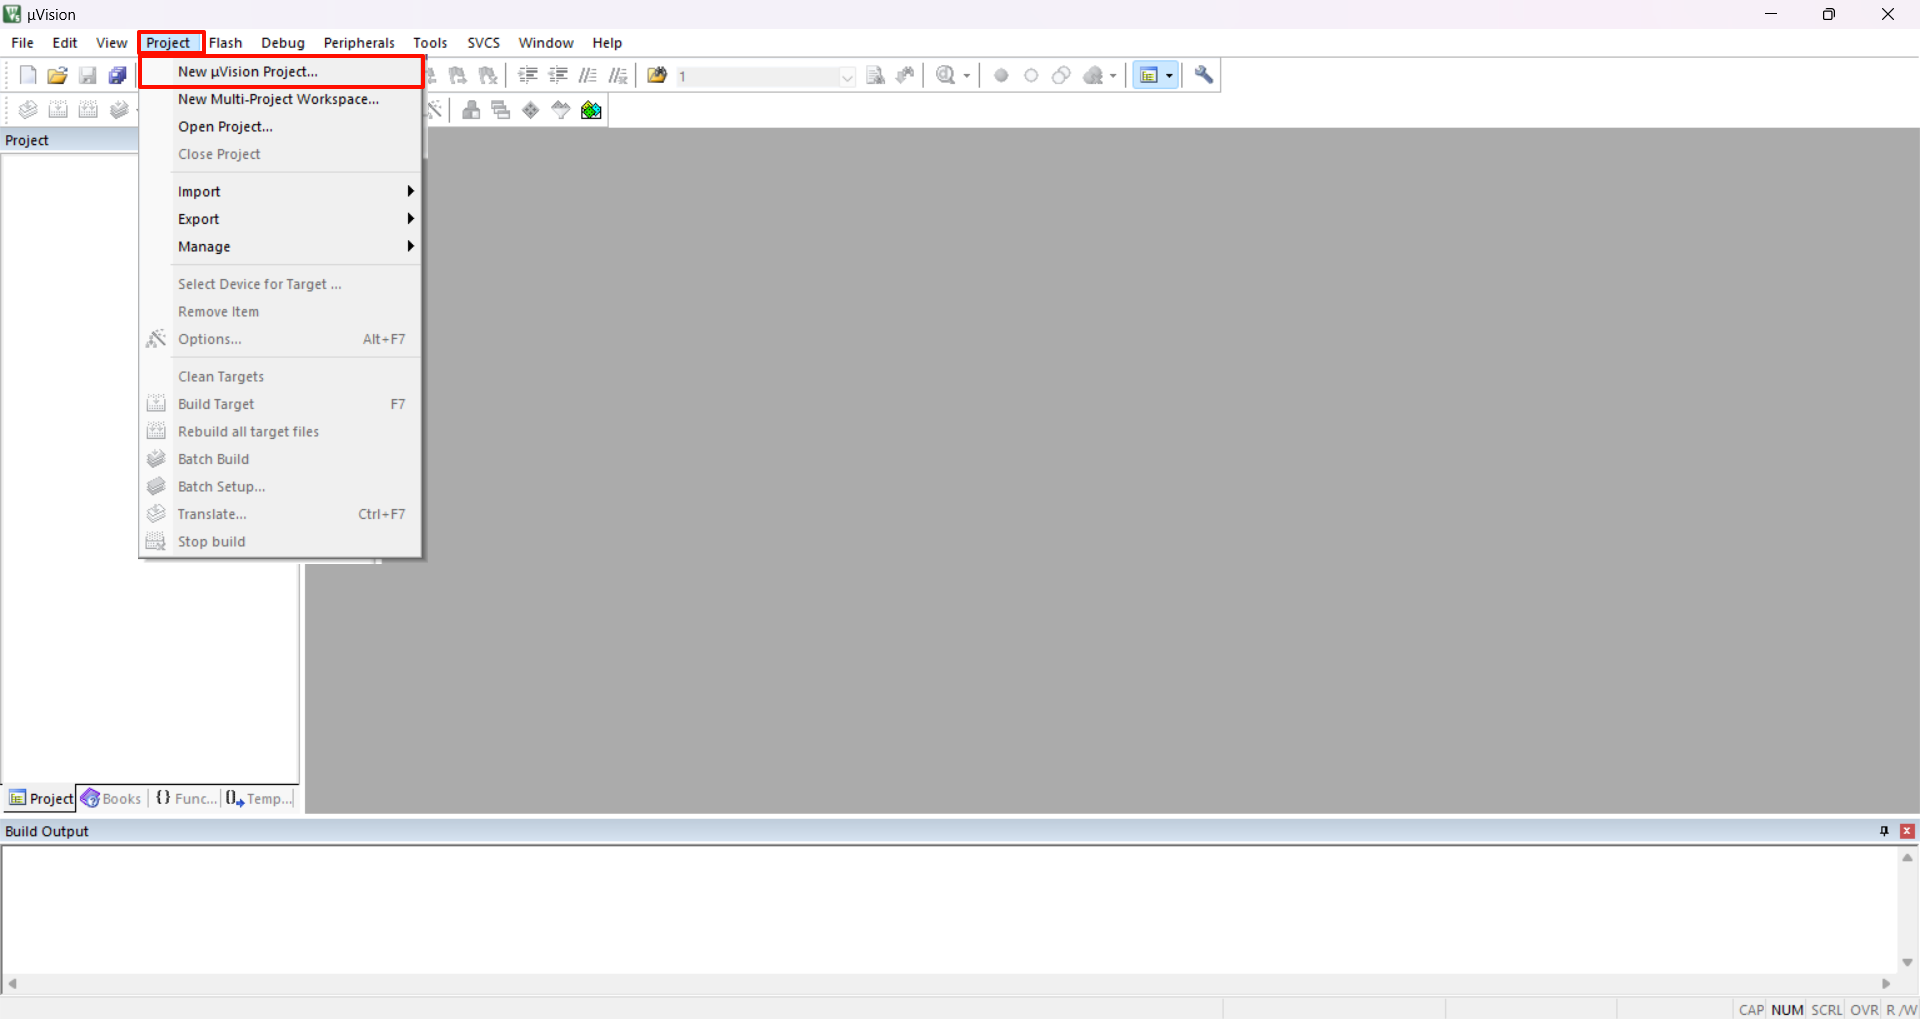
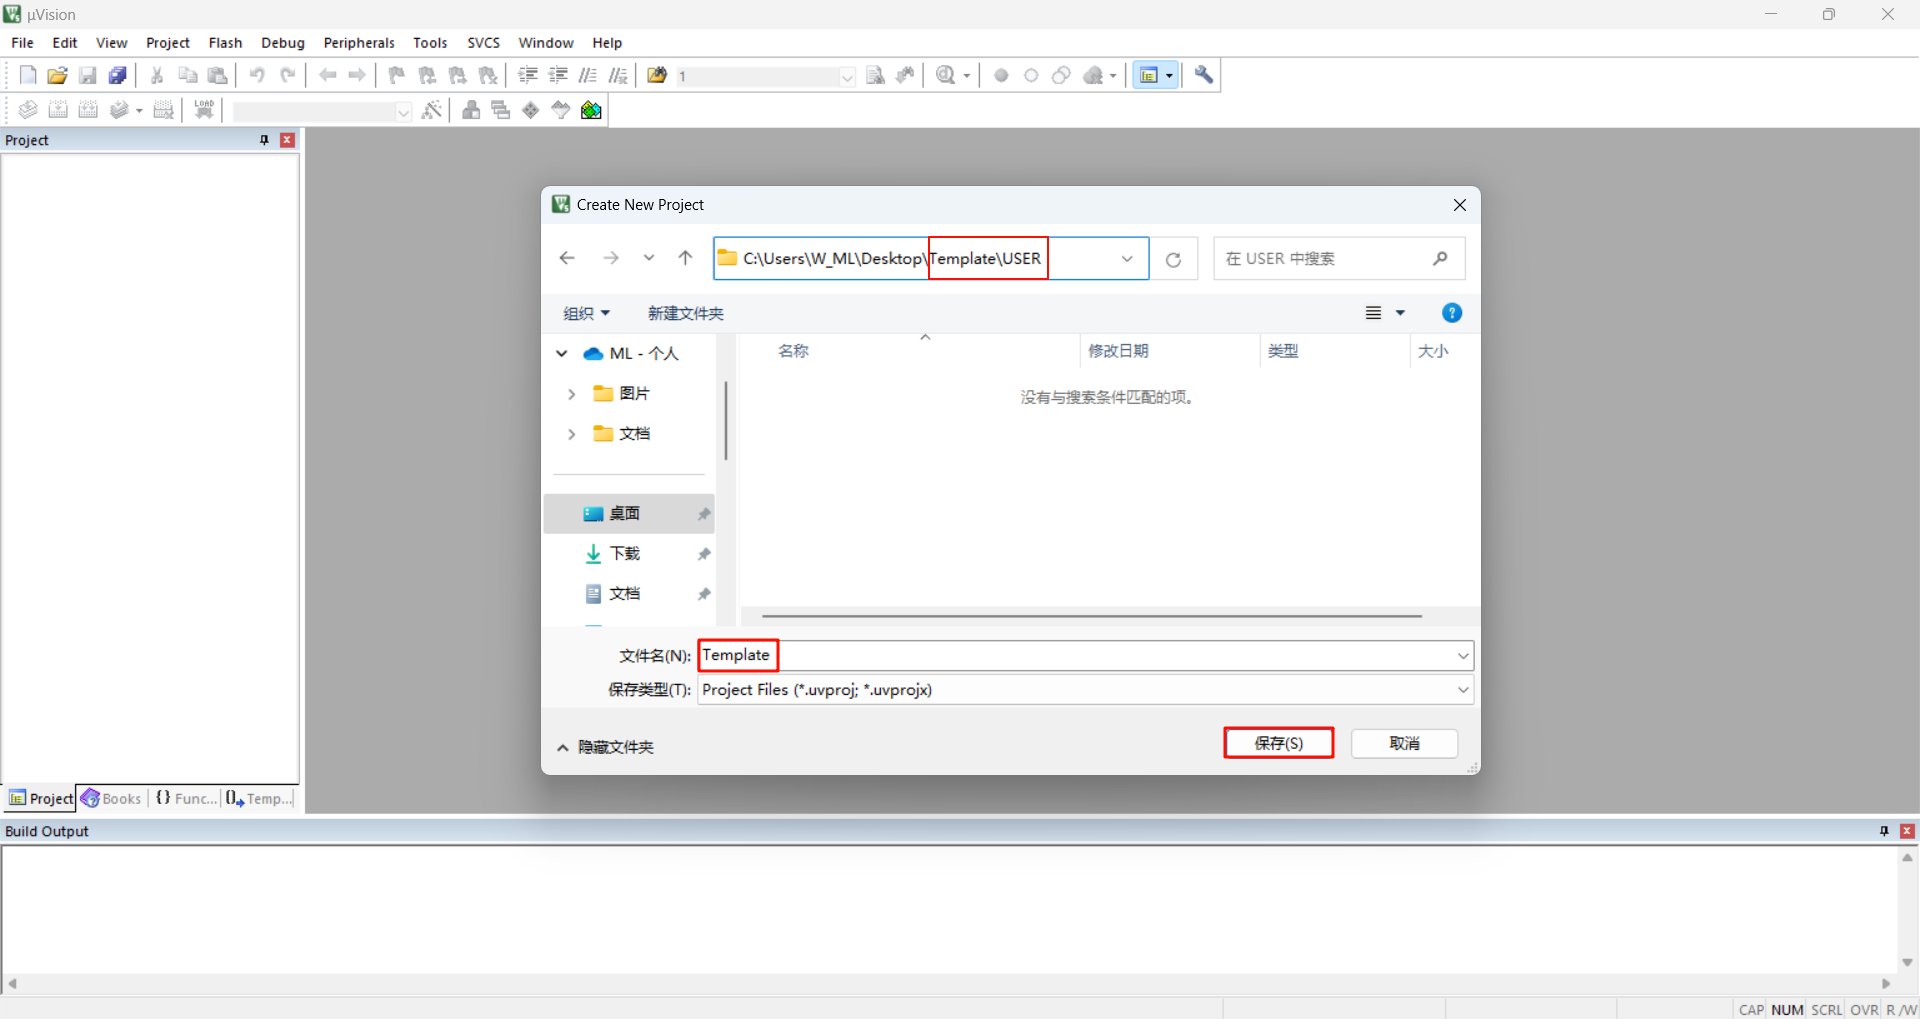
Create a new project
Double-click to open the Keil uVision5 software on the desktop

New project: Select the newly created USER folder as the project path, and you can define the project file name yourself
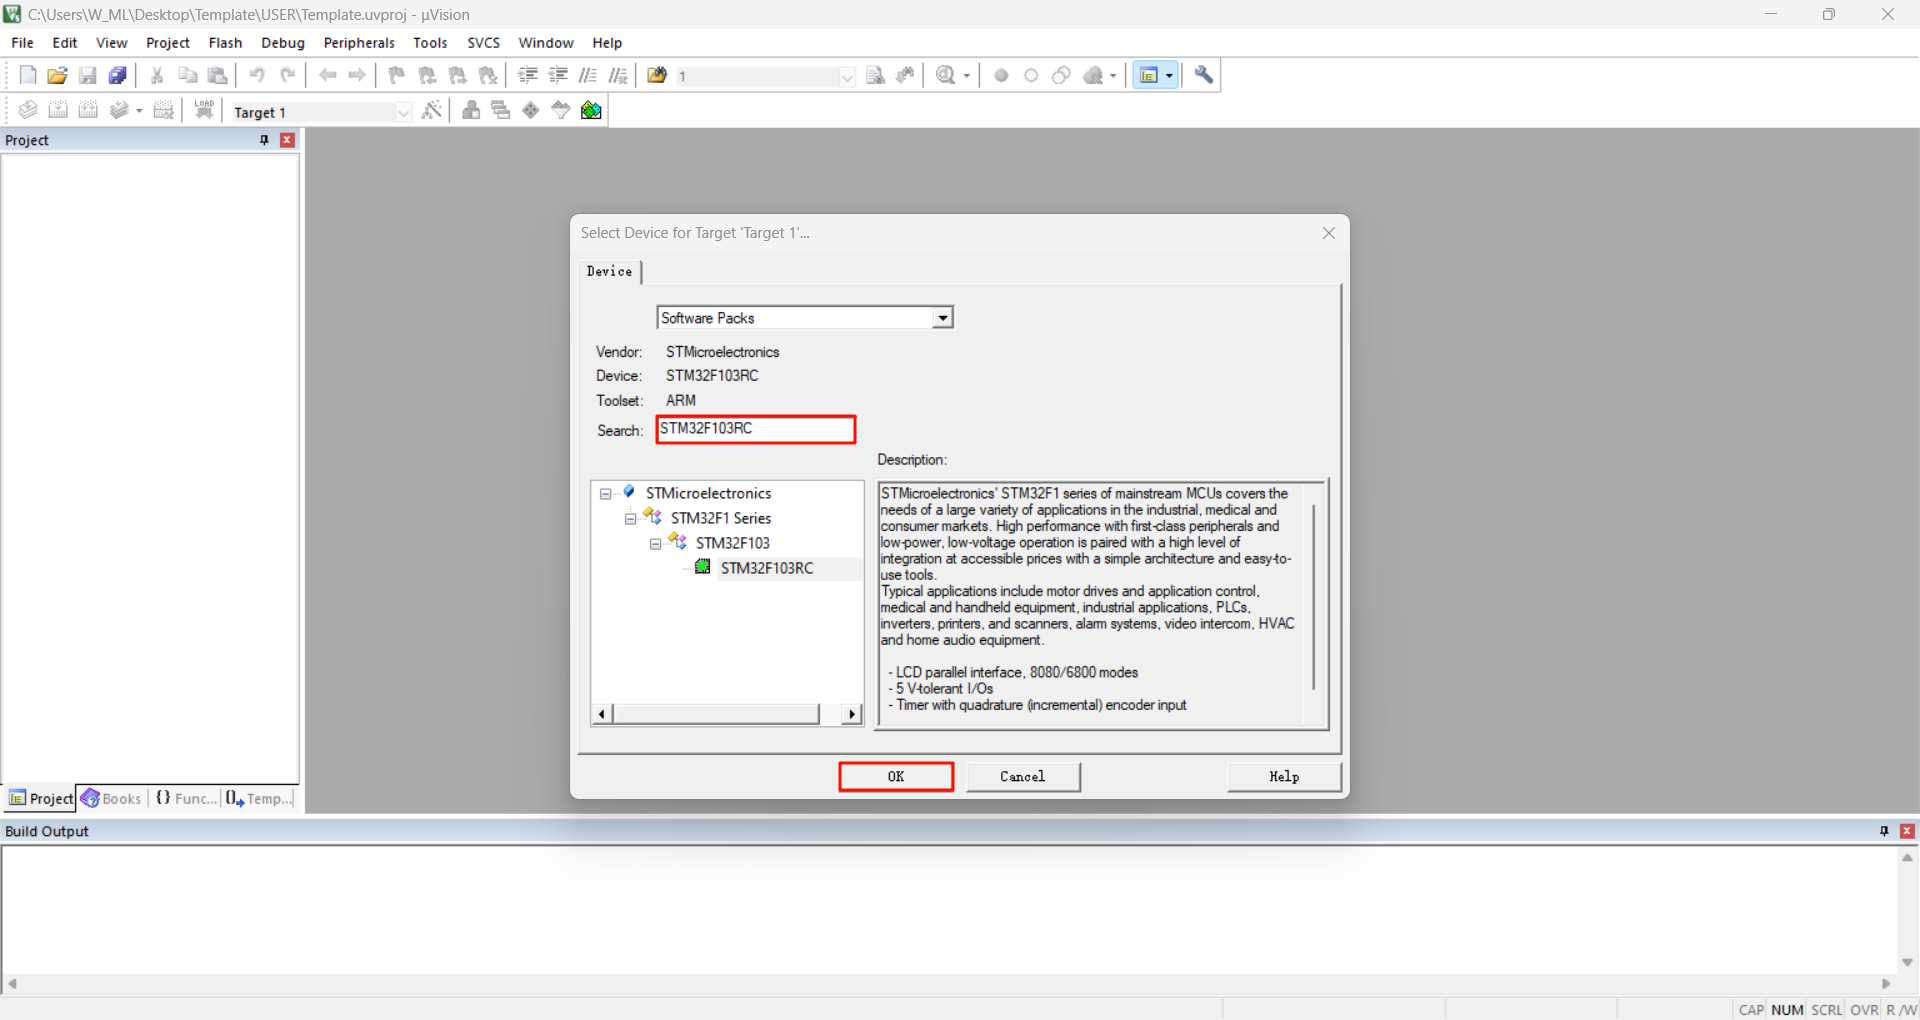
Chip selection
Search in the chip search bar: STM32F103RC
xxxxxxxxxxIf you don’t have a chip, you can install the STM32F1 series firmware package yourself
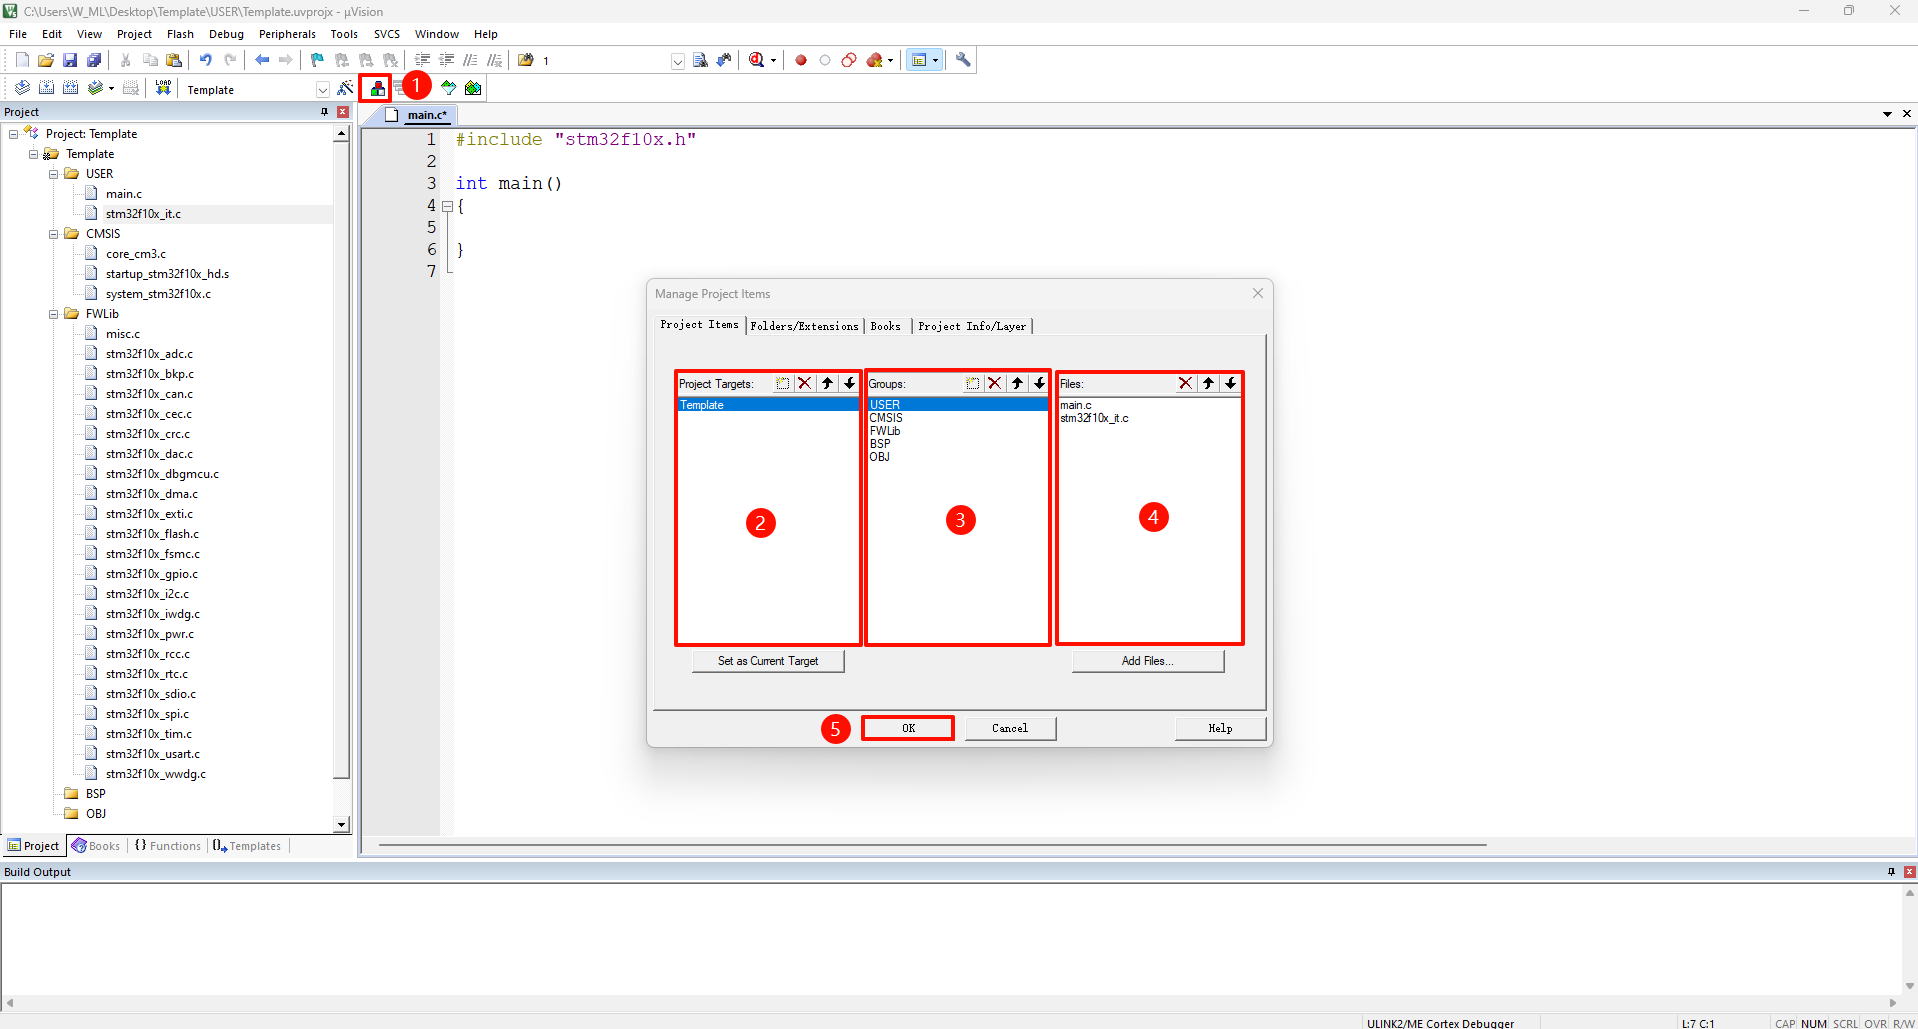
Project file management
It is recommended to add according to the project folder framework
②: Modify according to the project name
③: Modify according to the subfolder name
④: Add the .c and .s files in the corresponding folder
xNote:1. Only one startup file can be added. We use STM32F103RCT6 here, so import the startup_stm32f10x_hd.s file2. Since the main.c file is copied from the STM32 standard firmware library, we need to delete the content inside and fill in the following content
Click OK and it will be like the directory on the left of the picture. Users can compare it by themselves!
Project target options
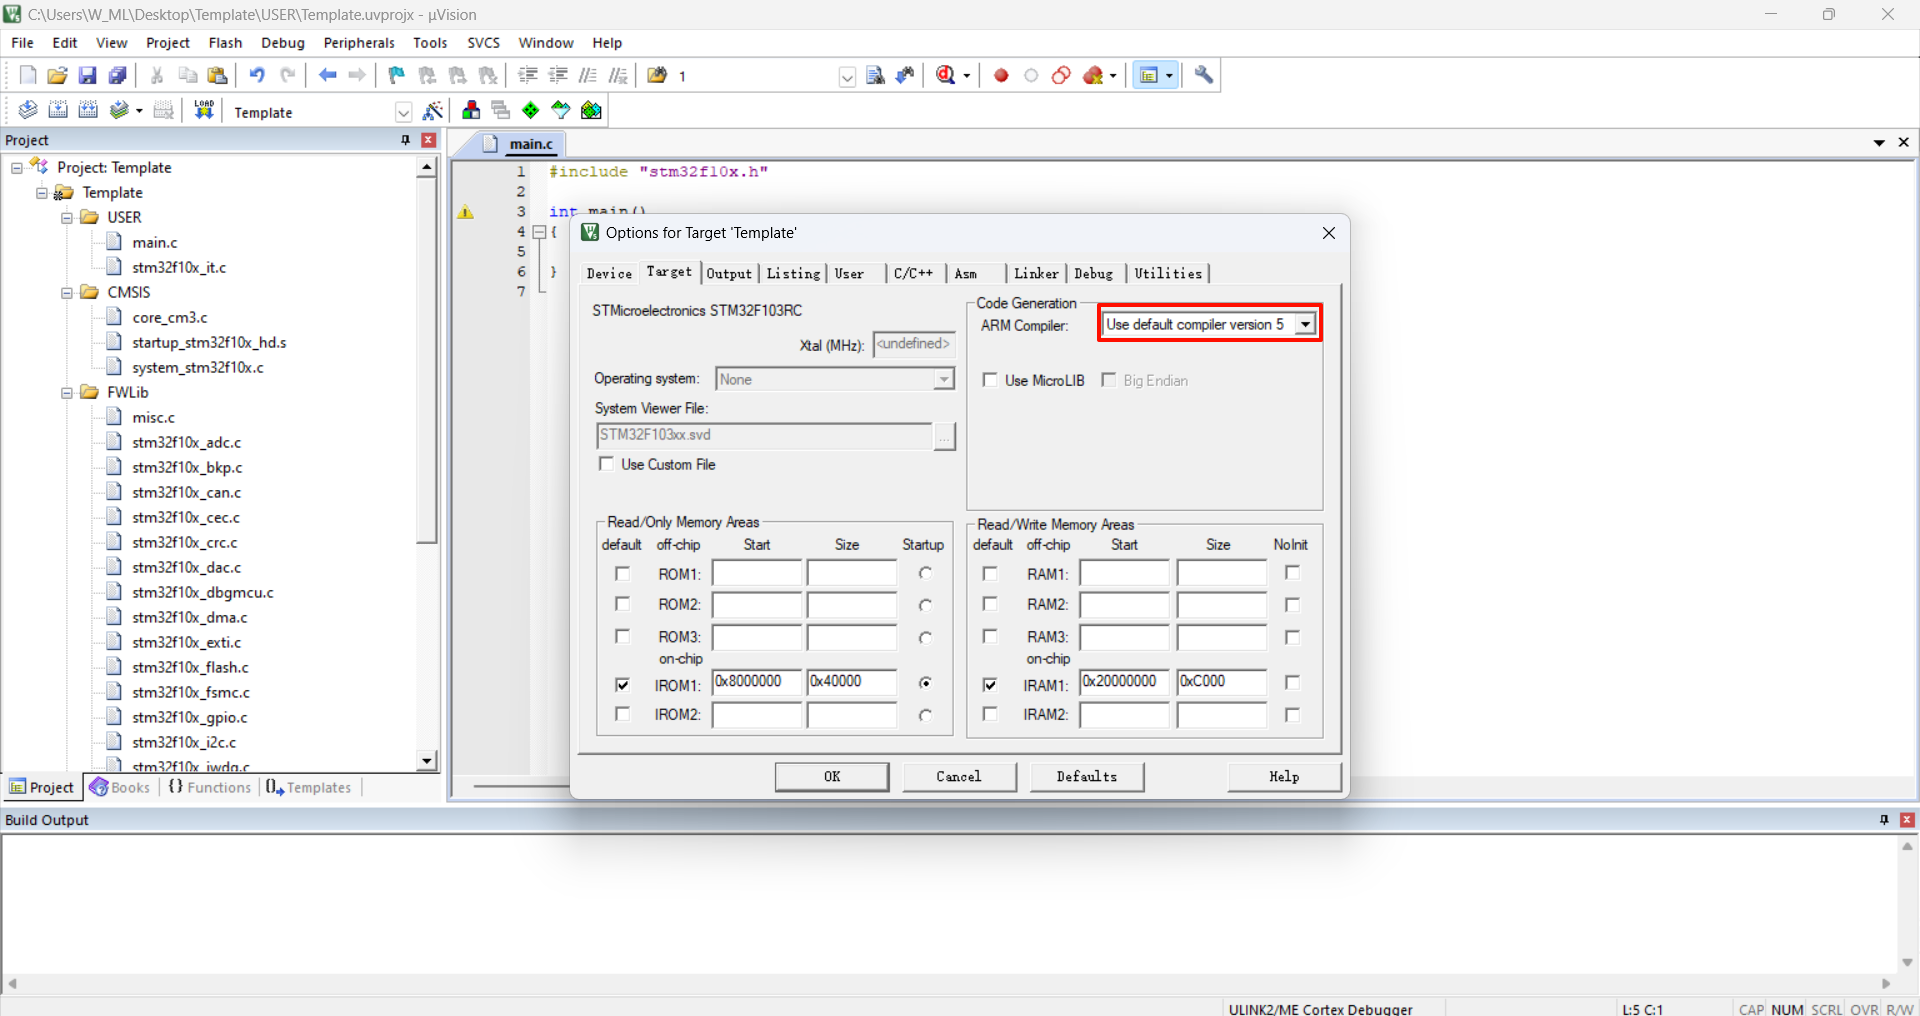
Target
Select the AC5 compiler
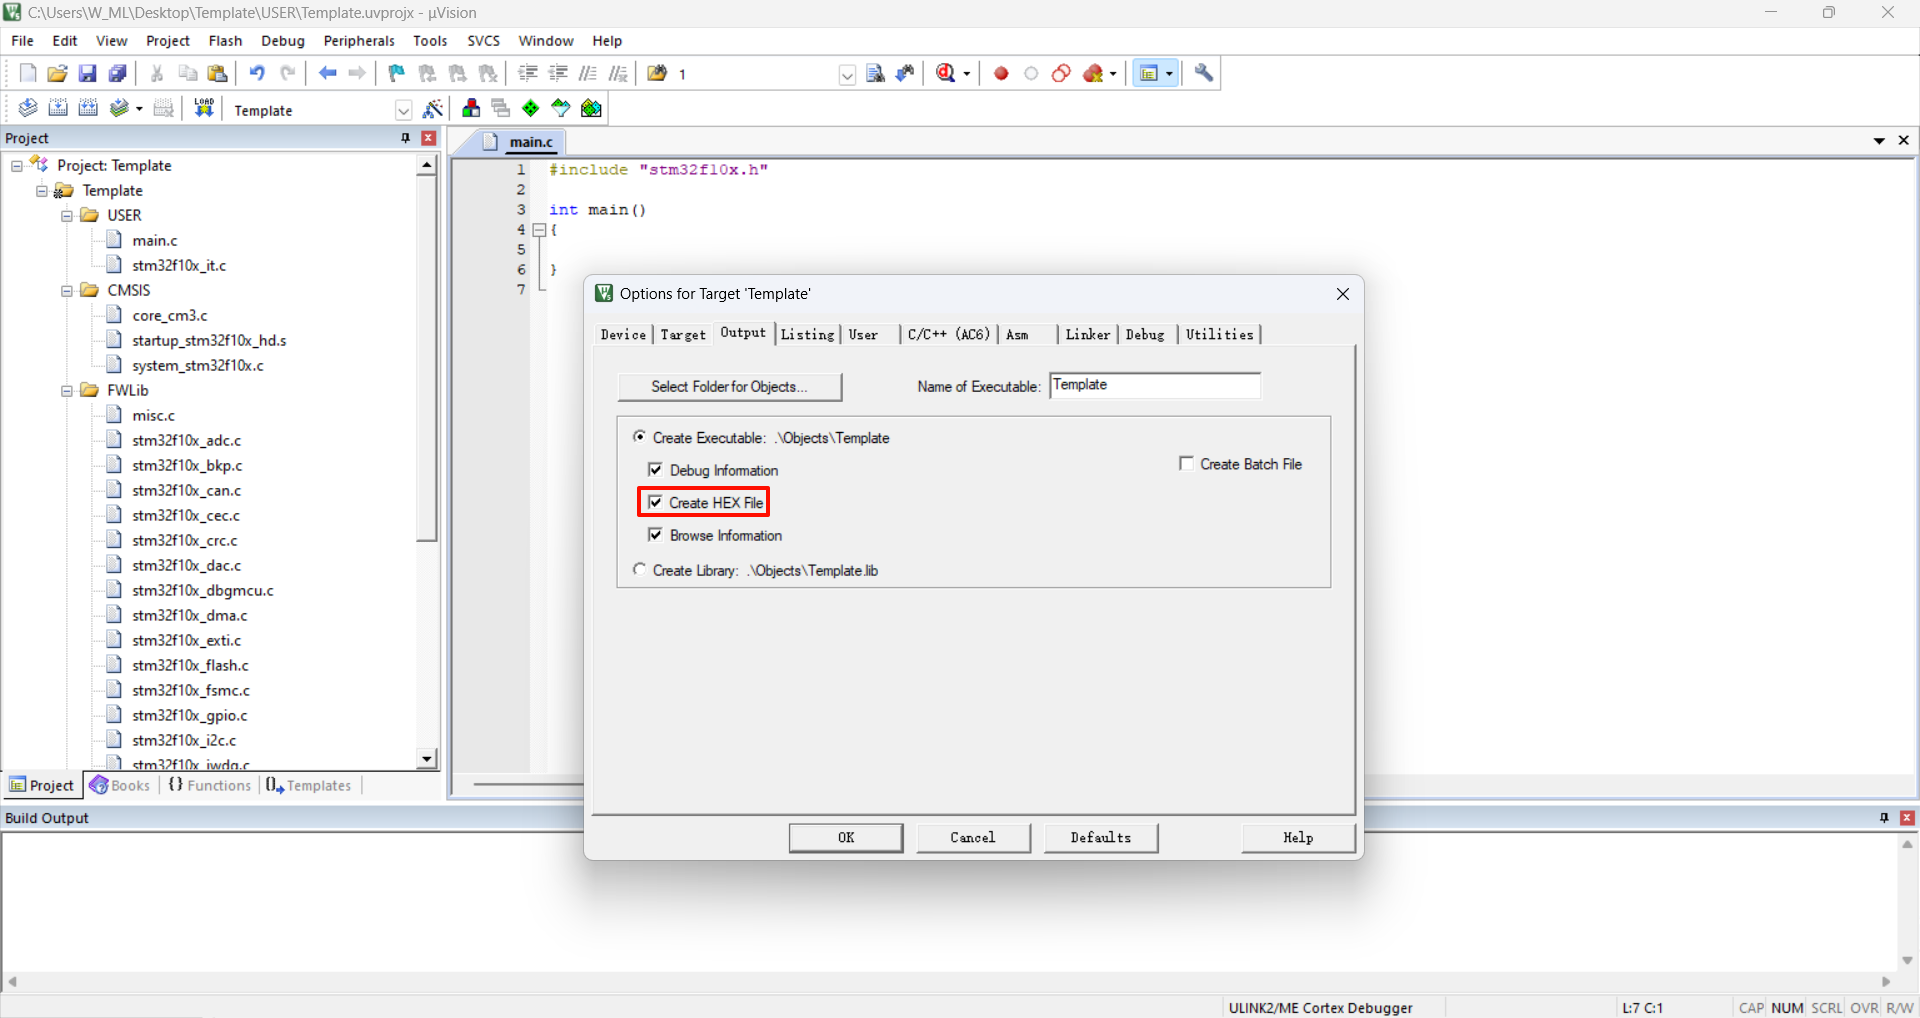
Output
Check the option Create HEX File
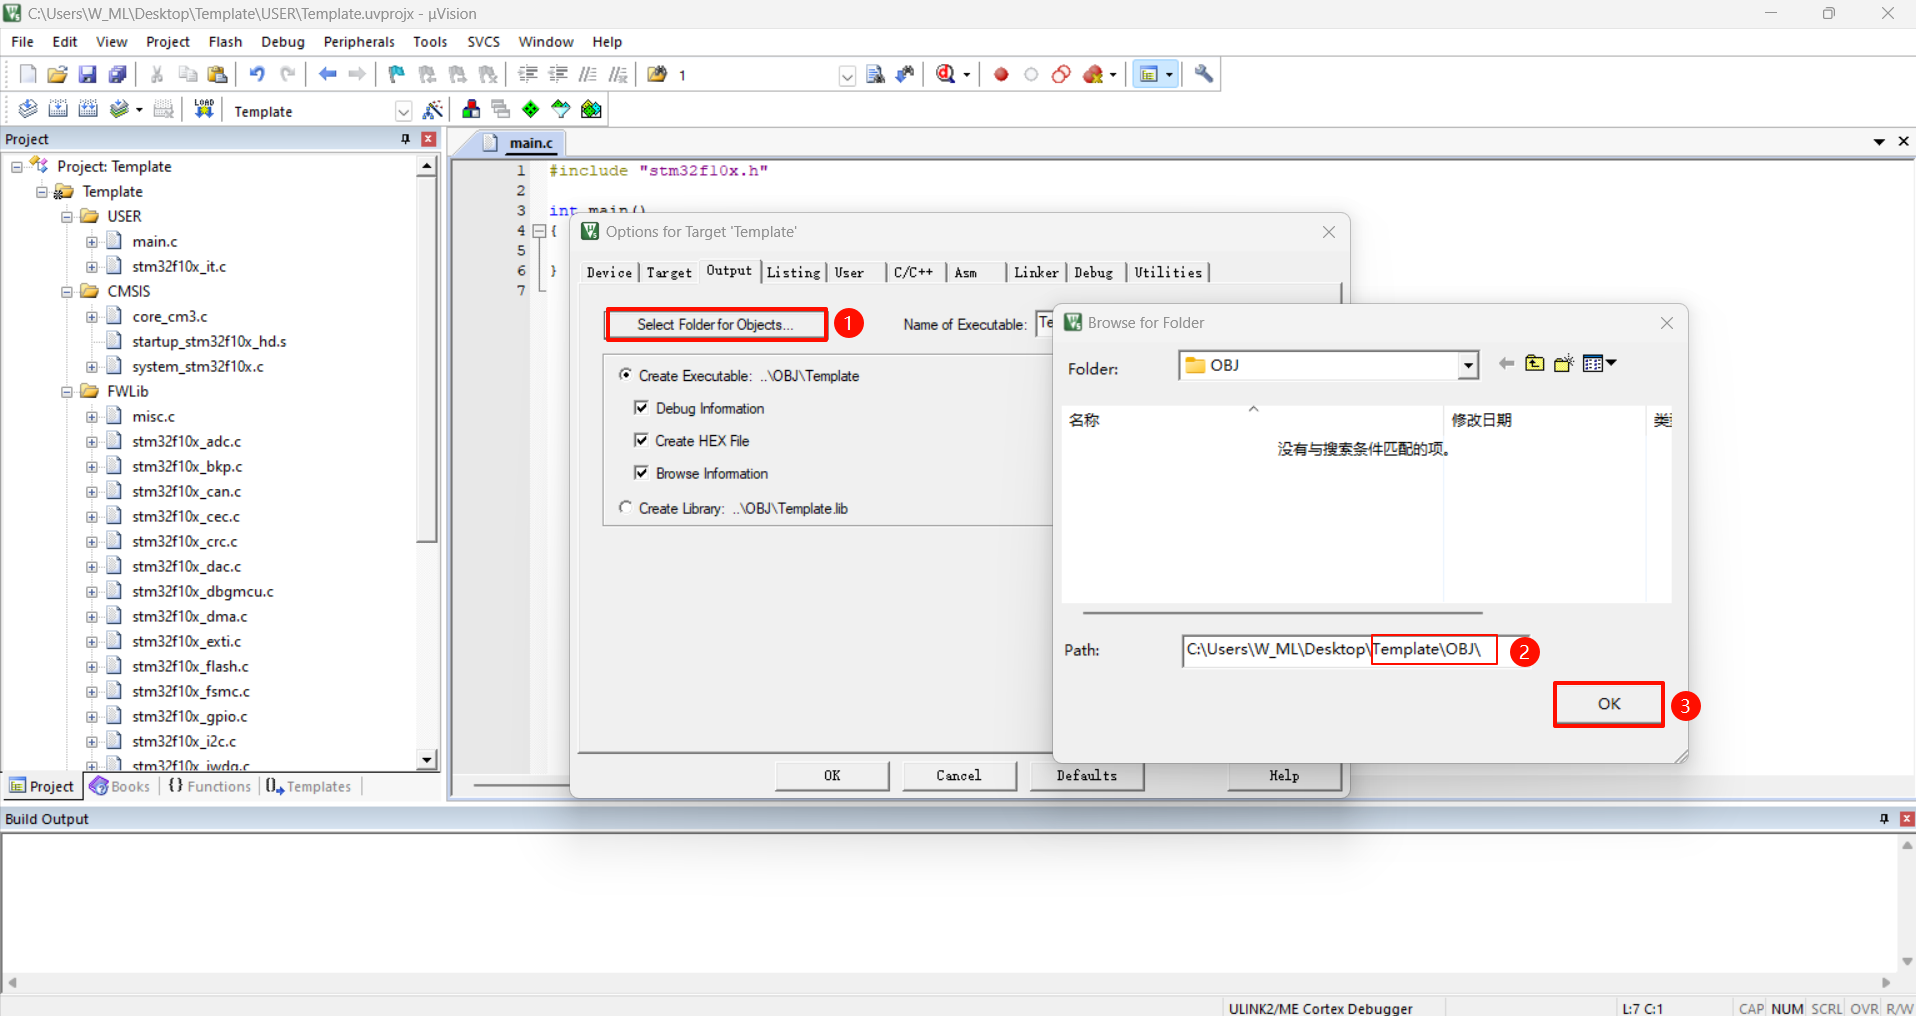
Select the location to store the compiled files: Template\OBJ
C/C++
Define: add USE_STDPERIPH_DRIVER

Include Paths: Add all folder paths containing .h files in the project
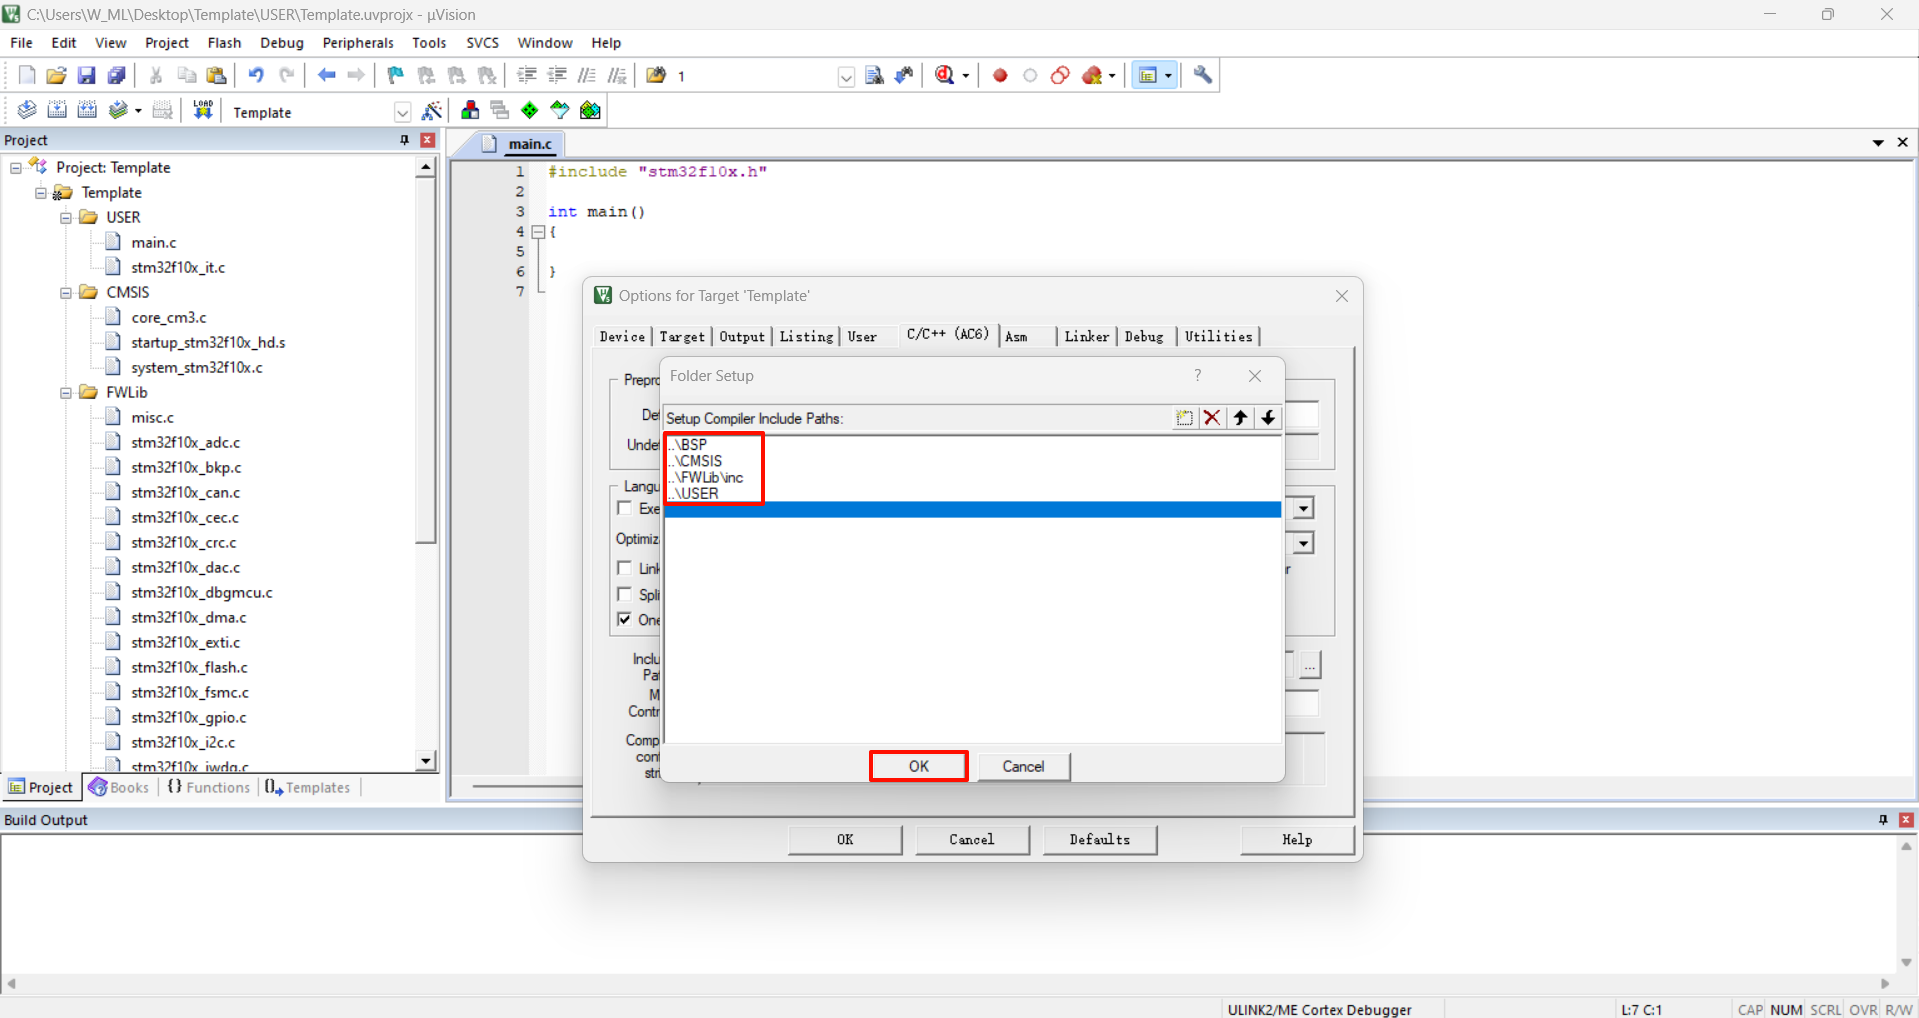
xxxxxxxxxxIf you are not sure which folders need to be added, you can add all the folder paths under this project.
Compile the project
Click rebuild to compile the project:
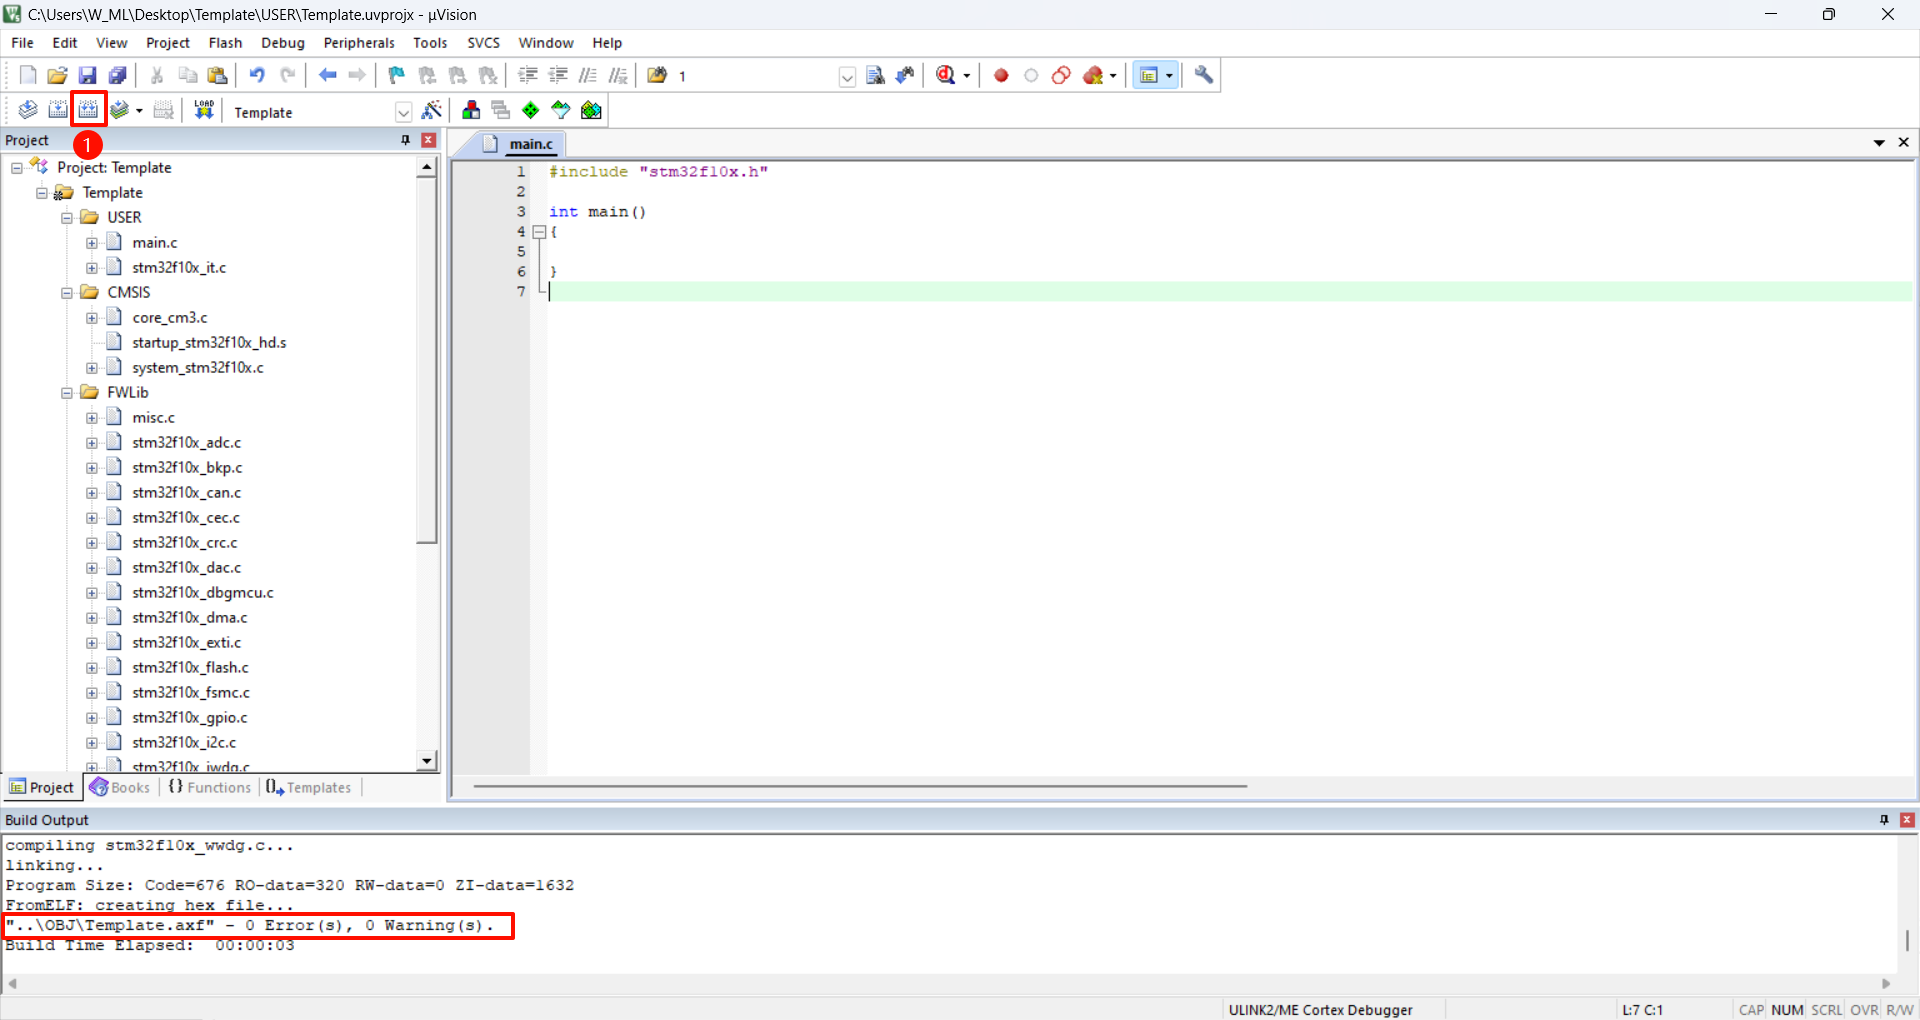
If "0 Error(s), 0 Warning(s) appears, it means the project template is created successfully!
Template.hex
Template.hex is the file generated after the project is compiled. You can use the serial port burning program to burn this file into the development board and run it!
Template.hex is generated in: Template\OBJ