Voice driver library installation and port binding
1. Bind voice port
The car's factory image system has bound the port, so there is no need to bind it again. If you are not using the factory image, you need to rebind it when developing on your own motherboard.
1.1. Check device number
Enter the following command in the terminal to check the device number,
xxxxxxxxxxll /dev/ttyUSB*
Here we found that two ttyUSB* device numbers were identified, one of which is an imu device. We enter the following command to see which one is imu.
xxxxxxxxxxll /dev/imu_usb
Here we can know that the system recognizes the voice board as /dev/ttyUSB1. Then we enter the following command to view the device path information and get the following picture,
xxxxxxxxxxudevadm info --attribute-walk --name=/dev/ttyUSB1 |grep devpath
Then, we modify the /etc/udev/rules.d/serial.rules file, bind the port number of the voice board, and enter the terminal,
xxxxxxxxxxsudo vi /etc/udev/rules.d/sixmic.rules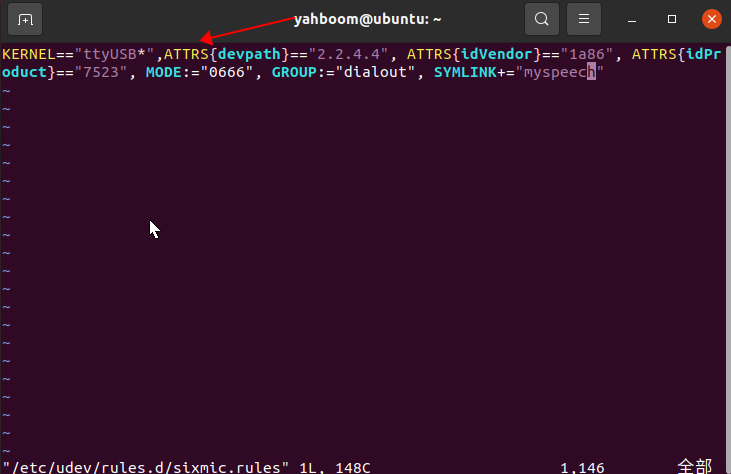
Change ATTRS{devpath} to the corresponding number of the device information, here is "2.2.4.4". Save and exit
Enter the following statement in the terminal to reload the system device
xxxxxxxxxxsudo udevadm triggersudo service udev reloadsudo service udev restart1.2, Test
Enter the following command in the terminal to check whether the binding is successful,
xxxxxxxxxxll /dev/myspeech
If this interface appears, the binding is successful.
2. Statement before installing the driver library
The factory image system of the car has already installed the latest driver library, so there is no need to install it again. If you are not using the factory image, or the driver library has updated content, you need to install the driver library.
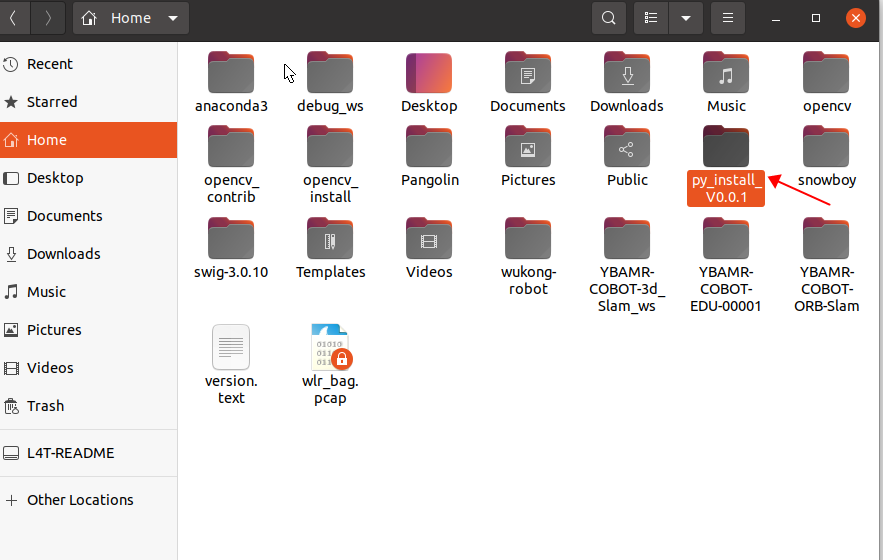
The storage path of the driver library that comes with the factory system: /home/yahboom/py_install_V0.0.1
For how to install the driver library, please refer to the following steps. Here, the installation of version V0.0.1 is taken as an example.
2.1. Download the Python driver library file
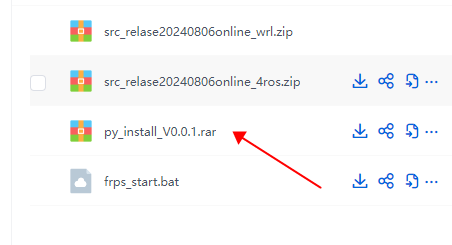
The latest version of the NAVROBOT Python driver library is provided in this course material, named py_install.zip. The file is in the attachment source code of Baidu Netdisk.
The path in the motherboard is in the home directory
The compressed package contains the following files:

2.2. Transfer files to Orin nx
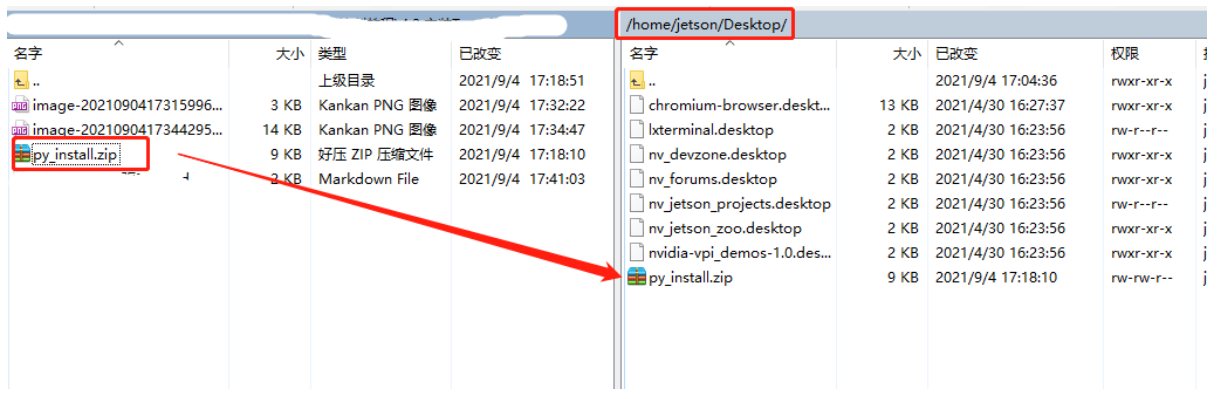
If you use the driver library compressed package file in the data, or download the driver library file with a computer browser, you can use WinSCP software to drag the driver library compressed package file to the Orin nx desktop.
After successful installation, the driver library file can be deleted.
2.3, Start installation
Open the terminal of Orin nx and enter the following command to decompress.
Enter the desktop and check whether the file exists. The target file is in the red box
xxxxxxxxxxcd ~ && ls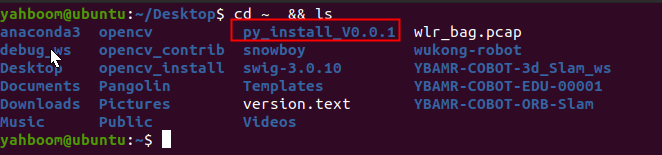
Unzip the file
xxxxxxxxxxunrar x py_install.zipNote: The entire document example is based on the example of placing the py_install.zip compressed package in the root directory of the orin nx system. If the path where the compressed package is stored is different, please enter the corresponding directory according to the actual path to operate.
Enter the driver library folder
xxxxxxxxxxcd py_install_V0.0.1/py_install/Run the installation command. If you see the installation version number at the end, it means the installation is successful. This command will overwrite the previously installed Speech-Lib driver library.
xxxxxxxxxxsudo python3 setup.py install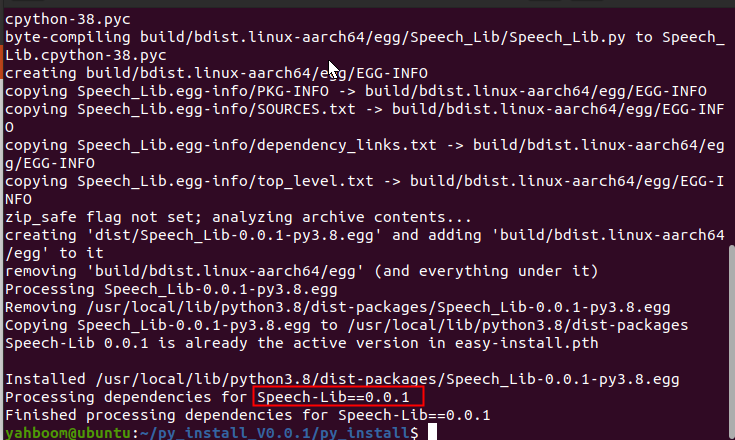
2.4. Import library file
The name of the speech driver library is Speech_Lib. Use Speech_Lib to import the library in the program.
xxxxxxxxxxfrom Speech_Lib import Speech2.5, API Introduction
It is mainly divided into two parts: reading data and writing data
xdef __init__(self, com="/dev/myspeech"):#Open the serial port numberdef void_write(self, void_data):#Select the broadcast statementdef speech_read(self):#Read the recognized speech