3. Jupyter Lab Basic Usage Tutorial
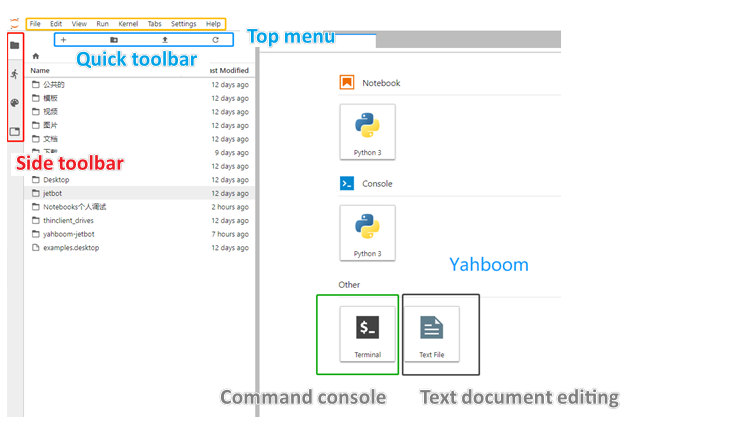
The JupyterLab interface is a dashboard that provides access to interactive iPython notebooks, as well as the folder structure of the Raspblock and a terminal window into the linux operating system. The first view you will see includes the menu bar at the top, the directory tree in the left sidebar, and the main workspace that initially opens to the "launcher" page.
For complete details on all functions and menu operations, see JupyterLab interface:
https://jupyterlab.readthedocs.io/en/stable/user/interface.html
Here are some key features that are particularly useful in this course:
· File browser:
The file browser in the left sidebar allows navigation of the file structure. Double-clicking a notebook or file opens it in the main workspace.
· iPython Notebooks:
The interactive notebooks used in this course have the ".ipynb" file extension. When you double-click a notebook from the file browser, it will open in the main workspace and its process will begin. Notebooks consist of text and code "cells". When a code cell is "run", by clicking the Run button at the top of the notebook or the keyboard shortcut [CTRL] + [ENTER], the code block in the cell will be executed and the output (if any) will be displayed below the notebook. To the left of each executable cell, there is an "execution count" or "prompt number" in parentheses. If a cell takes more than a few seconds to run, you will see an asterisk mark there, indicating that the cell has not yet finished executing. When processing of that cell is completed, a number will be displayed in parentheses.

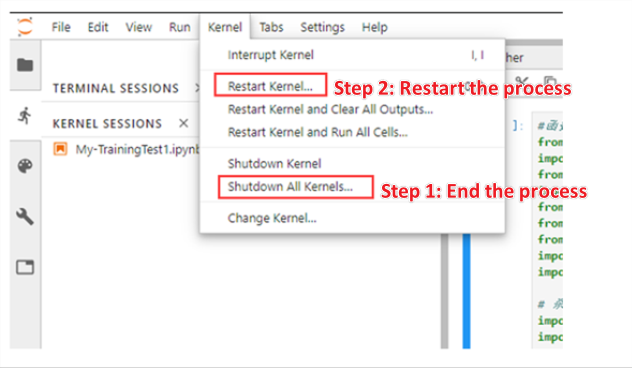
· Kernel Operations:
The kernel of each running notebook is an independent process that runs user code. When you open a notebook from the file browser, the kernel is automatically started. The kernel menu on the main menu bar contains commands to shut down or restart the kernel, and you will need to use them regularly. After the kernel is shut down, no code cells can be executed. When you restart the kernel, all memory is lost due to imported packages, variable assignments, etc.
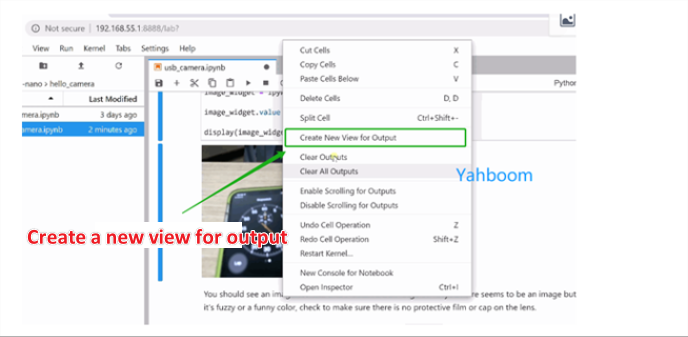
Cell Tabs:
You can move any cell to a new window tab in the main workspace by right-clicking the cell and selecting "Create New View for Output". This allows you to continue scrolling down your JupyterLab notebook while still watching a specific cell. This is especially useful in cells that contain camera views!
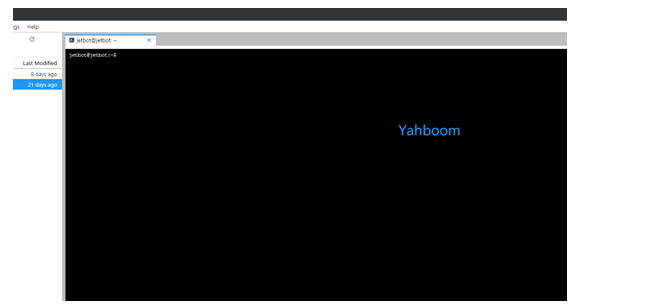
· Terminal Window:
You can work in your system's terminal window directly from Jupyter Remote. From the Launcher page, click the Terminal icon under "Other". To bring up the Launcher page, if it is no longer visible, click the "+" icon at the top of the left sidebar.
Shortcuts are one of the biggest advantages of Jupyter Notebooks. When you want to run any code block, just press Ctrl+Enter. Jupyter Notebooks provides a lot of keyboard shortcuts that can help us save a lot of time.
Below are some shortcuts that we have hand-picked to be extremely helpful in getting started. I strongly recommend that you try them one by one while reading this article. You will not be able to live without them in the future!
Jupyter Notebooks provides two different keyboard input modes - Command and Edit. Command mode is to bind keyboard and notebook-level commands and is represented by a gray cell border with a blue left margin. Edit mode allows you to enter text (or code) in the active cell and is represented by a green cell border.
You can jump between command mode and edit mode using Esc and Enter respectively. Try it now!
After entering command mode (you have no active cell at this time), you can try the following shortcuts:
Shift+Enter: Run this cell and select the next cell
Ctrl+Enter: Run this cell
Alt+Enter: Run this cell and insert a new cell below it
Y: The cell is switched to code state
M: The cell is switched to markdown state
A: Insert a new cell above
B: Insert a new cell below
X: Cut the selected cell
Shift +V: Paste the cell above