Raspberry Pi PCIE Installation Steps
Installation Steps
To use the Raspberry Pi M.2 HAT+, you will need:a Raspberry Pi 5

- Disconnect the Raspberry Pi from power before beginning installation.
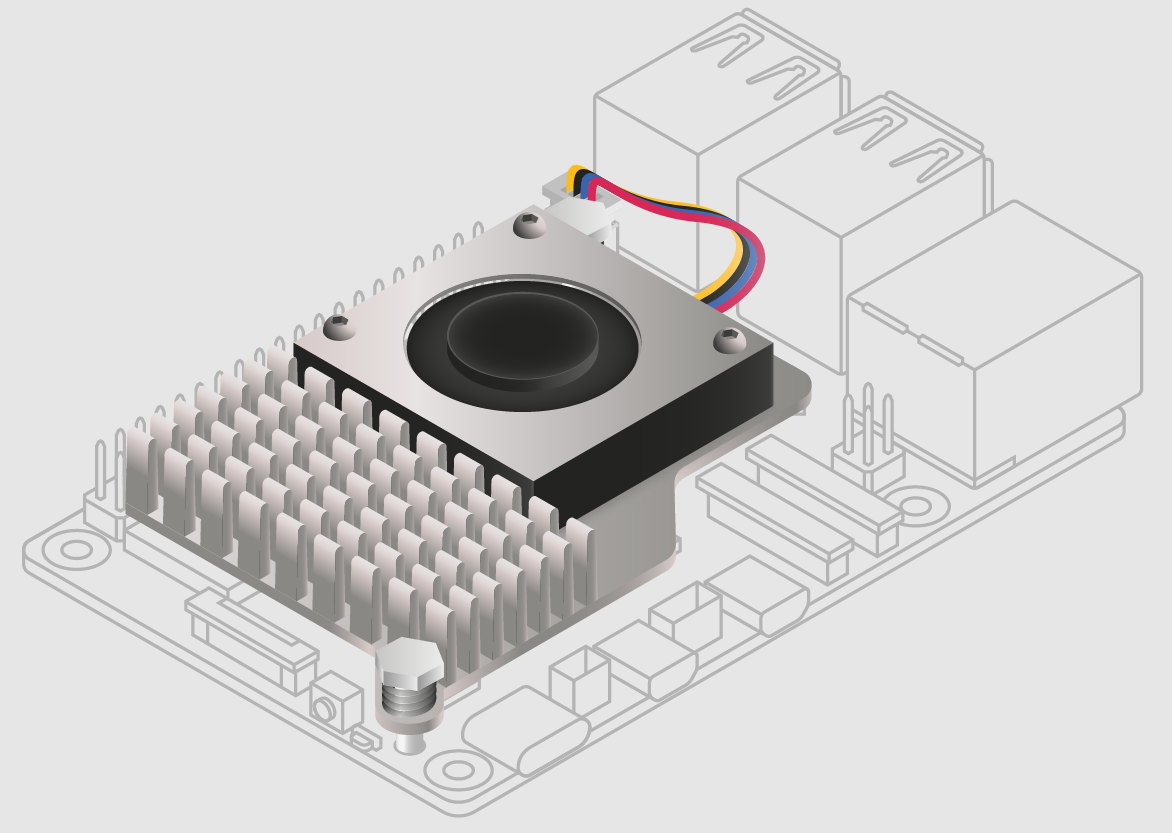
- The M.2 HAT+ is compatible with the Raspberry Pi 5 Active Cooler. If you have an Active Cooler, install it before installing the M.2 HAT+.
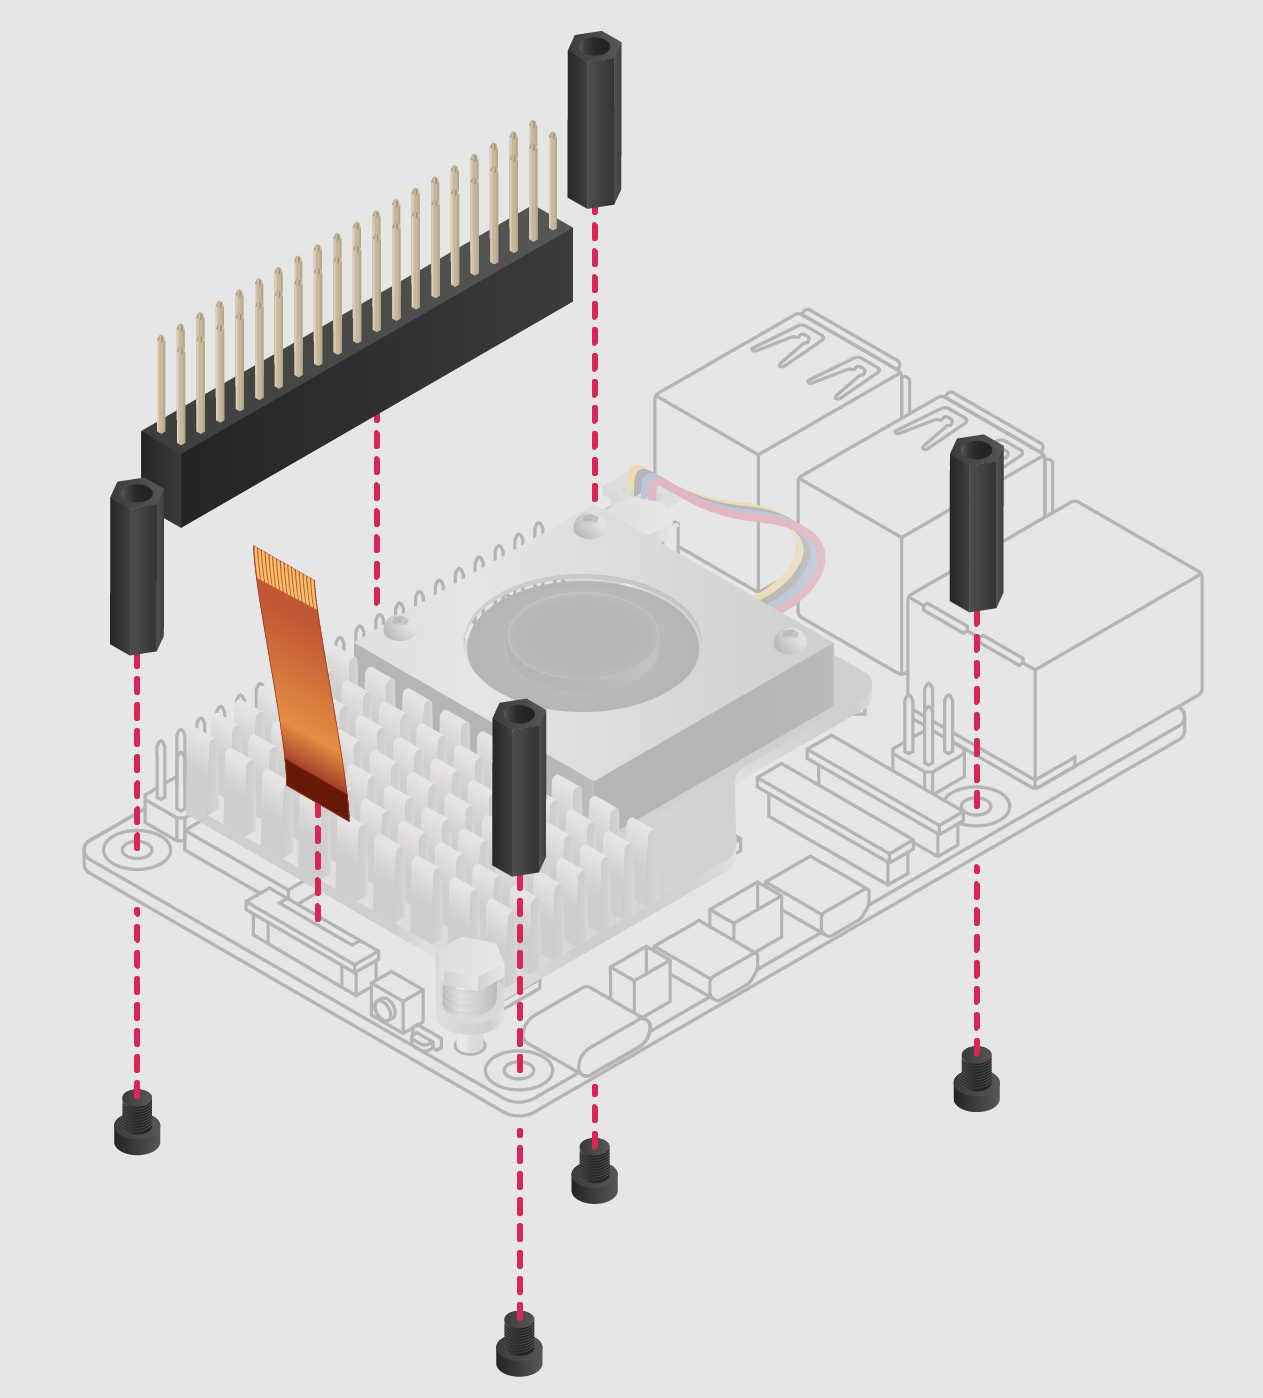
- Install the spacers using four of the provided screws. Firmly press the GPIO stacking header on top of the Raspberry Pi GPIO pins; orientation does not matter as long as all pins fit into place. Disconnect the ribbon cable from the M.2 HAT+, and insert one end into the PCIe port of your Raspberry Pi. Lift the ribbon cable holder from both sides, then insert the cable with the copper contact points facing inward, towards the USB ports. With the ribbon cable fully and evenly inserted into the PCIe port, push the cable holder down from both sides to secure the ribbon cable firmly in place.
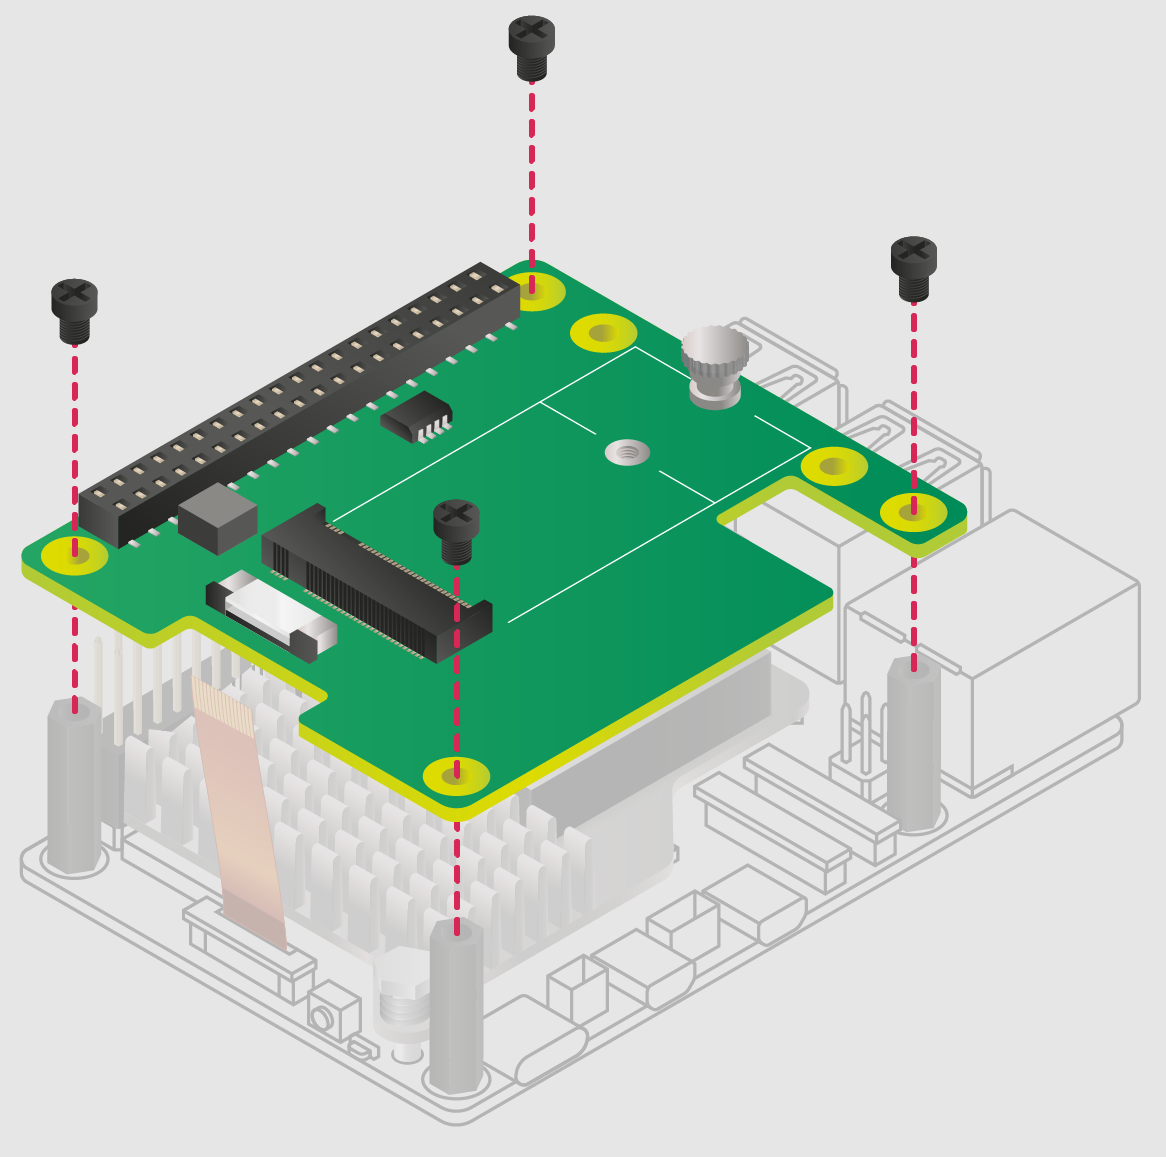
- Set the M.2 HAT+ on top of the spacers, and use the four remaining screws to secure the M.2 HAT+ in place.
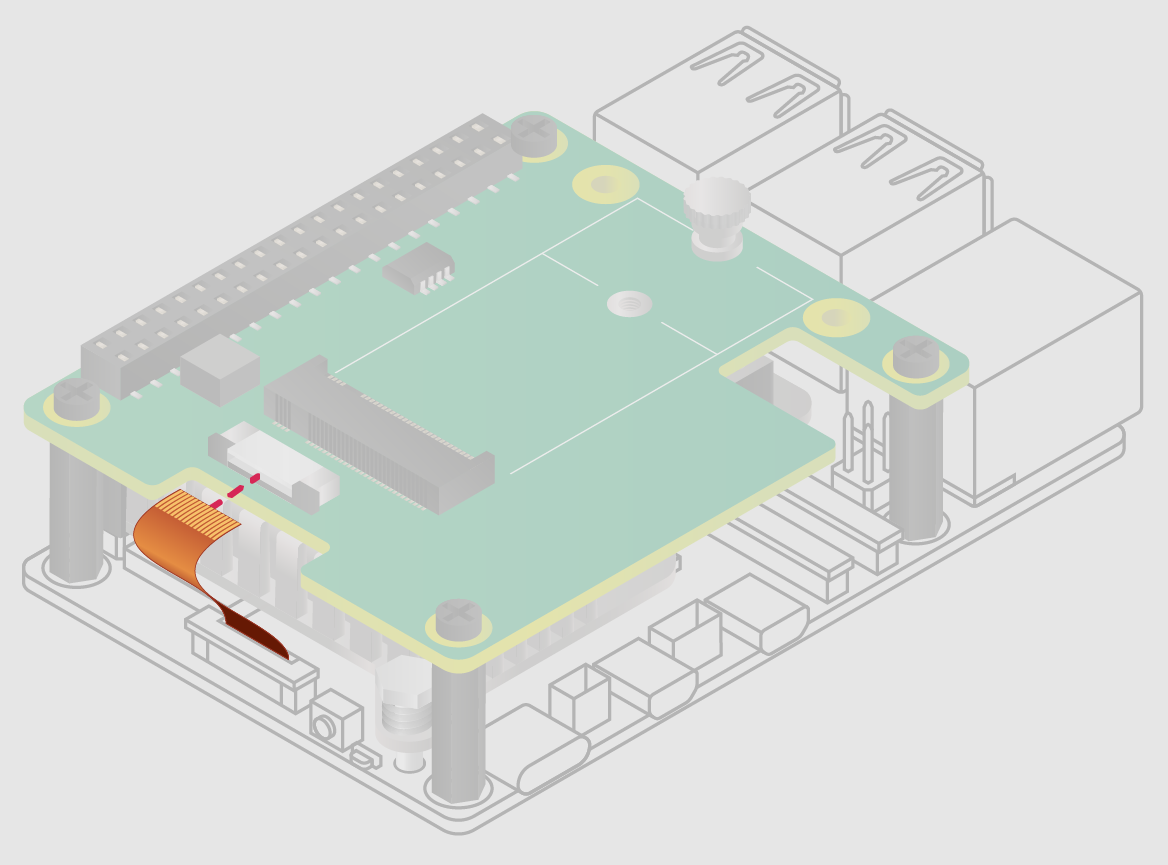
- Insert the ribbon cable into the slot on the M.2 HAT+. Lift the ribbon cable holder from both sides, then insert the cable with the copper contact points facing up. With the ribbon cable fully and evenly inserted into the port, push the cable holder down from both sides to secure the ribbon cable firmly in place.
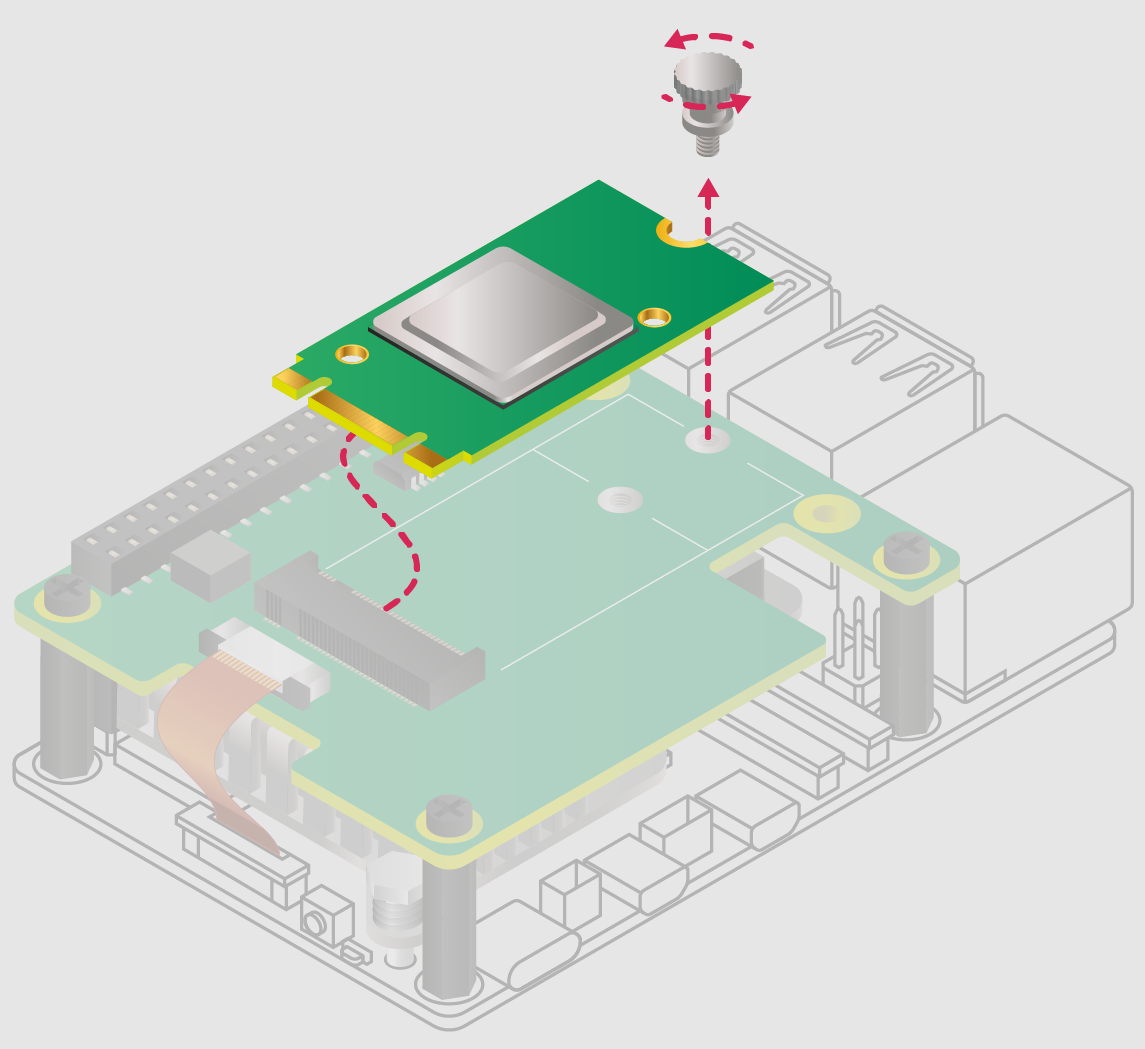
- Remove the drive attachment screw by turning the screw counter-clockwise. Insert your M.2 SSD into the M.2 key edge connector, sliding the drive into the slot at a slight upward angle. Do not force the drive into the slot: it should slide in gently.
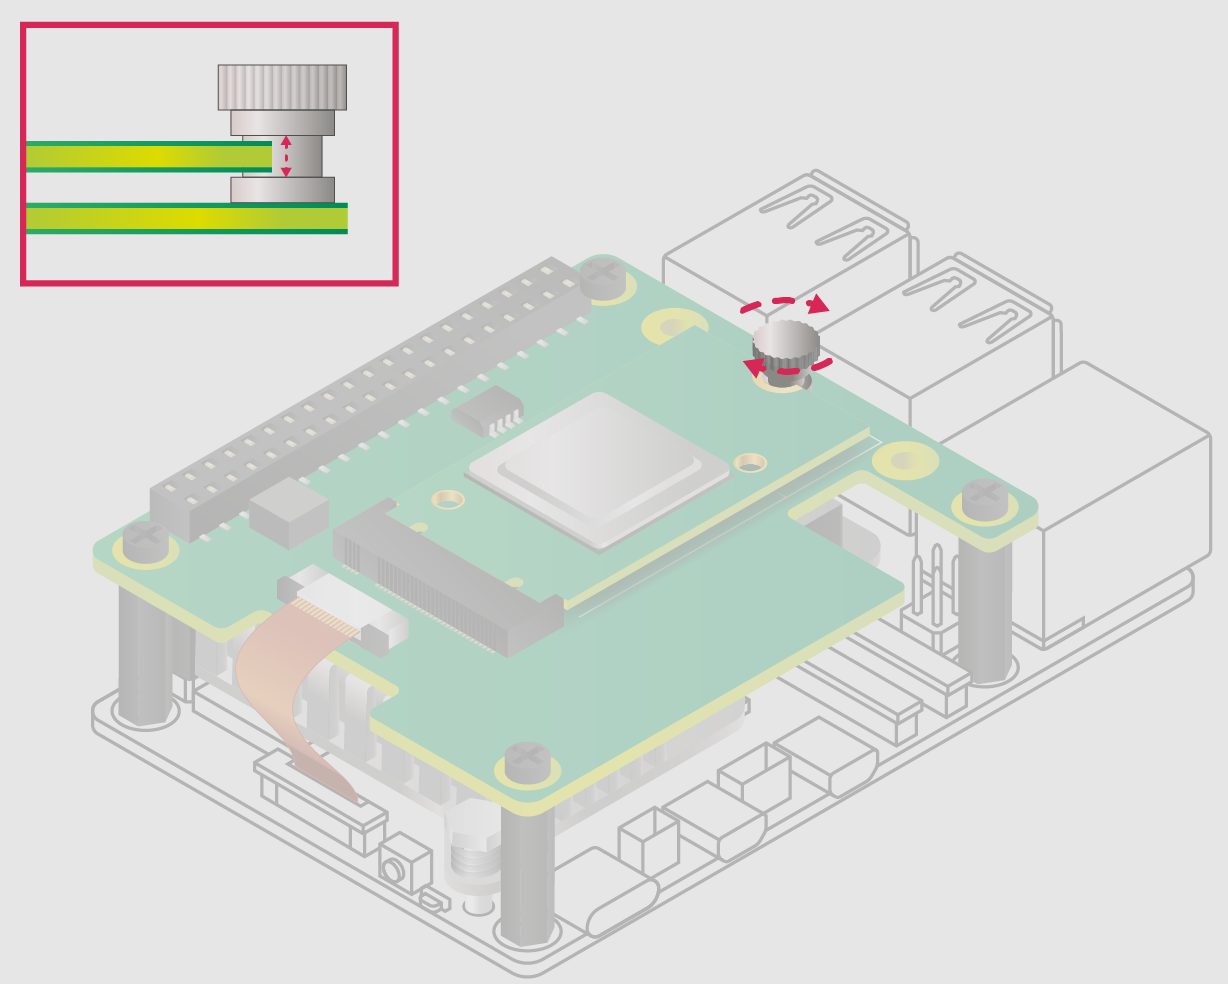
- Push the notch on the drive attachment screw into the slot at the end of your M.2 drive. Push the drive flat against the M.2 HAT+, and insert the SSD attachment screw by turning the screw clockwise until the SSD feels secure. Do not over-tighten the screw.
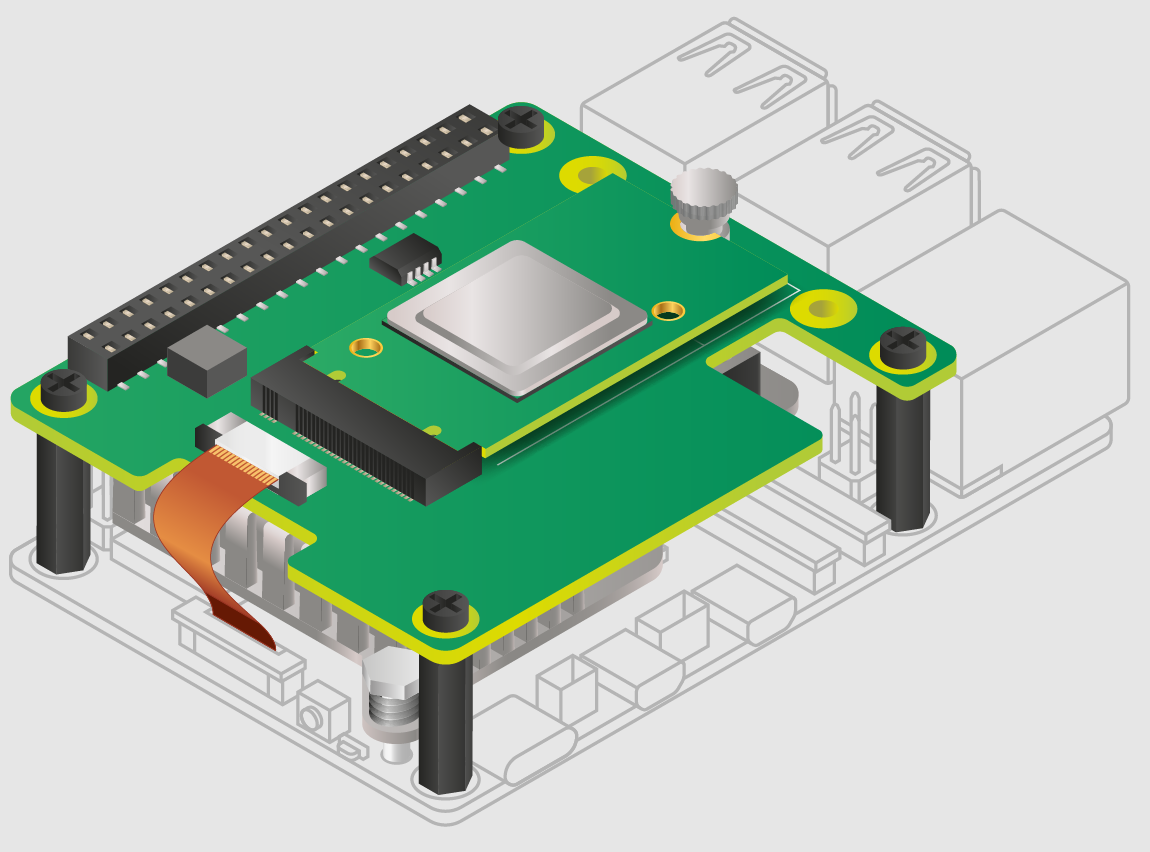
- Congratulations, you have successfully installed the M.2 HAT+. Connect your Raspberry Pi to power; Raspberry Pi OS will automatically detect the M.2 HAT+. If you use Raspberry Pi Desktop, you should see an icon representing the drive on your desktop. If you don’t use a desktop, you can find the drive at /dev/nvme0n1. To make your drive automatically available for file access, consider configuring automatic mounting.
WARNING: Always disconnect your Raspberry Pi from power before connecting or disconnecting a device from the M.2 slot.