Interesting gameplay of radar obstacle avoidance
1. Program function description
After the program is started, the mechanical dog will move forward. When an obstacle appears within the detection range, it will adjust its posture to avoid the obstacle, and then continue to move forward. If the handle node is activated.
2. Program code reference path
The source code of this function is located at,
xxxxxxxxxx#pi4version/home/pi/cartographer_ws2/src/yahboom_laser/yahboom_laser/laser_Avoidance_xgo_RS200.py
#pi5version/root/yahboomcar_ws/src/yahboom_laser/yahboom_laser/laser_Avoidance_xgo_RS200.py
3. Program startup
3.1. Start command
PI4 version driver:
The mechanical dog chassis and radar have been set to start automatically at boot. If you find that they have not started, please enter in the terminal.
xxxxxxxxxxsudo systemctl restart YahboomStart.service
If the radar and chassis are started, you need to enter in the terminal:
xxxxxxxxxxcd /home/pi/cartographer_ws2source install/setup.bash#Start radar obstacle avoidance program Radar MS200ros2 run yahboom_laser laser_Avoidance_xgo_RS200PI5 version driver:
Open a terminal in the root directory of the Raspberry Pi and enter the following command to enter docker:
xxxxxxxxxx./run_humble.sh
Then enter the following command in the docker terminal to start the radar data:
xxxxxxxxxxros2 launch bringup Navigation_bringup.launch.pyThen enter the command to run the obstacle avoidance program, ** (PI5 version needs to enter the same docker to run, please refer to "Introduction and Use of Radar" for steps)**
xxxxxxxxxx#Start radar obstacle avoidance program Radar MS200ros2 run yahboom_laser laser_Avoidance_xgo_RS2003.2. View the topic communication node diagram
Terminal input, ** (PI5 version needs to run in the same docker, please refer to "Introduction and Use of Radar" for steps)**
xxxxxxxxxxros2 run rqt_graph rqt_graph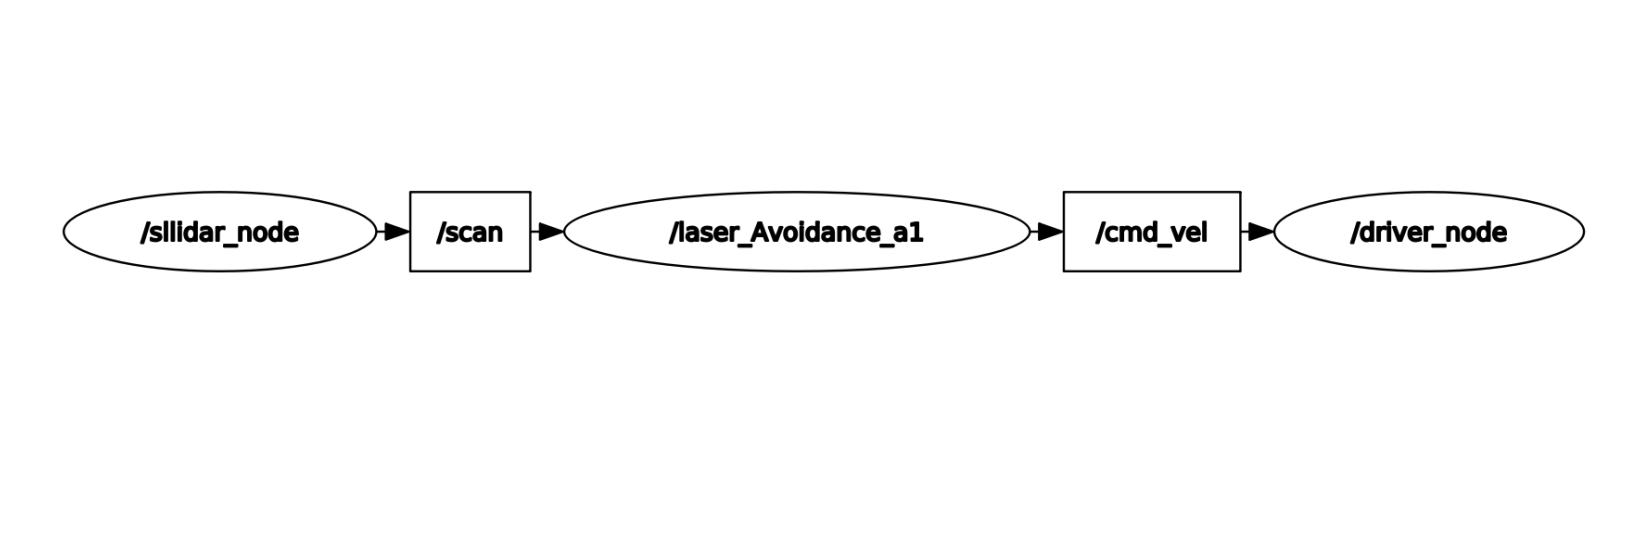
You can also set the parameter size through the dynamic parameter adjuster, terminal input, ** (PI5 version needs to run in the same docker, please refer to "Introduction and Use of Radar" for steps)**
xxxxxxxxxxros2 run rqt_reconfigure rqt_reconfigure
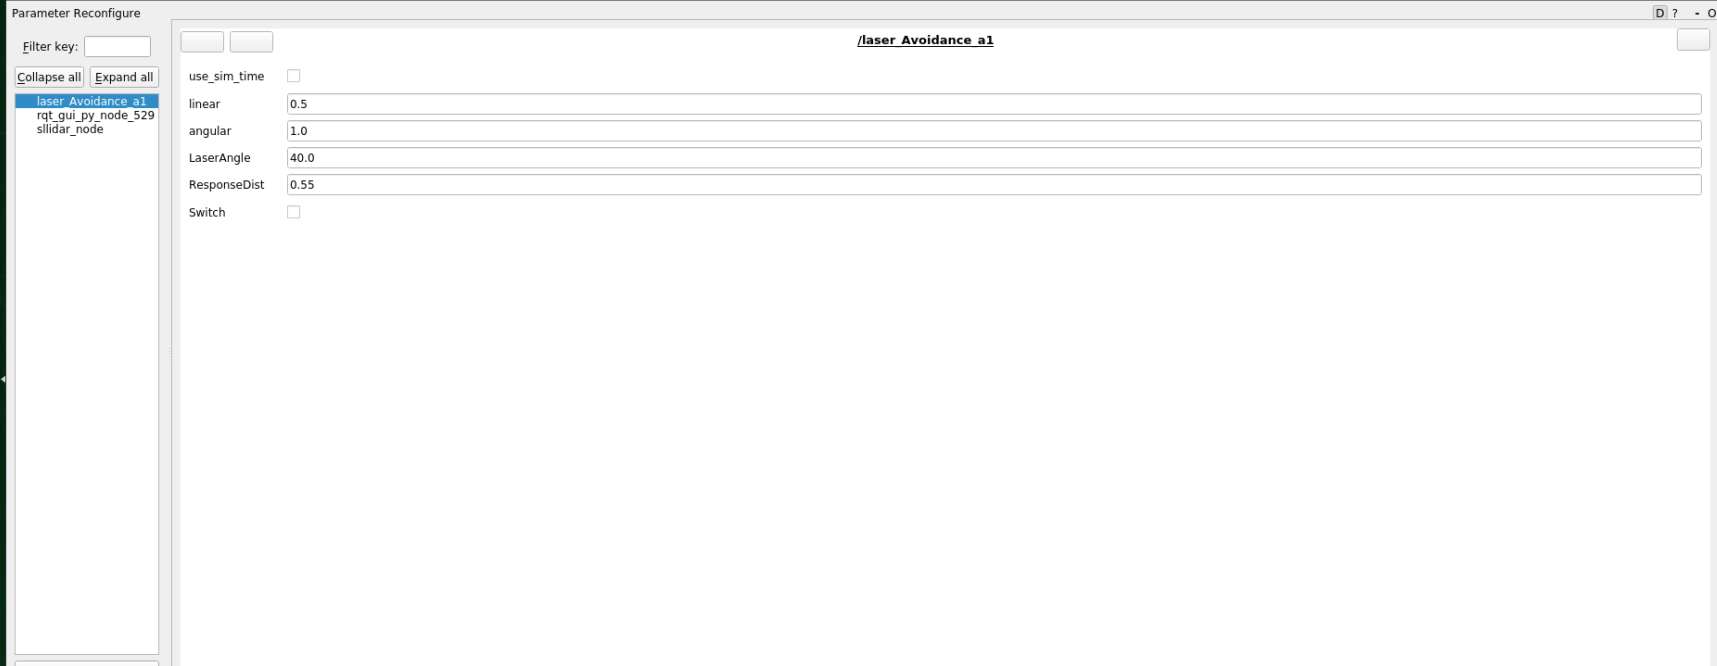
The meaning of each parameter is as follows:
| Parameter name | Parameter meaning |
|---|---|
| linear | linear speed |
| angular | angular velocity |
| LaserAngle | Radar detection angle |
| ResponseDist | Obstacle detection distance |
| Switch | Gameplay switch |
The above parameters are all adjustable. Except for Switch, the other four need to be set to decimals. After modification, click on the blank space to write.
4. Core source code analysis
Taking the X3 model and the source code of the A1 radar as an example, we mainly look at the callback function of the radar. Here is an explanation of how to obtain the obstacle distance information at each angle.
xxxxxxxxxxdef registerScan(self, scan_data):     if not isinstance(scan_data, LaserScan): return     ranges = np.array(scan_data.ranges)     self.Right_warning = 0     self.Left_warning = 0     self.front_warning = 0
     for i in range(len(ranges)):         angle = (scan_data.angle_min + scan_data.angle_increment * i) * RAD2DEG#The angle of the radar information is in radians, and it needs to be converted into an angle for calculation.         if 160 > angle > 180 - self.LaserAngle:#angle sets the judgment range based on the structure of the radar             if ranges[i] < self.ResponseDist*1.5: #range[i] is the result of radar scanning, here refers to the distance information                 self.Right_warning += 1if - 160 < angle < self.LaserAngle - 180:             if ranges[i] < self.ResponseDist*1.5:                 self.Left_warning += 1if abs(angle) > 160:if ranges[i] <= self.ResponseDist*1.5:self.front_warning += 1if self.Joy_active or self.Switch == True:if self.Moving == True:self.pub_vel.publish(Twist())self.Moving = not self.Movingreturnself.Moving = True