Burn system image
Jetson Nano burning system image
The Jetson Nano is an embedded motherboard with a shape and interface similar to Raspberry Pie, equipped with a quad core Cortex-A57 processor. The GPU is an NVIDIA Maxwell architecture graphics card with 128 NVIDIA CUDA cores, 4GB of LPDDR4 memory, and 60Hz video decoding.
1.Preparation before burning
- Power cord (mandatory)
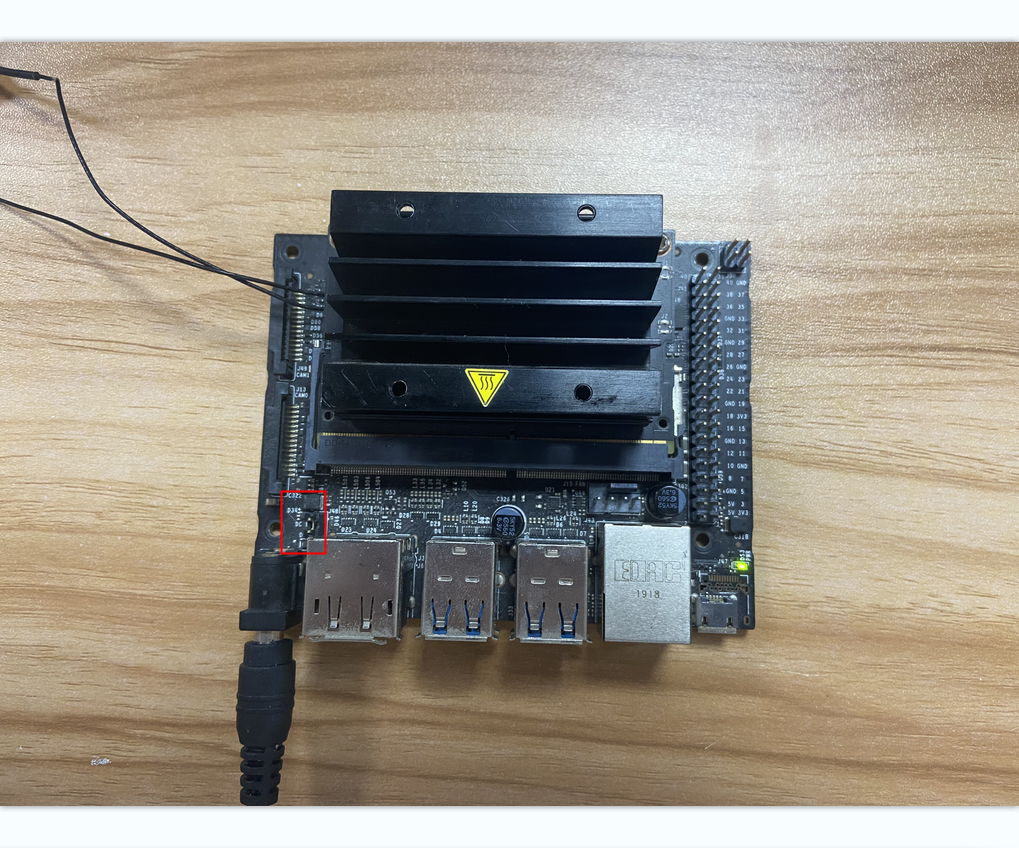
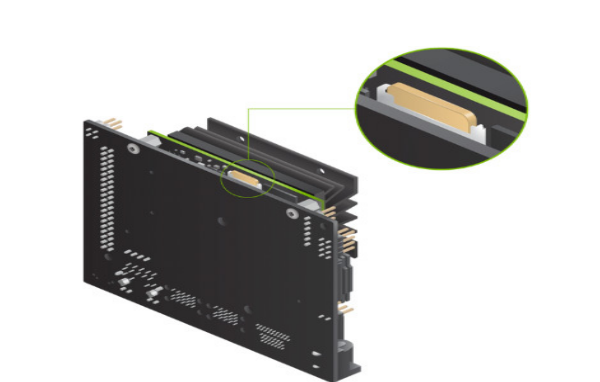
The Jetson Nano does not include a power cord. You need to provide one yourself, and the specific parameter is a 5V ⎓ 2A MicroUSB power cord. You can use a MicroUSB cable with a Raspberry Pi power supply of 5V ⎓ 2.5A. Here we choose the 5V4A DC power supply in the store, and note that JETSON NANO B01 official version J48 needs to be shorted with a jumper cap. The figure below shows the 5V4A power supply, and you can see that the jumper cap is connected.
- SD card / U disk(mandatory)
Jetson Nano requires a minimum configuration of 16G SD card / U disk, but the entire system uses approximately 13G after flashing the SD card. In the future, some machine learning frameworks such as TensorFlow will need to be installed, and sample data may also need to be installed. Therefore, 16G cards are not enough, and it is recommended to use 64G cards.
- Wireless network card (optional)
The Jetson Nano is equipped with a gigabit Ethernet card, but it is troublesome to connect the keyboard and mouse cables. Therefore, it is recommended to buy a PCI wireless network card (recommended in the store package) or a USB wireless network card (occupying an additional USB port).
2.Burning system
The method of flashing the system of JETSON NANO B01 official version is different from that of the Jetson family's TX series. You can directly write the image to the SD file. The method of flashing the system of JETSON NANO B01 SUB version is to directly write the image to the USB disk.
2.1 Download Image
- Download the official image from NVIDIA
https://developer.nvidia.com/embedded/downloads
- Download the configured image we provided, and the image is provided in the network disk information we provided.
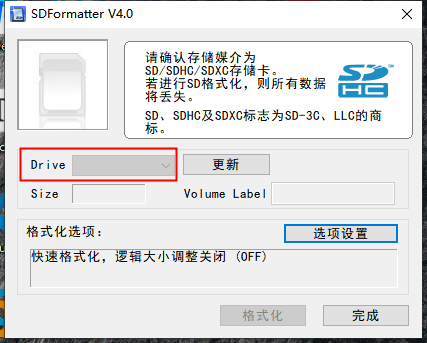
2.2 Format SD card / U disk
After inserting the SD card into the card reader, insert it into the computer and use the software SDFormatter to format it. Here, it is necessary to pay attention to the formatted drive letter
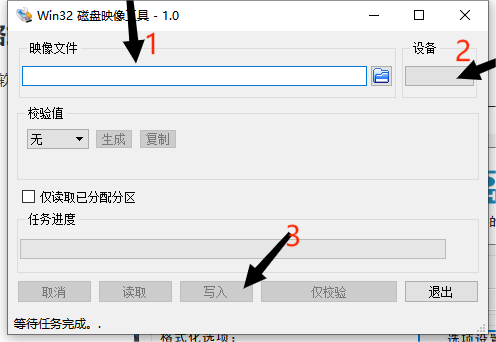
2.3 SD card / U disk burning image
First, we need to extract the downloaded image into an. img format file, and then use the Win32DiskImager software to burn it. Here, we also need to pay attention to the SD card drive letter for burning. 1. At the same time, we need to add the. img image we just extracted. 2. Select the SD card drive letter, and 3. Then click Write
Note: After the burning is completed, the system may prompt to format the partition because it cannot be recognized. Do not format at this time! Do not format! Do not format! Click Cancel, then pop up the memory card and insert it into the Jetson Nano to power it on.
3.Power on
After the burning is completed, insert the SD card / U disk into the Jetson Nano and turn it on. Note that JETSON NANO B01 official version needs to short-circuit the J48 jumper cap when using DC power supply, and unplug the J48 jumper cap when using microUSB.
After that, there will be prompts to complete some settings, time zone, language, input method, and so on. No screenshots will be taken, as shown in the figure below, and the work is completed
4.USB drive startup
The USB drive/TF card in the package comes with a factory image by default, without the need for burning steps. If there is a startup error or a third-party USB drive/TF card is used, you can follow this tutorial to burn the image.The boot method of the factory image is USB boot.
Insert the USB drive into the virtual machine, open the USB drive on the virtual machine, open the terminal on the USB drive interface, and enter the following command
cd boot/extlinuxsudo gedit extlinux.conf
grasp“root=/dev/mmcblk0p1”Modify to“root=/dev/sda1”
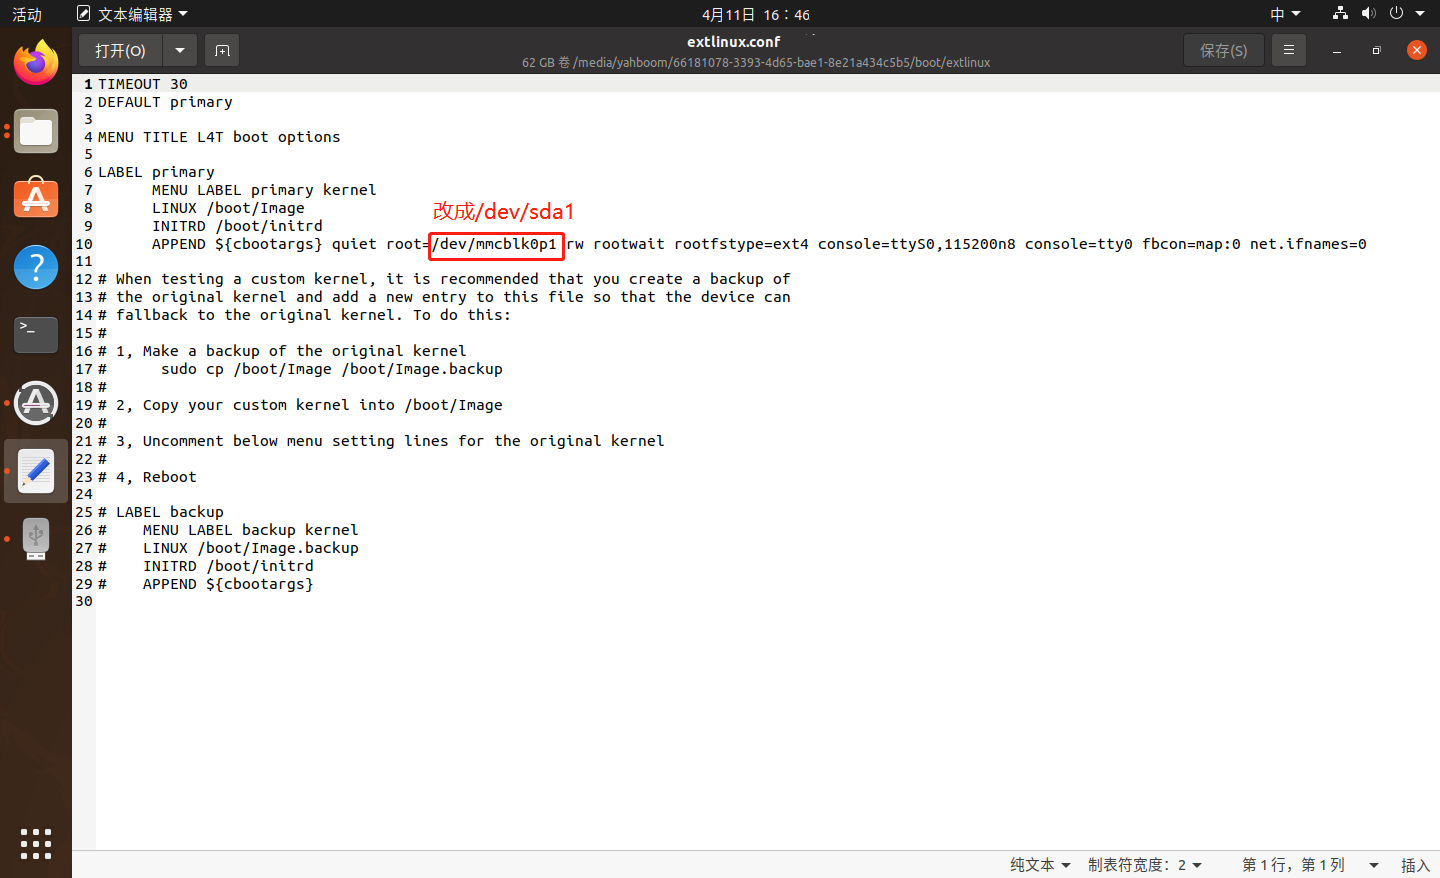
mmcblk0p1:SD card startup
sda1:USB drive startup
Save and exit, insert the USB drive into the Jetson nano, and then turn it on
If the above methods have not been resolved yet:
Reference link:https://blog.csdn.net/propor/article/details/127966228