ESP32-IDF configuration tool
ESP32-IDF configuration tool1、Introduction to ESP32-IDF configuration tool2、Activate the ESP-IDF development environment3、New Construction4、Configuration project
1、Introduction to ESP32-IDF configuration tool
In the root directory of the ESP32-IDF project, there is an sdkconfig file, which is used to store the configuration content of ESP32-IDF.
2、Activate the ESP-IDF development environment
Run the following command in the esp-idf tool directory
source ~/esp/esp-idf/export.sh
Note: Every time you open a new terminal, you need to activate the ESP-IDF development environment before you can compile the ESP-IDF project.
3、New Construction
Create a new blank project to use as a basic project.
xxxxxxxxxxmkdir ~/esp/Samples/esp32_samplescd ~/esp/Samples/esp32_samplesidf.py create-project maincd main
4、Configuration project
Set the target chip to esp32s3 chip and open the configuration interface.
xxxxxxxxxxidf.py set-target esp32s3idf.py menuconfig

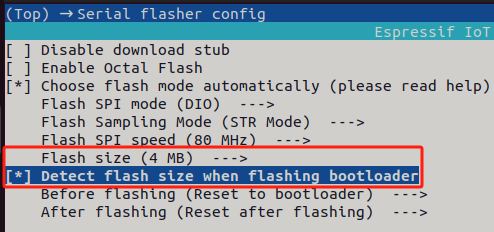
- Configure to automatically detect the flash size during burning.
In the Serial flasher config, change the Flash size to 4MB and check Detect flash size when flashing bootloader.
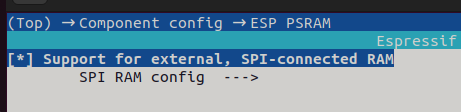
- Configure external PSRAM
Open Component config->ESP PSRAM and enable Support for external, SPI-connected RAM.
Just keep the default in the SPI RAM config configuration as shown in the figure below.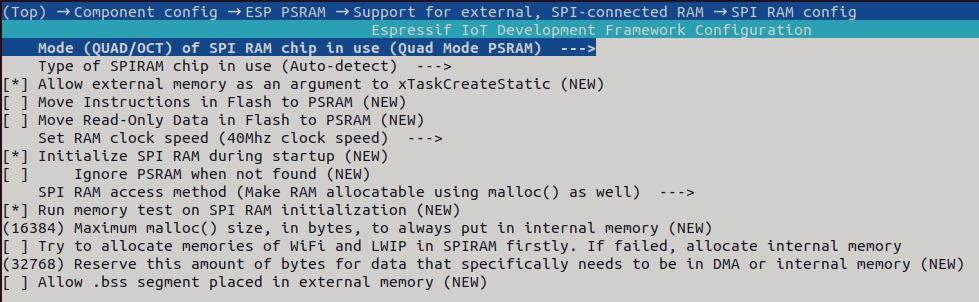
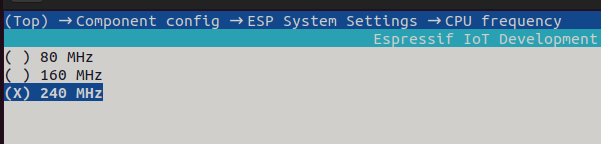
- Configure the CPU frequency to 240MHz
Open Component config->ESP System Settings->CPU frequency and change the CPU frequency to 240MHz.
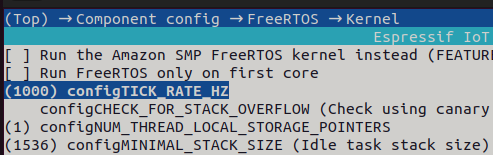
4.Configure the frequency of freertos to 1000hz
Open Component config->FreeRTOS->Kernel, find configTICK_RATE_HZ, and change the value to 1000.
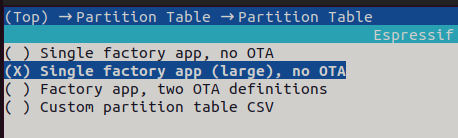
5.Configure partition table to increase program space
Open Partition Table->Partition Table, select Single factory app (large), no OTA.