Brief introduction and use of rviz
rviz is a 3D visualization platform in ROS. On one hand, it can realize the graphical display of external information, and on the other hand, it can also release control information to an object through rviz, realizing the monitoring and control of a robot.
1 Installation of rviz and the introduction to its interface
When installing ros, if you perform a complete installation, rviz is already installed, and you may try to run it directly; if it is not fully installed, you may install rviz separately:
xxxxxxxxxx# Ubuntu16.04sudo apt-get install ros-kinetic-rviz# Ubuntu18.04sudo apt-get install ros-melodic-rviz# Ubuntu20.04sudo apt-get install ros-noetic-rvizAfter the installation is complete, open a new terminal (shortcut key: Ctrl+Alt+T) and enter the following command:
xxxxxxxxxxroscoreThen open a new terminal (shortcut key: Ctrl+Alt+T) and input the following command to open rviz.
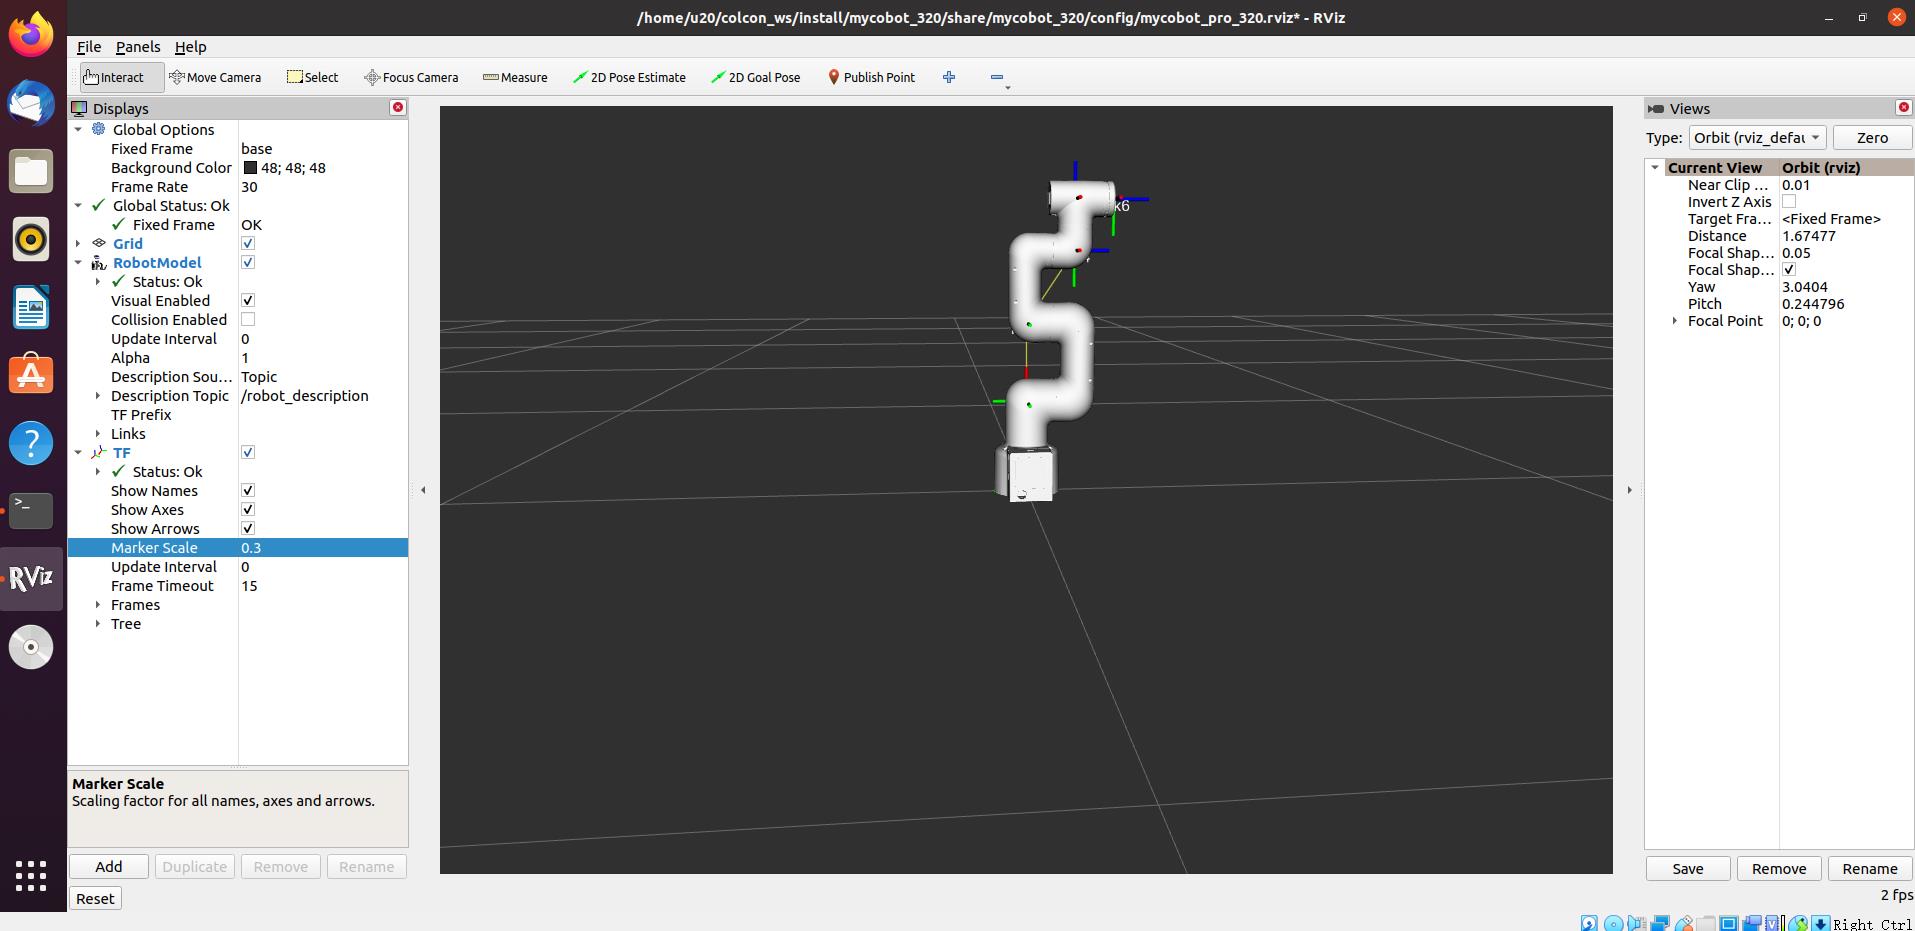
xxxxxxxxxxrosrun rviz rviz# orrvizOpen rviz, and the following interface will be displayed:
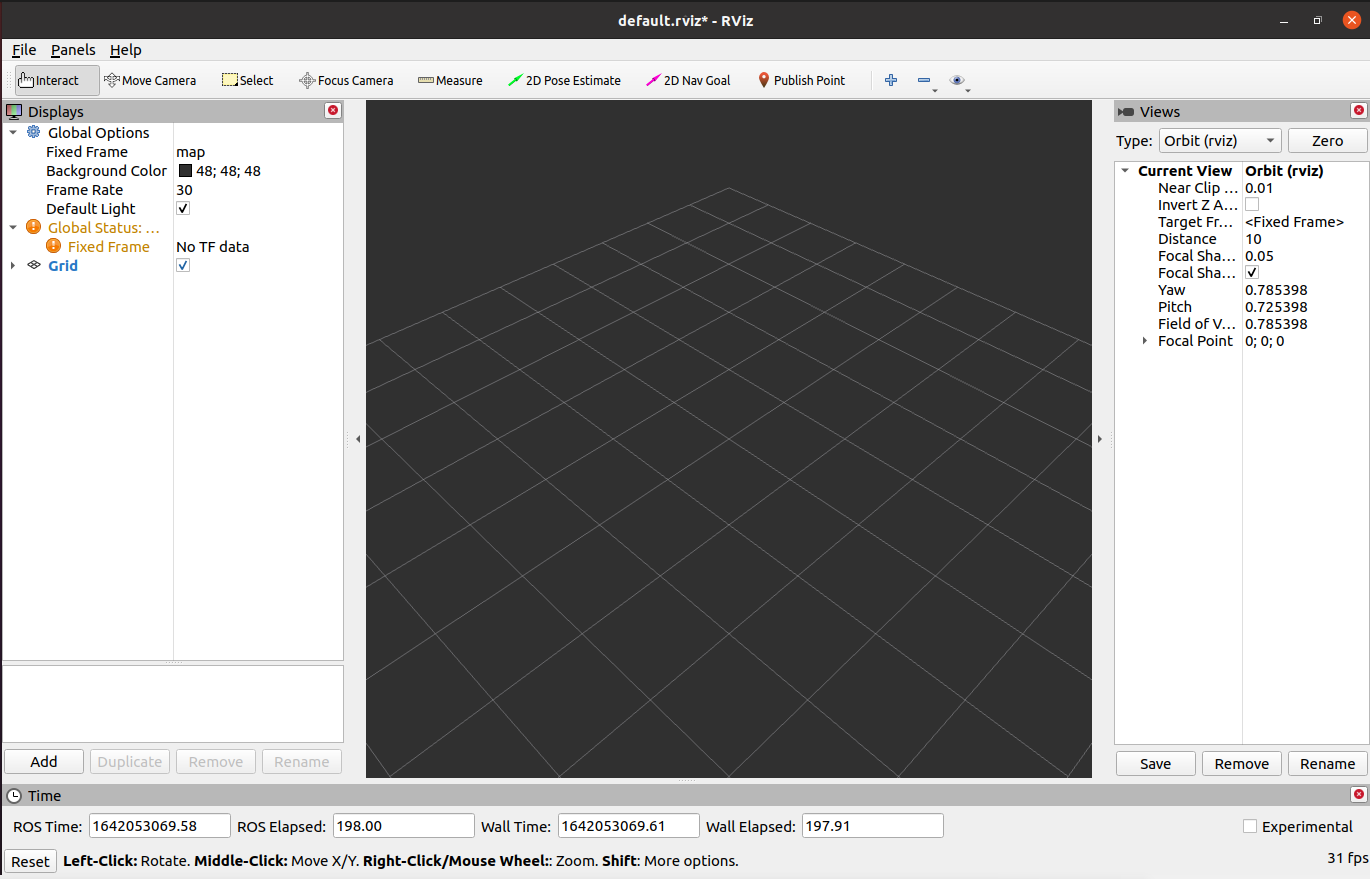
1.1 Introduction of all areas
- There is a list of monitors on the left. The monitor is a device that draws something in a 3D world and may have some options available in the display list.
- On the top is a toolbar, which allows the user to use various function buttons to select tools with multiple functions.
- The middle part is the 3D view: It is a main screen where various data can be viewed in three dimensions. The background color, fixed frame, grid, etc. of the 3D view can be set in detail in the Global Options and Grid items displayed on the left.
- Below is the time display area, including system time and ROS time.
- The right side is the observation angle setting area where different observation angles can be set.
We only give a rough introduction in this part. If you want to know more details, go to User Guide.
2 mycobot_ros installation and update
- M5 Version: Please refer to the end of the [13.1.1 Environment Building] chapter.
- PI版本(Ubuntu 20.04):
mycobot_ros is a ROS package from ElephantRobotics that works with all types of desktop robots.
The address of the project: https://github.com/elephantrobotics/mycobot_ros
The official default ROS1 workspace is catkin_ws.
Click the ROS1 Shell icon on the desktop or the corresponding icon in the lower bar of the desktop to open the ROS1 environment terminal:


Then enter the following command:
xxxxxxxxxxcd ~/catkin_ws/src # Enter the src folder of the workspace# Clone the code on githubgit clone https://github.com/elephantrobotics/mycobot_ros.gitcd .. # return to the workspacecatkin_make # Build the code in the workspacesource devel/setup.bash # add environment variablesNote: If the /home/er/catkin_ws/src(equivalent to ~/catkin_ws/src) already exists in the mycobot_ros folder, you need to delete the mycobot_ros folder before running the above command. In the directory path, er is the user name of the VM. If they are different, change them.
3 Simple use
Start using launch file
This example is built on what you have already done Environment building and you have successfully copied the company's code from GitHub to your virtual machine.
Open a new terminal (shortcut key: Ctrl+Alt+T)
Input the command to configure the ROS environment.
xxxxxxxxxxcd ~/catkin_ws/source devel/setup.bashInput again:
- mycobot 280-M5 version:
xxxxxxxxxxroslaunch mycobot_280 test.launch- mycobot 280-Pi version:
xxxxxxxxxxroslaunch mycobot_280pi test.launch- mycobot 280-JetsonNano version:
xxxxxxxxxxroslaunch mycobot_280jn test.launchOpen rviz, and then you will obtain the following result:
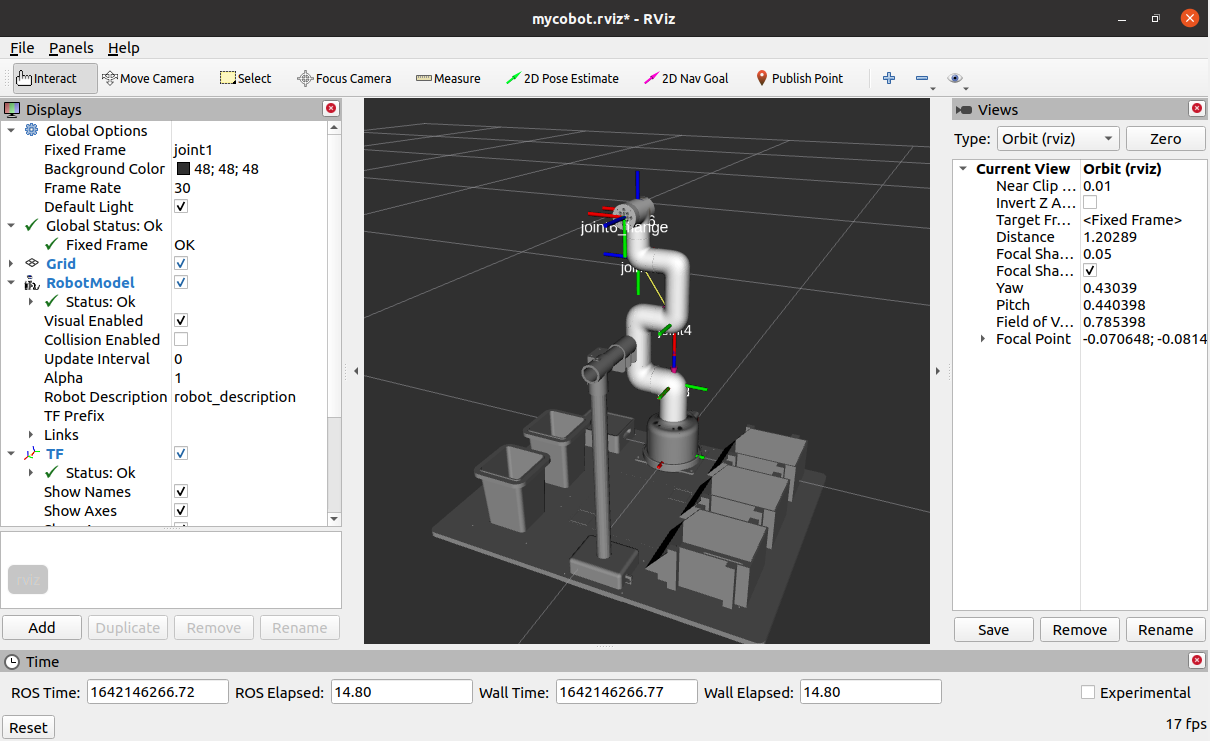
If you want to know more information about rviz, go to Official documents.
4 M5 Version Prerequisites
- Type Ctrl+Shift+T in the command terminal to open another terminal window in the same directory to view the device name:
xxxxxxxxxx# View the device name of the robotic armls /dev/ttyUSB* # old version myCobot280 M5
# If the terminal does not display the /dev/ttyUSB related name, you need to use the following commandls /dev/ttyACM* # new version myCobot280 M5- Grant the serial port permission to the robotic arm:
xxxxxxxxxx# The default device name is /dev/ttyUSB0, if the device name is not the default value, it needs to be modified.sudo chmod 777 /dev/ttyUSB0 # old version myCobot280 M5
sudo chmod 777 /dev/ttyACM0 # new version myCobot280 M5
Then enter the user password(Note: The password is not displayed, just enter it correctly).
Control and following of the robot arm
1 Slider Control
Open a command line and run:
- 2022 mycobot 320-M5 version:
xxxxxxxxxx# The default serial port name of 2022 mycobot 320-M5 version is "/dev/ttyUSB0", and the baud rate is 115200. The serial port name of some models is "dev/ttyACM0". If the default serial port name is wrong, you can change the serial port name to "/dev/ttyACM0".roslaunch new_mycobot_320 mycobot_320_slider.launch port:=/dev/ttyUSB0 baud:=115200- 2022 mycobot 320-Pi version:
xxxxxxxxxx# The default serial port name of 2022 mycobot 320-Pi version is "/dev/ttyAMA0", and the baud rate is 115200.roslaunch new_mycobot_320_pi mycobot_320_slider.launch port:=/dev/ttyAMA0 baud:=115200rviz and a slider component will be opened, and you will see the following interface:
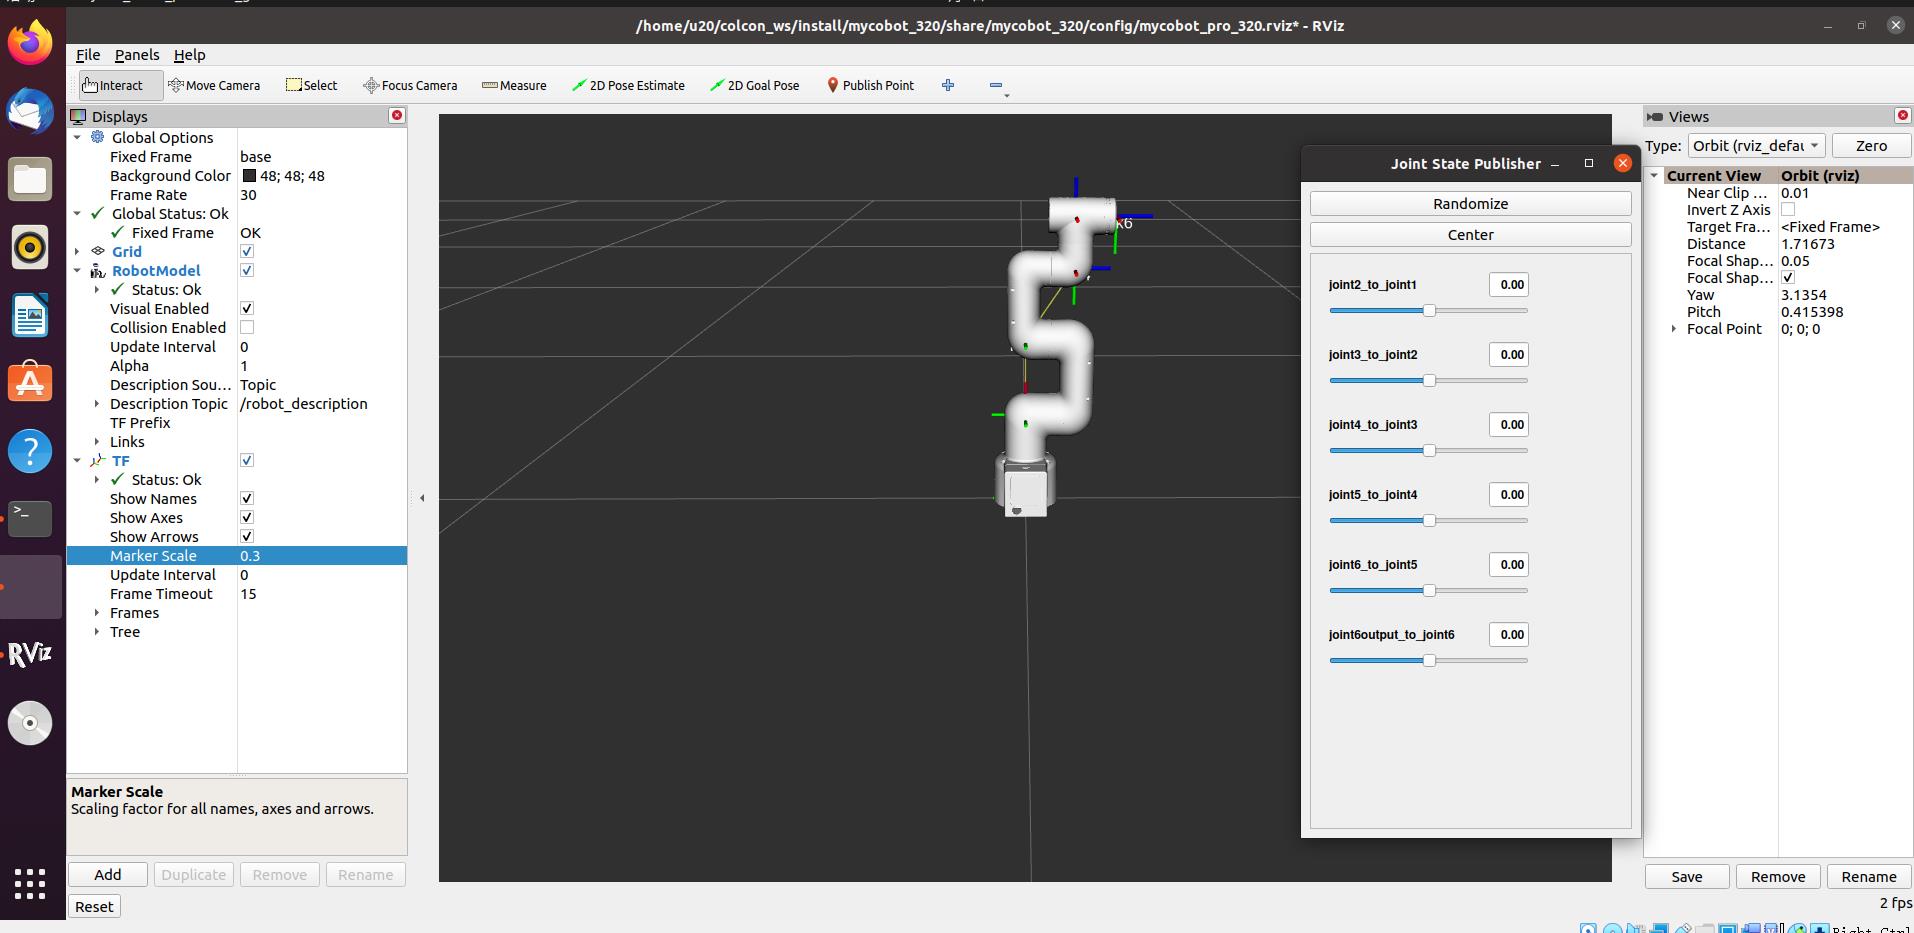
Then you can control the model in rviz to make it move by dragging the slider. If you want the real mycobot to move with the model, you need to open another command line and run:
- 2022 mycobot 320-M5 version:
xxxxxxxxxx# The default serial port name of 2022 mycobot 320-M5 version is "/dev/ttyUSB0", and the baud rate is 115200. The serial port name of some models is "dev/ttyACM0". If the default serial port name is wrong, you can change the serial port name to "/dev/ttyACM0".rosrun new_mycobot_320 mycobot_320_slider.py _port:=/dev/ttyUSB0 _baud:=115200- 2022 mycobot 320-Pi version:
xxxxxxxxxx# The default serial port name of 2022 mycobot 320-Pi version is "/dev/ttyAMA0", and the baud rate is 115200.rosrun new_mycobot_320_pi mycobot_320_slider.py _port:=/dev/ttyAMA0 _baud:=115200Note: Since the robot arm will move to the current position of the model when the command is input, make sure that the model in rviz does not appear to be worn out before you use the command.
Do not drag the slider quickly after connecting the robot arm to prevent damage to the robot arm.
2 Model Following
In addition to the above controls, we can also let the model move by following the real robot arm. Open a command line and run:
- 2022 mycobot 320-M5 version:
xxxxxxxxxx# The default serial port name of 2022 mycobot 320-M5 version is "/dev/ttyUSB0", and the baud rate is 115200. The serial port name of some models is "dev/ttyACM0". If the default serial port name is wrong, you can change the serial port name to "/dev/ttyACM0".rosrun new_mycobot_320 mycobot_320_follow_display.py _port:=/dev/ttyUSB0 _baud:=115200- 2022 mycobot 320-pi version:
xxxxxxxxxx# The default serial port name of 2022 mycobot 320-Pi version is "/dev/ttyAMA0", and the baud rate is 115200.rosrun new_mycobot_320_pi mycobot_320_follow_display.py _port:=/dev/ttyAMA0 _baud:=115200Then open another command line and run:
- 2022 mycobot 320-M5 version:
xxxxxxxxxxroslaunch new_mycobot_320 mycobot_320_follow_display.launch- 2022 mycobot 320-Pi version:
xxxxxxxxxxroslaunch new_mycobot_320_pi mycobot_320_follow_display.launchIt will open rviz to show the model following effect.
3 GUI control
On the basis of the previous contents, this package also provides a simple GUI control interface. This method is used for interaction between real robot arms. Connect to mycobot.
Open a command line:
- 2022 mycobot 320-M5 version:
xxxxxxxxxx# The default serial port name of 2022 mycobot 320-M5 version is "/dev/ttyUSB0", and the baud rate is 115200. The serial port name of some models is "dev/ttyACM0". If the default serial port name is wrong, you can change the serial port name to "/dev/ttyACM0".roslaunch new_mycobot_320 mycobot_320_simple_gui.launch port:=/dev/ttyUSB0 baud:=115200- 2022 mycobot 320-Pi version:
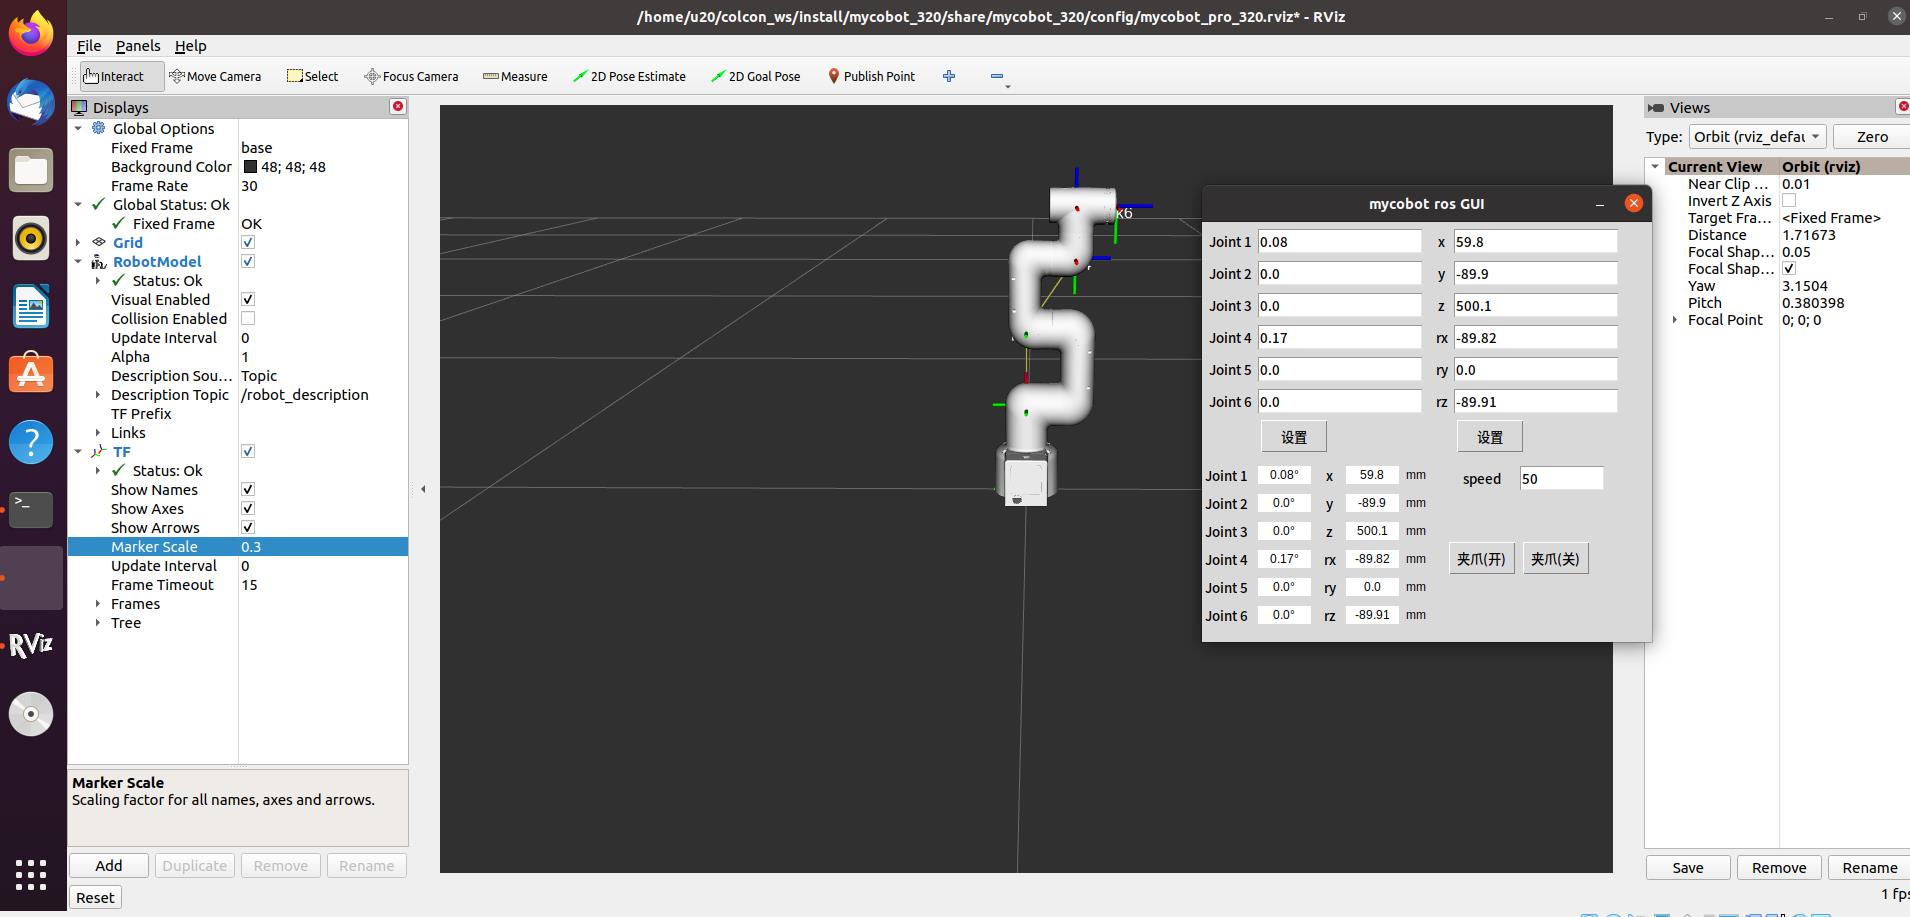
xxxxxxxxxx# The default serial port name of 2022 mycobot 320-Pi version is "/dev/ttyAMA0", and the baud rate is 115200.roslaunch new_mycobot_320_pi mycobot_320_simple_gui.launch port:=/dev/ttyAMA0 baud:=115200Running effect:
4 Keyboard control
Keyboard control is added in new_mycobot_320 package, and real-time Synchronization is performed in rviz. This function depends on pythonApi, so be sure to connect with the real robot arm.
Open a command line and run:
- 2022 mycobot 320-M5 version:
xxxxxxxxxx# The default serial port name of 2022 mycobot 320-M5 version is "/dev/ttyUSB0", and the baud rate is 115200. The serial port name of some models is "dev/ttyACM0". If the default serial port name is wrong, you can change the serial port name to "/dev/ttyACM0".roslaunch new_mycobot_320 mycobot_320_teleop_keyboard.launch port:=/dev/ttyUSB0 baud:=115200- 2022 mycobot 320-Pi version:
xxxxxxxxxx# The default serial port name of mycobot 320-Pi version is "/dev/ttyAMA0", and the baud rate is 115200.roslaunch new_mycobot_320_pi mycobot_320_teleop_keyboard.launch port:=/dev/ttyAMA0 baud:=115200Running effect is as follows:
mycobot information will be output in the command line as follows:
xxxxxxxxxxSUMMARY========
PARAMETERS * /mycobot_services/baud: 115200 * /mycobot_services/port: /dev/ttyUSB0 or /dev/ttyAMA0 * /robot_description: <?xml version="1.... * /rosdistro: kinetic * /rosversion: 1.12.17
NODES  /    mycobot_services (mycobot_320/mycobot_services.py)    real_listener (mycobot_320/listen_real.py)    robot_state_publisher (robot_state_publisher/state_publisher)    rviz (rviz/rviz)
auto-starting new masterprocess[master]: started with pid [1333]ROS_MASTER_URI=http://localhost:11311
setting /run_id to f977b3f4-b3a9-11eb-b0c8-d0c63728b379process[rosout-1]: started with pid [1349]started core service [/rosout]process[robot_state_publisher-2]: started with pid [1357]process[rviz-3]: started with pid [1367]process[mycobot_services-4]: started with pid [1380]process[real_listener-5]: started with pid [1395][INFO] [1620882819.196217]: start ...[INFO] [1620882819.205050]: /dev/ttyAMA0,115200
MyCobot Status--------------------------------Joint Limit:    joint 1: -165 ~ +165    joint 2: -165 ~ +165    joint 3: -165 ~ +165    joint 4: -165 ~ +165    joint 5: -165 ~ +165    joint 6: -175 ~ +175
Connect Status: True
Servo Infomation: all connected
Servo Temperature: unknown
Atom Version: unknown
[INFO] [1620882819.435778]: ready
Then open another command line and run:
- 2022 mycobot 320-M5 verion:
xxxxxxxxxxrosrun new_mycobot_320 mycobot_320_teleop_keyboard.py#orrosrun new_mycobot_320 mycobot_320_teleop_keyboard.py _speed:=70- 2022 mycobot 320-Pi version:
xxxxxxxxxxrosrun new_mycobot_320_pi mycobot_320_teleop_keyboard.py#orrosrun new_mycobot_320_pi mycobot_320_teleop_keyboard.py _speed:=70You will see the following output in the command line:
xxxxxxxxxxMycobot Teleop Keyboard Controller---------------------------Movimg options(control coordinations [x,y,z,rx,ry,rz]):              w(x+)
    a(y-)     s(x-)     d(y+)
    z(z-) x(z+)
u(rx+)   i(ry+)   o(rz+)j(rx-)   k(ry-)   l(rz-)
Gripper control:    g - open    h - close
Other:    1 - Go to init pose    2 - Go to home pose    3 - Resave home pose    q - Quit
currently:      speed: 50       change percent 5
In this terminal, you can control the state of the robot arm and move it using the keys in the command line.
Parameters supported by this script:
- _speed: the movement speed of the robot arm
- _change_percent: movement distance percentage