3. OpenCV image processing
3. OpenCV image processing3.1. Image grayscale3.2. Image binarization3.3. Image edge detection3.4. Line Segment drawing3.5. Draw Rectangles3.6. Draw the circle3.7. Draw the ellipse3.8. Draw polygons3.9. Draw text
Before running the sample program, you need to switch to the directory where the code is located. SSH connects the car, runs at the terminal,
xxxxxxxxxxcd /userdata/yahboomcar_ws/src/yahboomcar_astra/opencv_examples3.1. Image grayscale
Gray-scale processing is the process of transforming a color image into a gray-scale image. Color image is divided into R, G, B three components, respectively, showing a variety of colors such as red, green and blue, grayscale is the process of making the color R, G, B components equal. Pixels with large gray values are brighter (the maximum pixel value is 255, which is white), and darker (the lowest pixel is 0, which is black). The core idea of image grayscale is R = G = B, which is also called grayscale value.
1) Maximum method: the value of R, G, B after conversion is equal to the largest one of the three values before conversion, that is: R=G=B=max (R, G, B). The brightness of the gray image converted by this method is very high.
2) Average value method: the value of R,G,B after conversion is the average value of R,G,B before conversion. That is, R=G=B=(R+G+B)/3. The gray image produced by this method is relatively soft.
After the car terminal switches to the directory where the code is located, run the program,
xxxxxxxxxxpython3 3_1.py
xxxxxxxxxximport cv2if __name__ == '__main__': img = cv2.imread('figures/yahboom.jpg') gray = cv2.cvtColor(img,cv2.COLOR_BGR2GRAY) # 图像灰度化# Image grayscale cv2.imwrite('figures/3_1.jpg', gray)The resulting image is shown here,

3.2. Image binarization
The core idea of binarization is to set a threshold, greater than the threshold is 0 (black) or 255 (white), so that the image is called black and white. The threshold can be fixed or adaptive. The adaptive threshold is generally the comparison of a point pixel with the average value of a region's pixels or a weighted sum of Gaussian distributions, where a difference can be set or no difference can be set.
After the car terminal switches to the directory where the code is located, run the program,
xxxxxxxxxxpython3 3_2.py
xxxxxxxxxximport cv2if __name__ == '__main__': img = cv2.imread('figures/yahboom.jpg') gray = cv2.cvtColor(img,cv2.COLOR_BGR2GRAY) # 先进行灰度化处理# Grayscale processing first ret, binary = cv2.threshold(gray,180,255,cv2.THRESH_BINARY_INV) cv2.imwrite('figures/3_2.jpg', binary)'''图像二值化:ret,binary = cv2.threshold(src,thresh,maxVal,thresholdType) 参数: src:原图像 thresh:当前阈值 maxVal:最大阈值,一般为255 thresholdType:阈值类型,一般有下面几个值, THRESH_BINARY=0:大于阈值的灰度值为maxVal,小于阈值的为0。 THRESH_BINARY_INV=1:大于阈值的灰度值为0,小于阈值的为maxVal。 THRESH_TRUNC=2:大于阈值的灰度值为该阈值,小于阈值的不变。 THRESH_TOZERO=3:小于阈值的灰度值为0,大于阈值的不变。 THRESH_TOZERO_INV=4:大于阈值的灰度值为0,小于阈值的不变。 返回值: ret:与参数thresh一致 binary:结果图像Image binarization: ret, binary = cv2. Threshold (SRC, thresh, very much, thresholdType) Parameters: src: indicates the original image thresh: indicates the current threshold maxVal: indicates the maximum threshold, usually 255 thresholdType: indicates the threshold type, which generally has the following values. THRESH_BINARY=0: The gray value larger than the threshold is maxVal, and the gray value smaller than the threshold is 0. THRESH_BINARY_INV=1: The gray value larger than the threshold is 0, and the gray value smaller than the threshold is maxVal. THRESH_TRUNC=2: The gray value that is larger than the threshold is the threshold, and the gray value that is smaller than the threshold is unchanged. THRESH_TOZERO=3: The gray value less than the threshold is 0, and the gray value greater than the threshold is unchanged. THRESH_TOZERO_INV=4: The gray value larger than the threshold is 0, and the gray value smaller than the threshold is unchanged. Return value: ret: This parameter is consistent with thresh binary: Result image'''The resulting image is shown here,

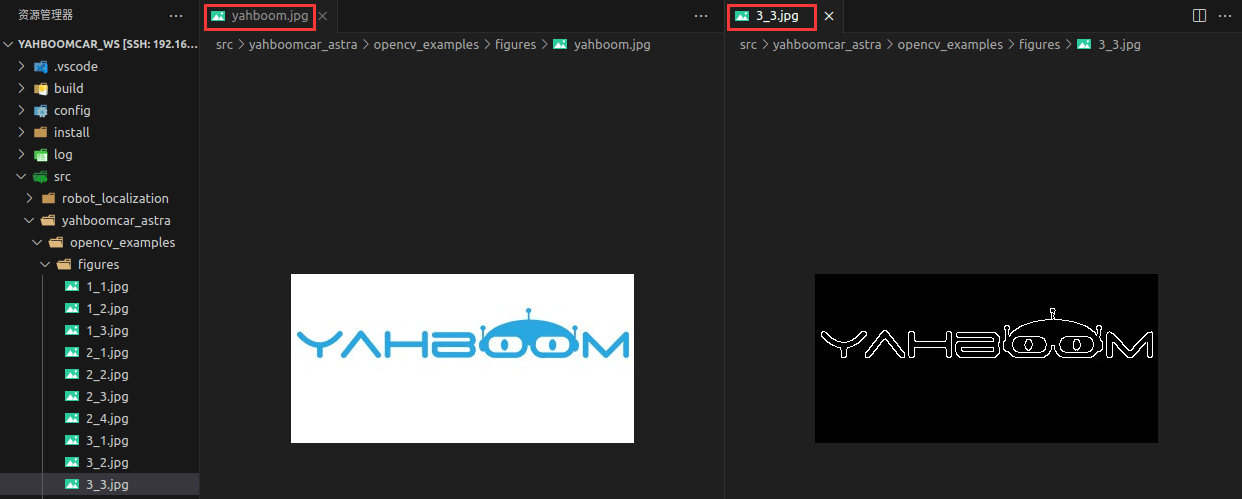
3.3. Image edge detection
Image edge detection can significantly reduce the data size of the image while retaining the original image attributes. Among the commonly used edge detection methods, Canny edge detection algorithm is one of the methods with strict definition and can provide good and reliable detection. Because it satisfies the three standards of edge detection and has the advantages of simple implementation process, it has become one of the most popular algorithms for edge detection.
Canny edge detection algorithm can be divided into the following 5 steps:
- Use Gaussian filters to smooth the image and filter out noise
- Calculate the gradient intensity and direction of each pixel in the image
- Apply Non-Maximum Suppression suppression to eliminate spurious responses from edge detection Double-Threshold detection is applied to determine real and potential edges
- Edge detection is finally completed by suppressing isolated weak edges
After the car terminal switches to the directory where the code is located, run the program,
xxxxxxxxxxpython3 3_3.py
xxxxxxxxxximport cv2if __name__ == '__main__': img = cv2.imread('figures/yahboom.jpg') gray = cv2.cvtColor(img,cv2.COLOR_BGR2GRAY) # 图像灰度化# Image grayscale imgG = cv2.GaussianBlur(gray,(3,3),0) dst = cv2.Canny(imgG,50,50) cv2.imwrite('figures/3_3.jpg', dst)'''高斯过滤(减噪处理):cv2.GaussianBlur(src,ksize,sigmaX[,dst[,sigmaY[,borderType]]])-> dst src:输入的图像,一般是灰度后的图片 ksize:高斯内核大小 sigmaX:X方向上的高斯核标准偏差 sigmaY:Y方向上的高斯核标准差 dst:处理后的图像Canny边缘检测:edges=cv2.Canny(image,threshold1,threshold2[,apertureSize[,L2gradient]]) edges:计算得到的边缘图像 image:计算得到的边缘图像,一般是高斯处理后得到的图像 threshold1:处理过程中的第一个阈值 threshold2:处理过程中的第二个阈值 apertureSize:Sobel 算子的孔径大小 L2gradient:默认值为False,使用L1范数计算;若为True则使用L2范数 Gaussian filter (noise reduction processing) : cv2.GaussianBlur(src,ksize,sigmaX[,dst[,sigmaY[,borderType]]]) -> dst. src: The input image, usually a grayscale image ksize: indicates the size of a Gaussian kernel sigmaX: Gaussian kernel standard deviation in the X direction sigmaY: standard deviation of Gaussian kernel in the Y direction dst: processed imageCanny edge detection: edges = cv2. Canny (image, threshold1 and threshold2 [, apertureSize [, L2gradient]]) edges: Calculated edge images image: The computed edge image, which is generally the image obtained after Gaussian processing threshold1: indicates the first threshold during processing threshold2: The second threshold during processing apertureSize: indicates the aperture size of the Sobel operator L2gradient: The default value is False and is calculated using L1 norm. If True, the L2 norm is used'''The resulting image is shown here,
3.4. Line Segment drawing
After the car terminal switches to the directory where the code is located, run the program,
xxxxxxxxxxpython3 3_4.py
xxxxxxxxxximport cv2if __name__ == '__main__': img = cv2.imread('figures/yahboom.jpg') line = cv2.line(img, (50,20), (20,100), (255,0,255), 10) cv2.imwrite('figures/3_4.jpg', line)'''线段绘制:cv2.line(img,pt1,pt2,color,thickness=None,lineType=None,shift=None) img:画布或者载体图像 pt1,pt2:必选参数。线段的坐标点,分别表示起始点和终止点 color:必选参数。用于设置线段的颜色 thickness:可选参数。用于设置线段的宽度 lineType:可选参数。用于设置线段的类型,类型如下, 8:8邻接连接线(默认) 4:4邻接连接线 cv2.LINE_AA:抗锯齿Line drawing: cv2. Line (img, pt1 and pt2, color, thickness = None, lineType = None, shift = None) img: canvas or carrier image pt1,pt2: This parameter is mandatory. The coordinate point of a line segment, representing the starting point and the ending point respectively color:This parameter is mandatory. Used to set the color of the line segment thickness: It is optional. Used to set the width of the line segment lineType: This parameter is optional. Used to set the type of the line segment, the type is as follows, 8:8 Adjacent Cable (default) 4:4 Connect the adjacent cable cv2.LINE_AA: anti-aliasing'''The resulting image is shown here,

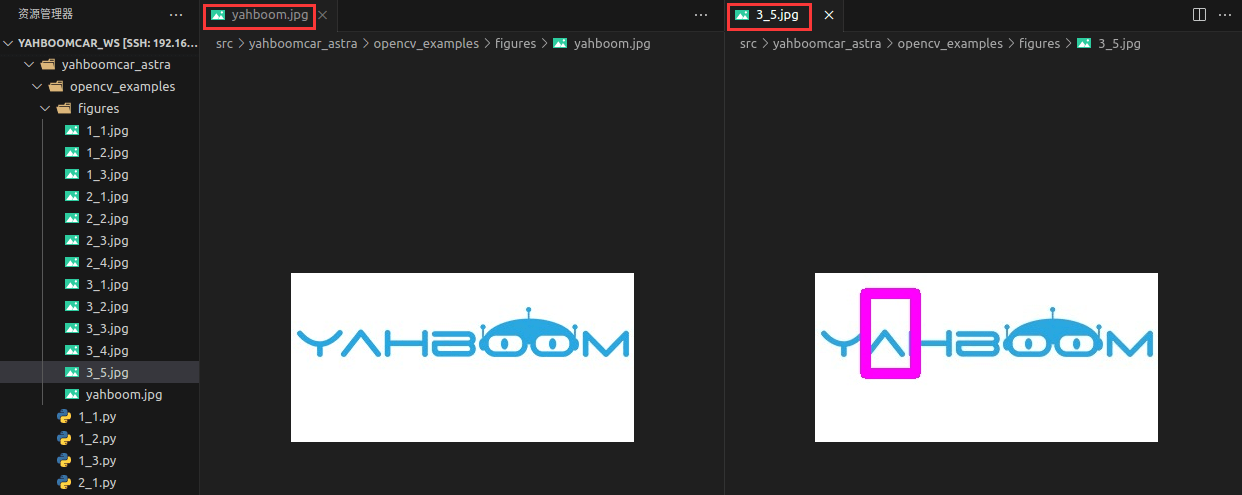
3.5. Draw Rectangles
After the car terminal switches to the directory where the code is located, run the program,
xxxxxxxxxxpython3 3_5.py
xxxxxxxxxximport cv2if __name__ == '__main__': img = cv2.imread('figures/yahboom.jpg') rect = cv2.rectangle(img, (50,20), (100,100), (255,0,255), 10) cv2.imwrite('figures/3_5.jpg', rect)'''绘制矩形:cv2.rectangle(img,pt1,pt2,color,thickness=None,lineType=None,shift=None) img:画布或者载体图像 pt1,pt2:必选参数。分别表示矩形的左上角和右下角顶点,从而确定唯一的矩形 color:必选参数。用于设置矩形的颜色 thickness:可选参数。用于设置矩形边的宽度,当值为负数时,表示对矩形进行填充 lineType:可选参数。用于设置线段的类型,类型如下, 8:8邻接连接线(默认) 4:4邻接连接线 cv2.LINE_AA:抗锯齿 cv2.FILLED:填充Draw a rectangle:cv2. A rectangle (img, pt1 and pt2, color, thickness = None, lineType = None, shift = None) img: canvas or carrier image pt1,pt2: This parameter is mandatory. Represent the top left and bottom right vertices of the rectangle respectively, thus determining the unique rectangle color:This parameter is mandatory. Used to set the color of the rectangle thickness: It is optional. Used to set the width of the side of a rectangle. When the value is negative, the rectangle is filled lineType: This parameter is optional. Used to set the type of the line segment, the type is as follows, 8:8 Adjacent Cable (default) 4:4 Connect the adjacent cable cv2.LINE_AA: anti-aliasing cv2.FILLED: indicates that the space is filled'''The resulting image is shown here,
3.6. Draw the circle
After the car terminal switches to the directory where the code is located, run the program,
xxxxxxxxxxpython3 3_6.py
xxxxxxxxxximport cv2if __name__ == '__main__': img = cv2.imread('figures/yahboom.jpg') circle = cv2.circle(img, (80,80), 50, (255,0,255), 10) cv2.imwrite('figures/3_6.jpg', circle)'''绘制圆形:cv2.circle(img, center, radius, color[,thickness[,lineType]]) img:画布或者载体图像 center:必选参数。圆心坐标,格式为(X坐标值,Y坐标值) radius:必选参数。圆的半径 thickness:可选参数。用于设置圆形轮廓的粗细,当值为负数时,表示对圆进行填充 lineType:可选参数。用于设置线段的类型,类型如下, 8:8邻接连接线(默认) 4:4邻接连接线 cv2.LINE_AA:抗锯齿 cv2.FILLED:填充Draw a circle: cv2.circle(img, center, radius, color[,thickness[,lineType]]) img: canvas or carrier image center: This parameter is mandatory. Center coordinates, in the format of (X coordinates, Y coordinates) radius: This parameter is mandatory. Radius of a circle thickness: It is optional. Used to set the thickness of the circle outline. When the value is negative, it indicates that the circle is filled lineType: This parameter is optional. Used to set the type of the line segment, the type is as follows, 8:8 Adjacent Cable (default) 4:4 Connect the adjacent cable cv2.LINE_AA: anti-aliasing cv2.FILLED: indicates that the space is filled'''The resulting image is shown here,

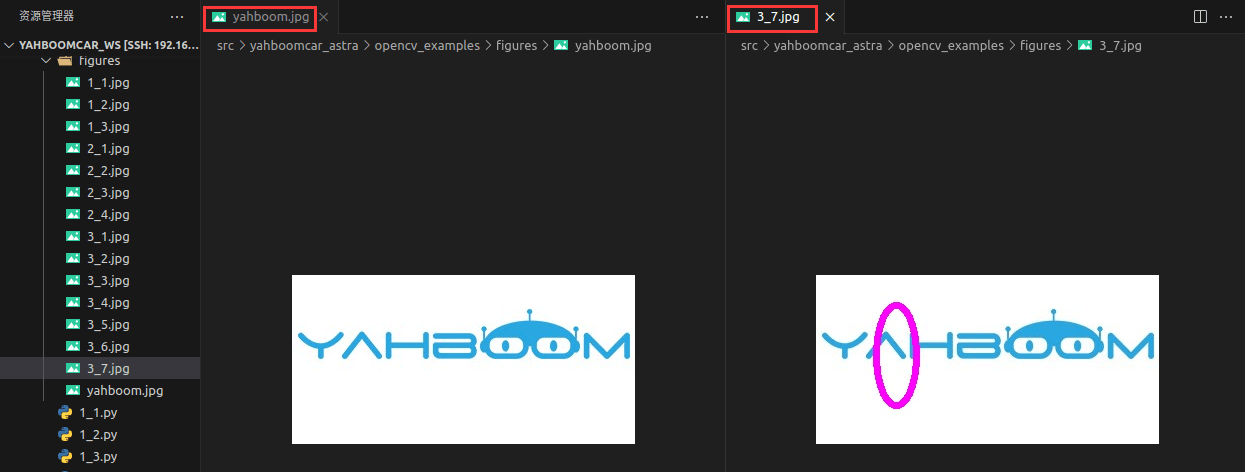
3.7. Draw the ellipse
After the car terminal switches to the directory where the code is located, run the program,
xxxxxxxxxxpython3 3_7.py
xxxxxxxxxximport cv2if __name__ == '__main__': img = cv2.imread('figures/yahboom.jpg') ellipse = cv2.ellipse(img, (80,80), (20,50),0,0, 360,(255,0,255), 5) cv2.imwrite('figures/3_7.jpg', ellipse)'''绘制椭圆:cv2.ellipse(img,center,axes,angle,StartAngle,endAngle,color[,thickness[,lineType]) center:椭圆的中心点,(x,y) axes:指的是短半径和长半径,(x,y) StartAngle:圆弧起始角的角度 endAngle:圆弧终结角的角度 img、color、thickness、lineType可以参考圆的说明Draw the ellipse :cv2.ellipse (img, center, axes, Angle, StartAngle, endAngle, color [, thickness, lineType []) center: The center point of the ellipse, (x, y) axes: refers to short radius and long radius, (x, y) StartAngle: indicates the start Angle of an arc endAngle: indicates the endAngle of the arc img, color, thickness, lineType refer to the circle description'''The resulting image is shown here,
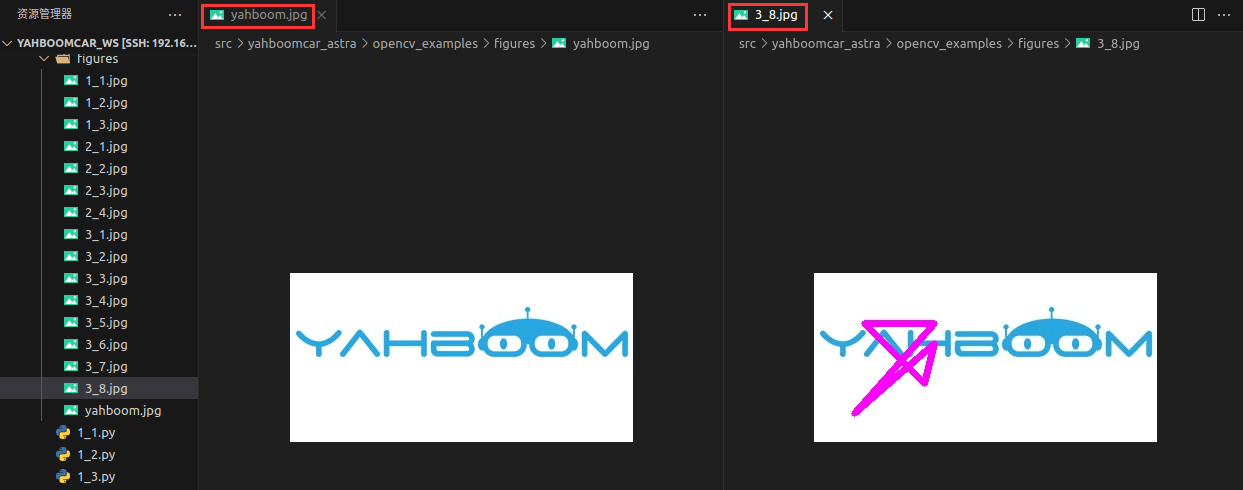
3.8. Draw polygons
After the car terminal switches to the directory where the code is located, run the program,
xxxxxxxxxxpython3 3_8.py
xxxxxxxxxximport cv2import numpy as npif __name__ == '__main__': img = cv2.imread('figures/yahboom.jpg') points = np.array([[120,50], [40,140], [120,70], [110,110], [50,50]], np.int32) polylines = cv2.polylines(img, [points],True,(255,0,255), 5) cv2.imwrite('figures/3_8.jpg', polylines)'''绘制多边形:cv2.polylines(img,[pts],isClosed,color[,thickness[,lineType]]) pts:多边形的顶点 isClosed:是否闭合(True/False) 其他参数参照圆的绘制参数Draw polygons: cv2.polylines(img,[pts],isClosed,color[,thickness[,lineType]]) pts: vertex of a polygon isClosed: Indicates whether it is closed (True/False). Refer to the drawing parameters of the circle for other parameters'''The resulting image is shown here,
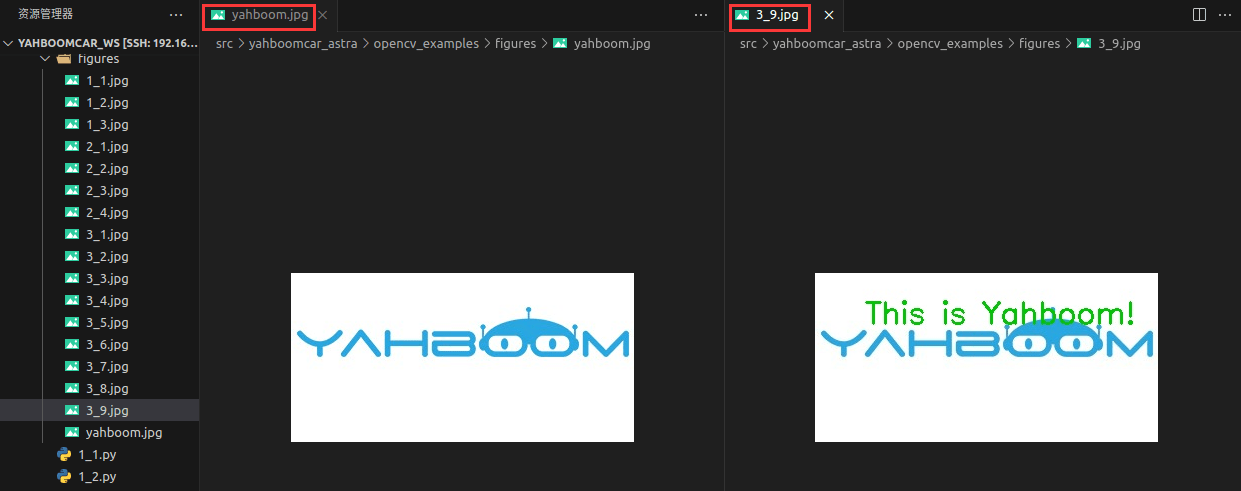
3.9. Draw text
After the car terminal switches to the directory where the code is located, run the program,
xxxxxxxxxxpython3 3_9.py
xxxxxxxxxximport cv2if __name__ == '__main__': img = cv2.imread('figures/yahboom.jpg') cv2.putText(img,'This is Yahboom!',(50,50),cv2.FONT_HERSHEY_SIMPLEX,1,(0,200,0),2) cv2.imwrite('figures/3_9.jpg', img)'''绘制文字:cv2.putText(img,str,origin,font,size,color,thickness) img:输入图像 str:绘制的文字 origin:左上角坐标(整数),可以理解成文字是从哪里开始的 font:字体 size:字体大小 color:字体颜色 thickness:字体粗细Draw text: cv2.putText(img,str,origin,font,size,color,thickness) img: Input the image str: Drawn text origin: Top-left coordinates (integers), which can be understood as where did the text start font: Font size: font size color: indicates the font color thickness: type thickness'''The resulting image is shown here,