Installation and Use of Jtop
Installation of Jtop
(1) Installing JTOP to check CPU usage
sudo apt-get updatesudo apt-get full-upgradesudo apt install curlsudo apt install nanocurl https://bootstrap.pypa.io/get-pip.py -o get-pip.py #下载安装脚本sudo python3 get-pip.py # 运行安装脚本sudo pip3 install jetson-statsjtop
Check the installed system components
(1) The OS image of Jetson nano already comes with JetPack, cuda, cudnn, opencv, and other installed examples. The installation path for these examples is as follows
xTensorRT /usr/src/tensorrt/samples/CUDA /usr/local/cuda-10.2/samples/cuDNN /usr/src/cudnn_samples_v8/VisionWorks /usr/share/visionworks/sources/samples//usr/share/visionworks-tracking/sources/samples//usr/share/visionworks-sfm/sources/samples/OpenCV /usr/share/opencv4/samples/
(2) Check CUDA
The CUDA10.2 version has already been installed in Jetson ano, but at this time, if you run nvcc - V, it will not succeed. You need to write the path of CUDA to the environment variable. The Vim tool comes with the OS, so run the following command to edit the environment variables
Firstly, check if there is nvcc in the bin directory of cuda:
xxxxxxxxxxls /usr/local/cuda/bin
If present,
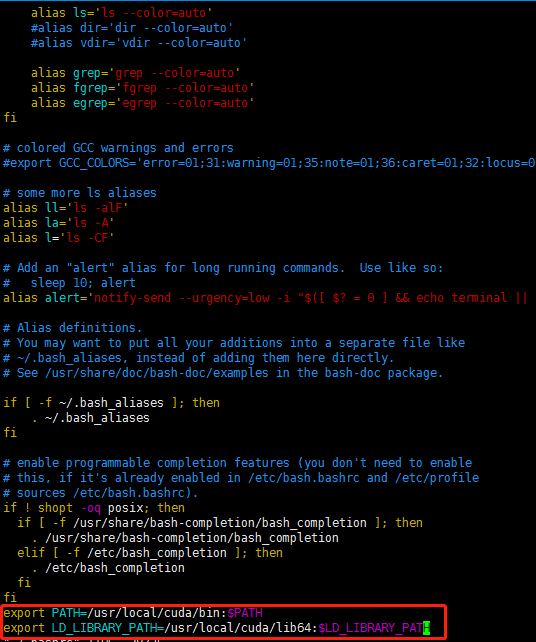
xxxxxxxxxxsudo vim ~/.bashrc进入配置文件; 在最后面添加以下两行:
Note: In vim, use Esc to return to command mode, and switch to the input module through I to enter text in input mode
xxxxxxxxxxexport PATH=/usr/local/cuda/bin:$PATHexport LD_LIBRARY_PATH=/usr/local/cuda/lib64:$LD_LIBRARY_PATH
Note: After exiting the command mode through Esc, press: to start inputting commands, wq to save and exit, q to exit, q! For forced exitSave to exit.
Then it needs to take effect under the source.
xxxxxxxxxxsource ~/.bashrc
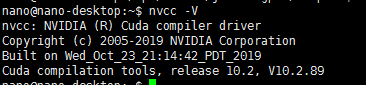
After the source, execute nvcc - V again at this time, and the result is as follows
beckhans@Jetson:~$ nvcc -V
(3) Check OpenCV
OpenCV4.1.1 version is already installed in Jetson nano. You can use the command to check if OpenCV is installed properlypkg-config opencv4 --modversionIf OpenCv is installed properly, the version number will be displayed, and my version is 4.4.1

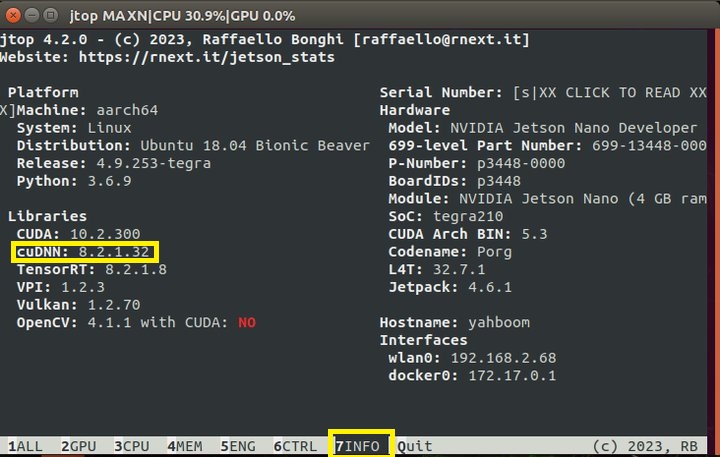
(4) Check cuDNN
CuDNN has been installed in Jetson nano and there are examples available for operation. Let's run the examples to verify the CUDA above
Enter jtop at the terminal, press the right arrow key on the keyboard to select 7info, and you can see the version of cuDNN, as shown in the following figure: