9.3 Jetson TX2 NX write system
1. Download the mirror
Download the corresponding version of the image compressed package file from the factory image of the data, and then extract it to the Ubuntu 18.04 system. For example, unzip the file to the user directory folder, remember that the files in this path need to be used after the unzip directory.
Please first remove the solid state drive from the carrier board and connect it to the Ubuntu 18.04 system computer/virtual machine (hereinafter referred to as the Ubuntu system) through the NVME solid state drive box.
2. Format the SSD
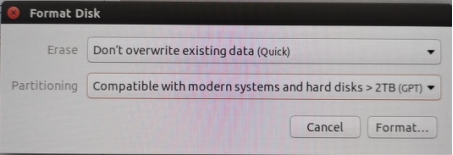
SSD need to be formatted in ext4 format first. Before operation, please confirm that the data in the solid-state drive has been backed up or can be erased. After formatting to ext4 format, all data in the solid-state drive will be cleared.
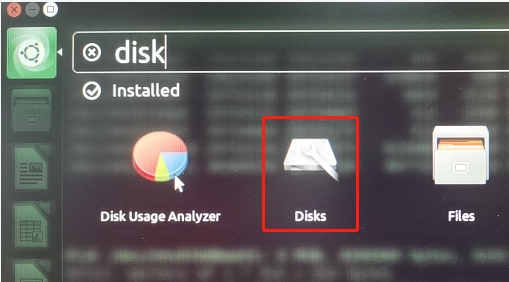
- Open the Disks disk utility of the Ubuntu system.
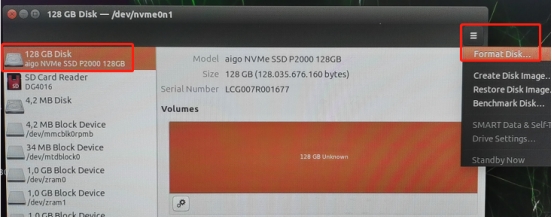
- Format the hard drive
Choose the M.2 solid-state drive we have connected, and be careful not to choose the wrong one here, otherwise it will cause the system to crash. Then press the three horizontal bars in the upper right corner and select Format Disk.

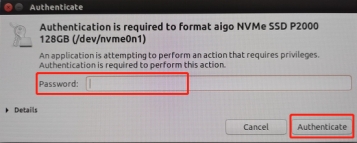
Enter the password for the system and confirm it.
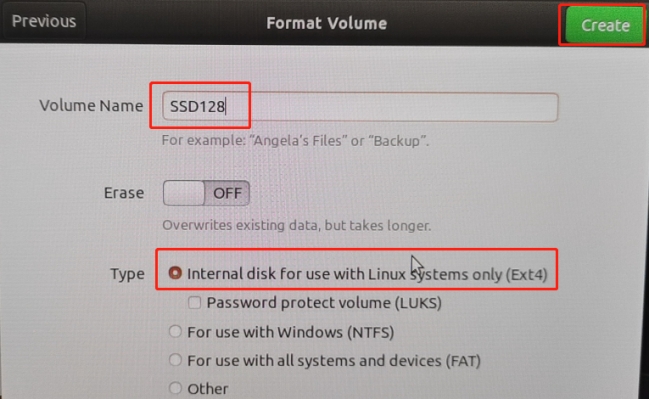
- Create a new disk partition
Still select the M.2 SSD, click 'Create Disk Image' to create the hard disk partition. Here we want to use the SSD as the system disk, so just use the entire hard disk space as a partition.
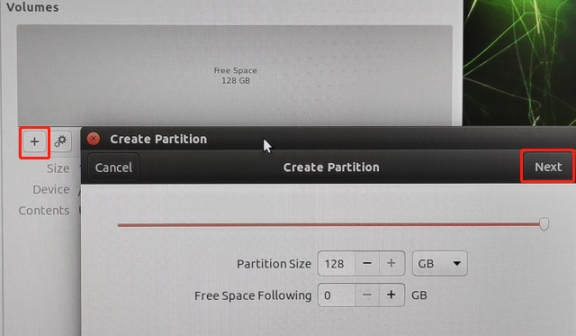
Fill in the disk name, here we take SSD128 as an example, the format of the disk must be Ext4. Then click Create to create it.
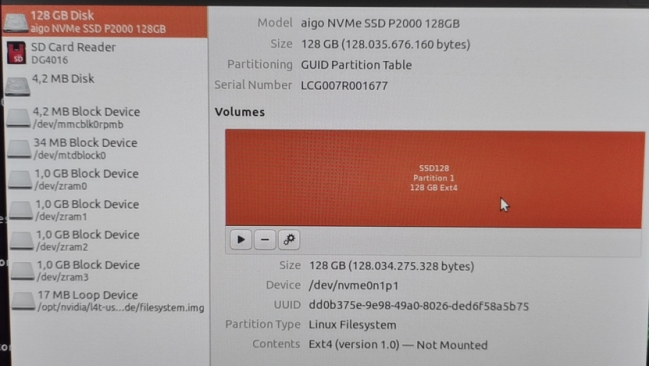
After completion, it will look like the following picture:
- Mount the disk
Click the dial button, you can see that it has been mounted on the system. At the same time, the dial key will automatically become the stop key.

Enter df -h in the terminal again to find the hard disk just mounted.
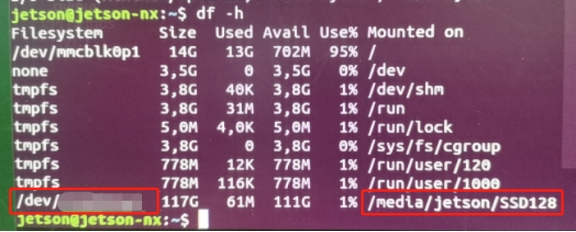
The Filesystem corresponding to SSD128 must be recorded, and errors cannot be recorded, otherwise irreversible errors may be caused.
3. Burning system
Here, the SSD is mounted to /dev/sdb1 as an example as a demonstration. Please modify the actual path according to the path actually found by Filesystem.
Open the terminal of the Ubuntu system and run the following commands in sequence.
sudo dd if=./tx2nx_rootfs.img of=/dev/sdb1

Among them, dd is the operation command, ./tx2nx_rootfs.img is the img file of the backed up tx2nx, and /dev/sdb1 is the path of the SSD.
If you need to view the progress of dd, you need to open another terminal and enter the following command:
xxxxxxxxxxsudo watch -n 3 pkill -USR1 ^dd$

Then the terminal of the original dd will print the progress every three seconds until it is completed.

After the data recovery is completed, the SSD solid state drive can be ejected, then installed back to the TX2NX carrier board, and powered on.