7.4 Multi-machine communication
7.4.1 ROS multi-machine communication
1. Universal version
All ros masters are under the same network; if multiple devices have similar processes, choose one as the master, and the others are all slaves; the following two devices are taken as an example.
Install the ssh server on two devices; install the chrony package for synchronization:
sudo apt-get install chrony openssh-server
Input following command to view the IP information and host name of the two devices:
xxxxxxxxxxCommand:ifconfig and hostname

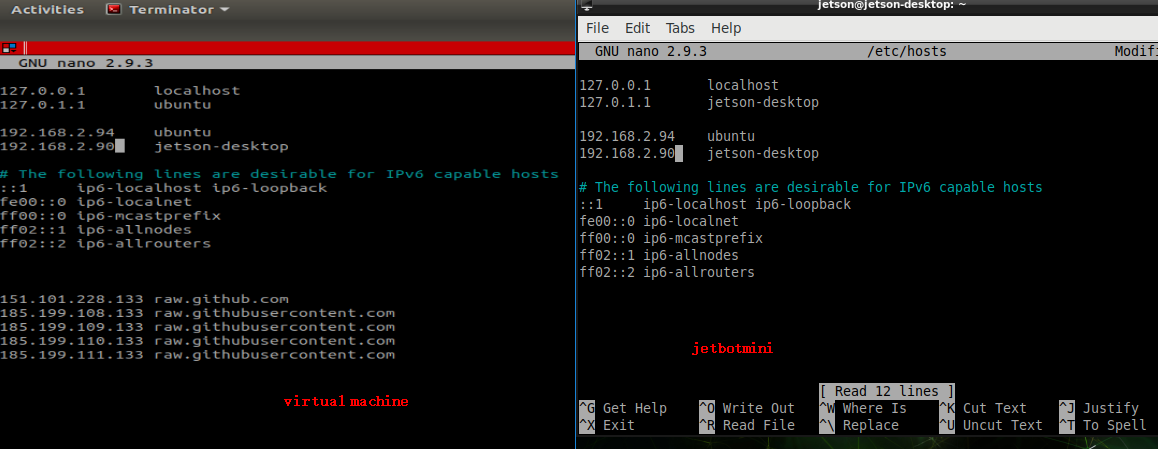
Modify the hosts file in the /etc folder:
xxxxxxxxxxsudo chmod a+w /etc/hostssudo nano /etc/hosts
Add the IP and host names of the two devices to the hosts file of the two devices to bind users; the IP in the front and the name in the back.
After the modification, enter the following commands on both devices to restart the following network to realize the communication between the two devices:
xxxxxxxxxxsudo /etc/init.d/networking restart
After installation, input following command confirm whether the server has been started:
xxxxxxxxxxps -e|grep ssh
Input following command to check if the communication is normal:
xxxxxxxxxxping 设备的主机名

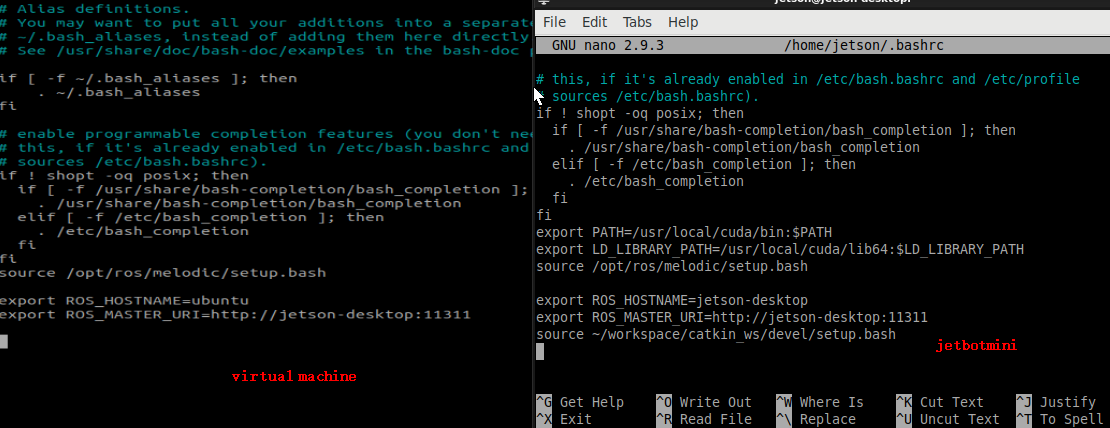
Modify~/.bashrc file
xxxxxxxxxxsudo nano ~/.bashrc
Add following content to ~/.bashrc file of master
xxxxxxxxxxexport ROS_HOSTNAME=Local user nameexport ROS_MASTER_URI=http://Host username:11311
Add following content to ~/.bashrc file of slave
xxxxxxxxxxexport ROS_HOSTNAME=Local user nameexport ROS_MASTER_URI=http://Host username:11311
For example, jetson nano as a master
After setting the IP, we need to refresh it, and then we can communicate.
xxxxxxxxxxsource ~/.bashrc
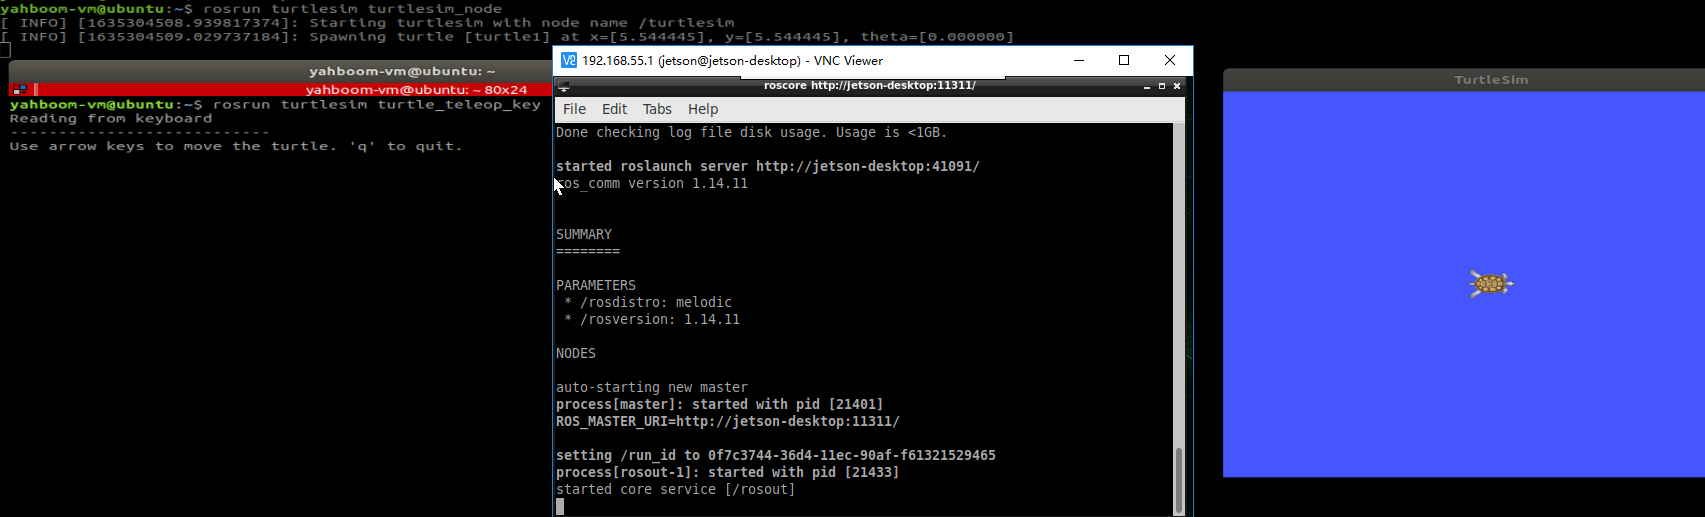
Phenomenon show
Note: we need to start up ROS Master on ROS Master
jetbotmini side
xxxxxxxxxxroscore
ubuntu (virtual machine)
xxxxxxxxxxrosrun turtlesim turtlesim_noderosrun turtlesim turtle_teleop_key
2. Smiple version
If jetson nano is the host and the IP address is known, you only need to modify the .bashrc file of the slave.
xxxxxxxxxxsudo vim ~/.bashrc
Add following content file at the bottom.
xxxxxxxxxxexport ROS_MASTER_URI=http://master username IP:11311
7.4.2 Webpage real-time monitoring
Environment setup
Note: if the jetbotmini factory image is burned, this part of the configuration can be skipped because the required software has been configured in the jetbotmini factory image.
Transfer the jetbotmini course source code to the jetbotmini file system /home/Jetson directory through "WinSCP" or other file transfer tools.
Path of package : [JetBot-Mini-Robot-Car] --> [13.Code] --> [workspace]
xxxxxxxxxxcd ~sudo chmod 777 * -R workspacecd ~/workspace/catkin_wscatkin_make
Check if it is successful
xxxxxxxxxxecho $ROS_PACKAGE_PATH

Build jetson-inference
xxxxxxxxxxcd ~/workspace/jetson-inference/buildcmake ../makesudo make install
Install the necessary environment
xxxxxxxxxxsudo apt-get install ros-melodic-async-web-server-cpp ros-melodic-web-video-server
Run
Open terminal, input following command to start it.
xxxxxxxxxxroslaunch jetbot_ros sci-cam-test.launchView pictures
xxxxxxxxxxView on local web browserhttp://localhost:8080/If you want to view by other devices, you must ensure they at the same local area networkhttp://192.168.2.103:8080/(192.168.2.103 is the IP address of the master)Note: It is recommended to use Google browser, other browsers may not be able to open the image
file path:/home/jetson/workspace/catkin_ws/src/jetbot_ros/launch/sci-cam-test.launch