3.3 Software Setting
3.3.1 Connecting to Jetbot by headless (head-free) mode
In this mode, your Jetson Nano Developer Kit connects directly to your computer via a USB cable. No need network connection on the Jetbot and the need to determine the IP address on the network.
It is always in this mode 192.168.55.1:8888. This means you can't connect your monitor directly to the Jetson Nano Developer Kit. This approach saves memory resources on the Jetson Nano and eliminates the need for additional hardware (monitors, keyboards, and mice).
Steps of headless mode
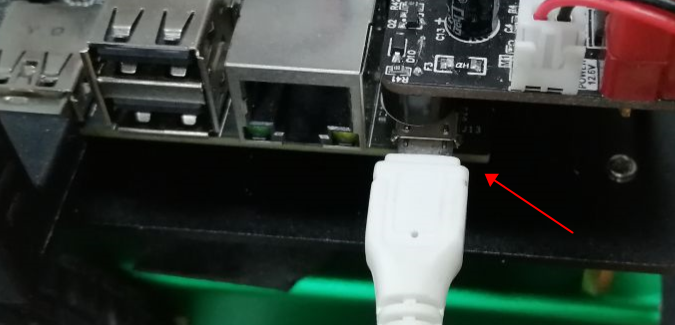
- You need to open the power switch of robot car and Connect robot car to your computer by USB cable, as shown below.
Wait patiently for a while. After the system is successfully booted, the PC will appear with the following device and a drive for communication between the two parties - Linux File-Stor Gadget USB Device.

!Note: You must first turn on the power switch of car, then connect to your computer by USB cable.
After the above device appears on the PC, we can connect to Jetbot through Xshell/Putty without connecting to the network. The host number is fixed IP address 192.168.55.1.
You can log in normally by entering the corresponding username and password of Jetbot.
As shown below(by Xshell):

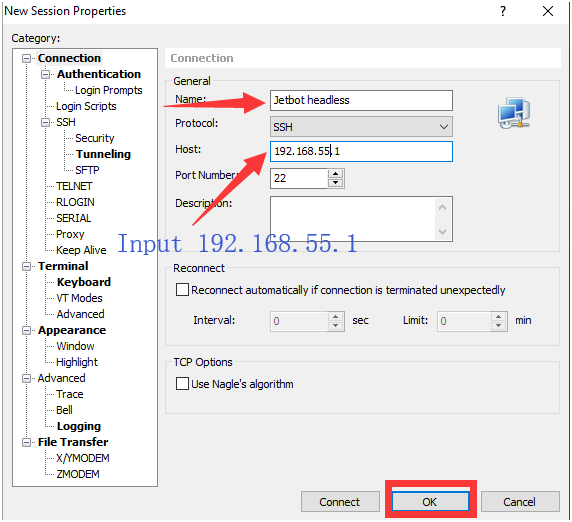
User name :jetson
Password: yahboom

3.3.2 Jetbot Mini connect WIFI
Method 1:Connect to the PC using the "headless mode" to configure the connection by command line.
Follow the steps to connect Jetbot to the WIFI network using the following command:
nmcli dev wifi
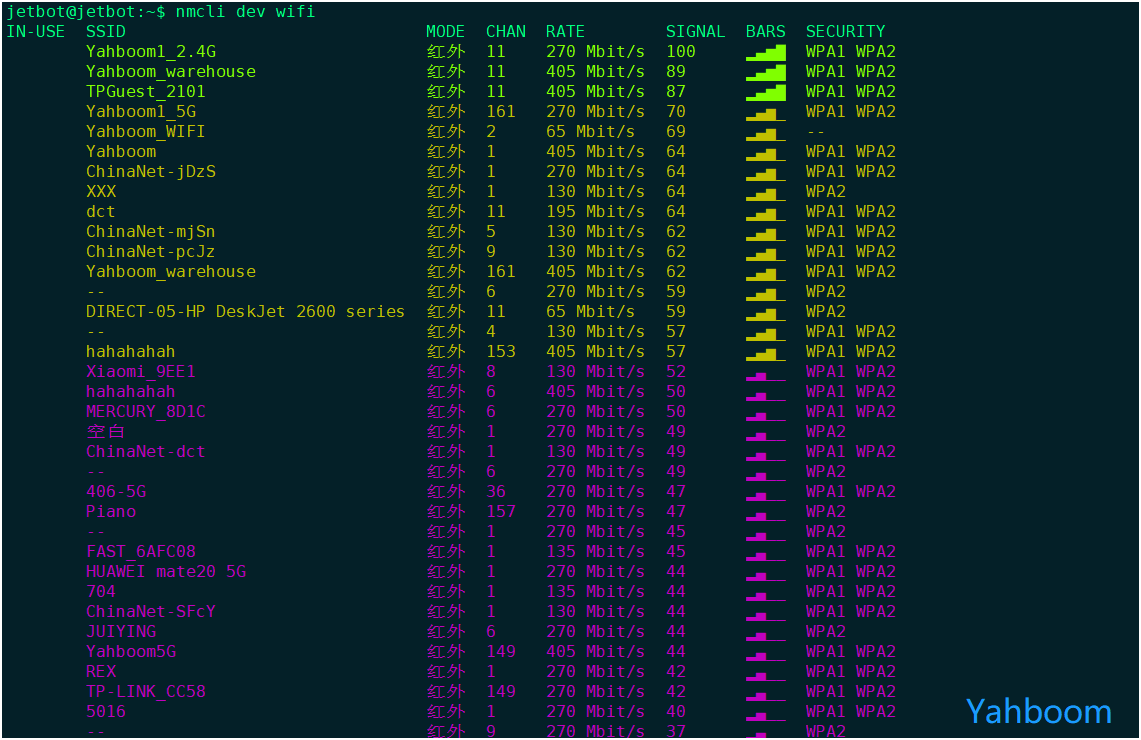
Input following command to connect WIFI:
xxxxxxxxxxsudo nmcli dev wifi connect wifi_name password 12345678

View the IP address after connecting to WIFI:
xxxxxxxxxxifconfig

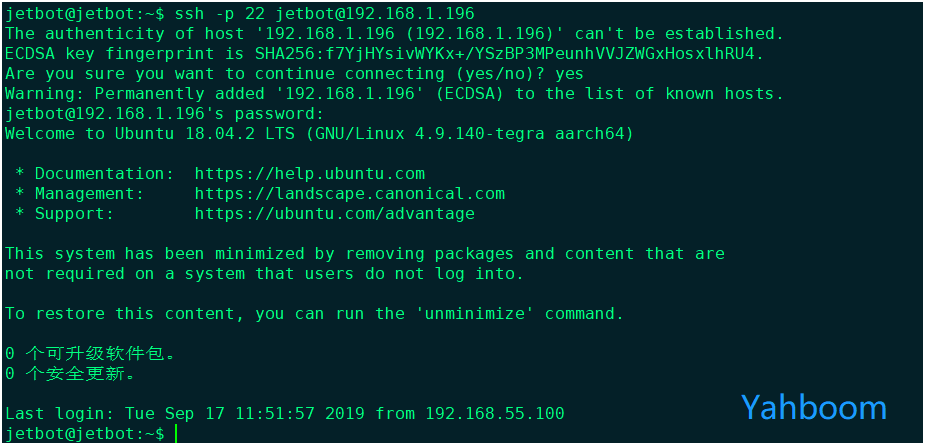
Connect Jetbot by new IP address, Input the command on the PC to control it.:
xxxxxxxxxxssh -p 22 jetson@192.168.1.196
Method 2:Connect Jetbot to the HDMI screen and configure it on the graphical interface using the mouse and keyboard.
Method 3:Use Windows to log in to Remote Desktop/VNC Remote Desktop.
Use VNC viewer software for VNC connection, and enter the IP address 192.168 Click OK after 55.1, double-click the corresponding VNC user, enter the password, and finally enter the VNC interface
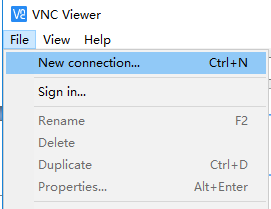
Open the app and select a new connection:
Enter the IP network and user name for the headless connection:

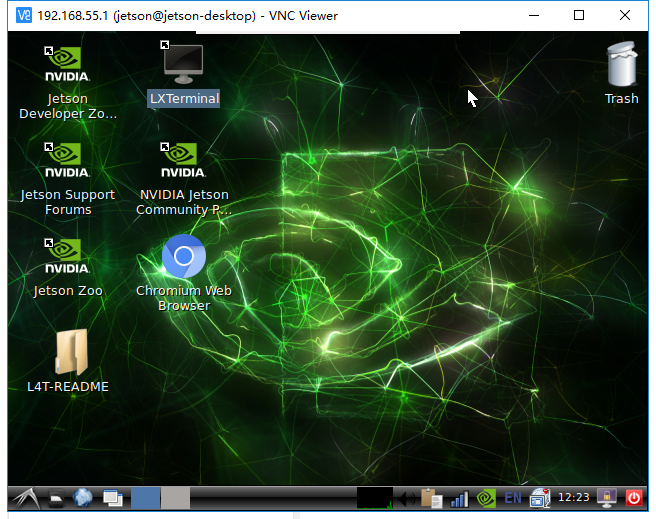
Then click OK to connect to VNC desktop:
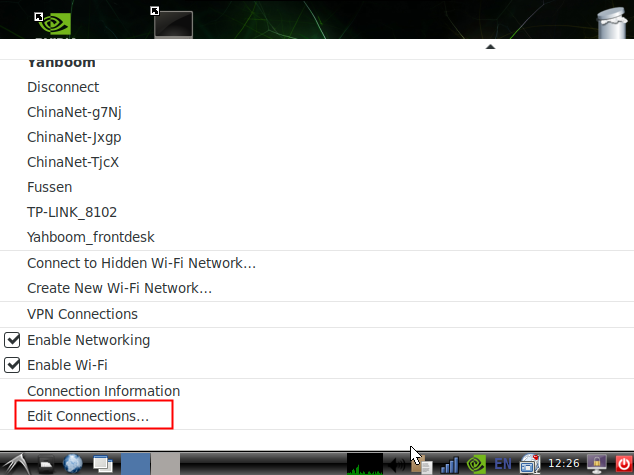
Because it is a third-party desktop, we need to enter a password when operating WiFi and other key information. After entering the password, we can normally go to the network icon in the lower right corner to configure WiFi.
Set static IP:
First enter the connected WiFi to set:
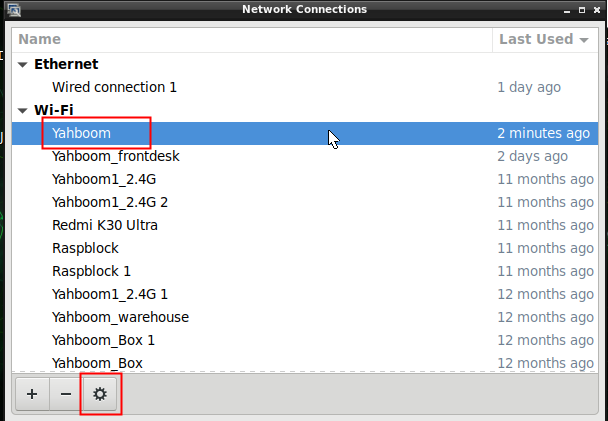
Then set it to manual connection and set the IP address you need to set. Note that this IP address should not be occupied by other devices, and then enter the netmask, which is generally 255.255.255.0 by default. Then enter the gateway, which is generally 192.168.1.1. The above gateway and subnet mask are subject to your actual network environment, and the above is only for reference.
3.3.3 Update software package
Note: if the jetbotmini factory image is burned, this part of the configuration can be skipped because the required software has been configured in the jetbotmini factory image.
Input this command to update software source:
xxxxxxxxxxsudo apt-get update
Input this command to update software package installed:
xxxxxxxxxxsudo apt-get full-upgradesudo apt install -y python3-pip python3-pilsudo -H pip3 install Cython
3.3.4 Configuring power mode
Note: if the jetbotmini factory image is burned, this part of the configuration can be skipped because the required software has been configured in the jetbotmini factory image。
Jetbotmini has two power modes: 5W mode and MAXN mode.
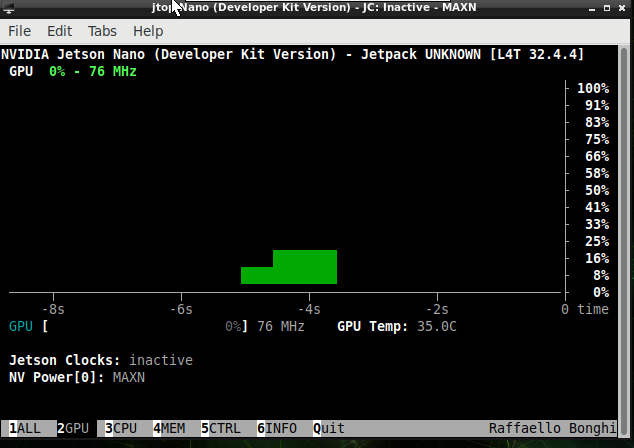
We passed 3.1 The current power mode can be viewed in jtop described in Chapter 4:
The current power mode can be seen in the second interface GPU
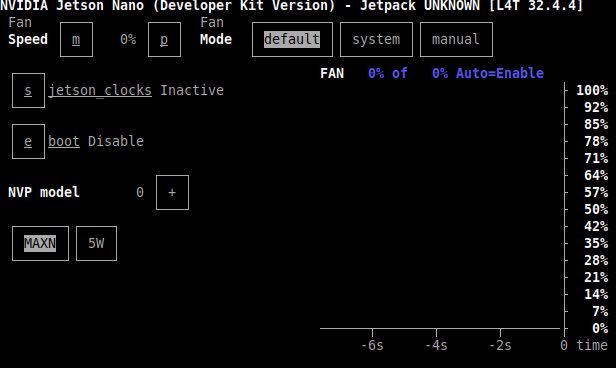
Or you can also see the current power mode in the fifth interface Ctrl
The biggest difference between the two power modes is:
When in the m0-MAXN mode, the four cores CPU1, CPU2, CPU3, and CPU4 are all turned on; (High-Performance mode)
When in the m1-5W mode, only CPU1 and CPU2 of the four core CPU1, CPU2, CPU3, and CPU4 will run, and CPU3 and CPU4 will sleep. At this time, only the CPU performs data processing. (Low power consumption mode)
So when it is in 5W power mode, it will be much slower than m0-MAXN mode. If you don't pursue long battery life, it is recommended to use MAXN mode to enjoy the high performance brought by Jetbot Mini.
We can also use the following command line to view the current power consumption mode.
xxxxxxxxxxsudo nvpmodel -q
Input this command to switch mo-MAXN mode:
xxxxxxxxxxsudo nvpmodel -m0
Input this command to switch m1-5W mode:
xxxxxxxxxxsudo nvpmodel -m1
(Especially when we train the AI model, switching to high performance mode can improve computing performance.)